
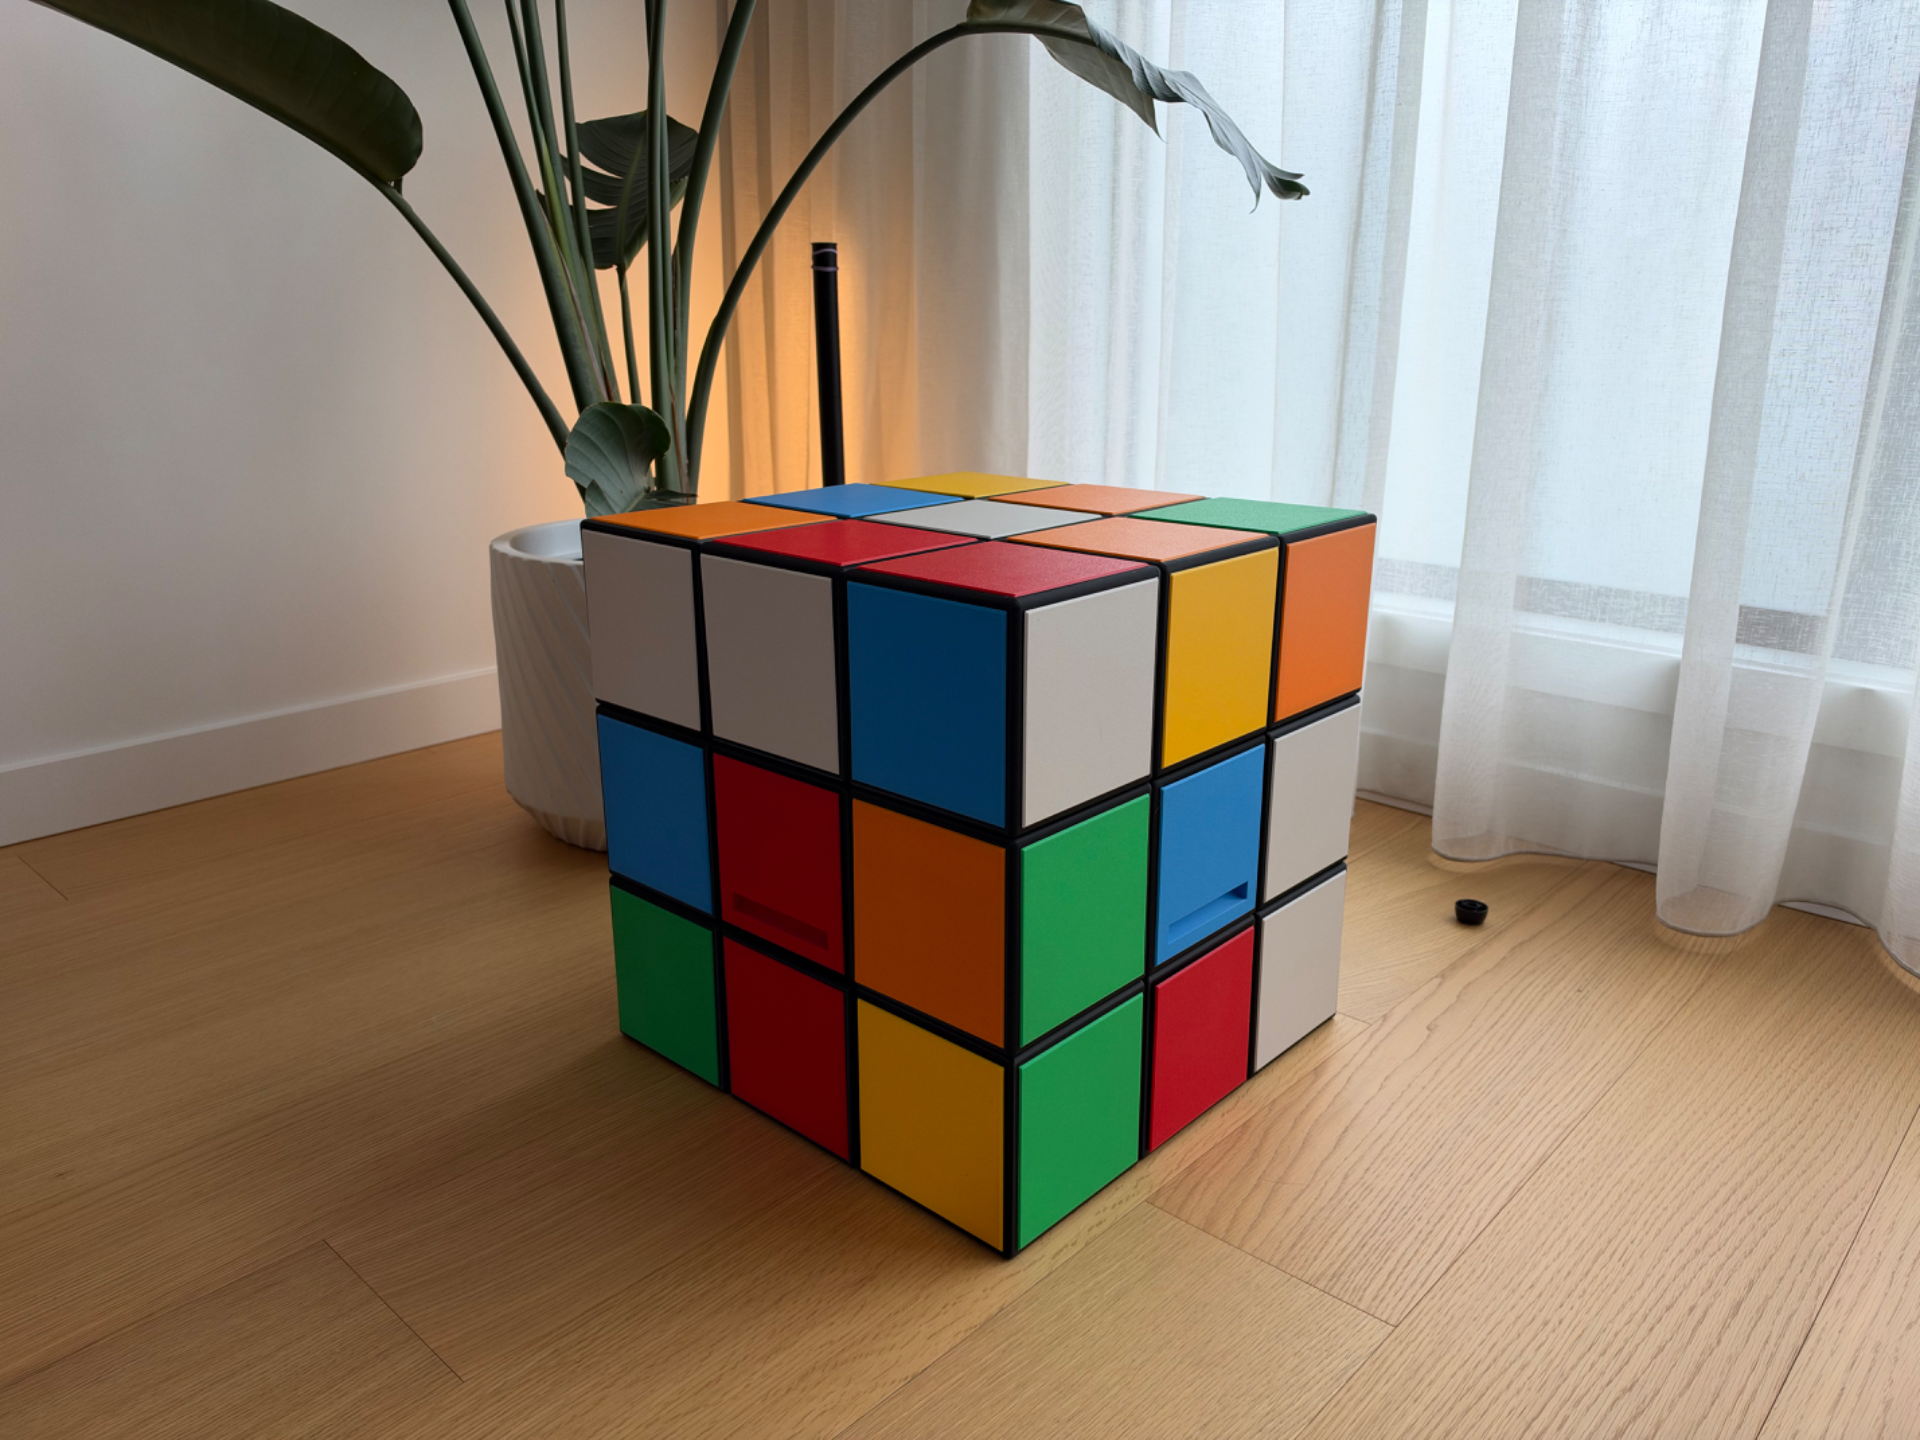
Rubik’s-Style Cube Table: Side / Bedside Table
Peso
465g
Tiempo
14h 29m
Precio
Pregunta por WhatsApp por este modelo o uno similar
Te ayudamos a conseguir este diseño o uno parecido, con precio según color y acabado
Las dimensiones dependen del diseño. Confirmamos las medidas exactas por WhatsApp.
Este diseño es de su creador en MakerWorld y se muestra solo como referencia. Tecnoprints no es dueño del modelo ni de su licencia.
Descripción
I saw a ceramic version of this table on Facebook Marketplace for $500, so I designed my own and printed it for a fraction of the price. It’s a full-size 450 × 450 × 450 mm cube table built from 26 printed frame blocks held together with printed pegs. No glue, no screws. Coloured face plates press into the frame, so you can build it solved or scrambled. Swap the centre plates for drawers if you want storage. Features 450 mm cube, about 550 mm tall with the optional feet Solved or scrambled pattern (scramble map and counts included) Optional drawers: 2 long + 2 short, or 4 short. Short drawers fit most other blocks too, so a whole face of drawers works Works as a coffee table, side table or bedside table Bottom face has no plates, so it sits flat or on the optional feet Printer requirement: 256 × 256 × 256 mm bed (A1, P1S, X1 or similar) The frame blocks print standing on their corner chamfer and are about 243 mm tall. They won’t fit an A1 mini. What to print PartQtyCorner Body8Edge Body12Middle Body6Pegs2 plates of 100 (~155 needed, rest are spares)Face Plate45, minus 1 per drawerDrawer Long / ShortOptional, see aboveDrawer Back1 per drawerBottom Plate Foot + Foot4 each, optionalFace plate colours (yellow as the bottom face) ColourSolvedScrambledWhite98Yellow06Red98Orange98Blue98Green97Total4545Each drawer replaces one plate of that face’s colour. Test one face plate first Print a single face plate and press it into a frame. It should be a firm push fit that stays put. Printers vary slightly, so if it’s loose, scale the plate up 0.5–1% in X and Y and test again before printing the rest. Print settings (as profiled, Bambu P1S) 0.2 mm layers, 2 walls, 15% infill Textured PEI plate, no supports needed Frame blocks: stand on the 45° corner chamfer. Auto brim recommended Face plates and drawers: face-down Pegs: on their flat side Filaments I used (Bambu Lab) Frame: PLA Basic Black White: PLA Matte Bone White Yellow: PLA Basic Yellow Red: PLA Matte Scarlet Red Orange: PLA Basic Pumpkin Orange Blue: PLA Matte Marine Blue Green: PLA Basic Bambu Green Total: approximately [X] kg of filament and [X] hours. The profile stats only count one of each part, so a full build is much more than MakerWorld shows. Assembly The full illustrated guide is attached as a PDF, with dimensions, layer map, colour counts and a print checklist. The short version: Build layer by layer from the bottom: corners on the corners, edges between them, middles in the centre of each face. The very centre stays empty. Blocks only fit one way round. Plate recesses face outward. If the pegs don’t line up, rotate the block, don’t force it. Press in the face plates, then slide in any drawers with their backs fitted. Notes Great for lamps, books and drinks. It is not a seat. PLA softens around 55–60 °C, so keep it away from heaters and direct summer sun. Use PETG for heavy loads. Not affiliated with or endorsed by Rubik’s or Spin Master.
Tags
Diseñador
Filamental Form