
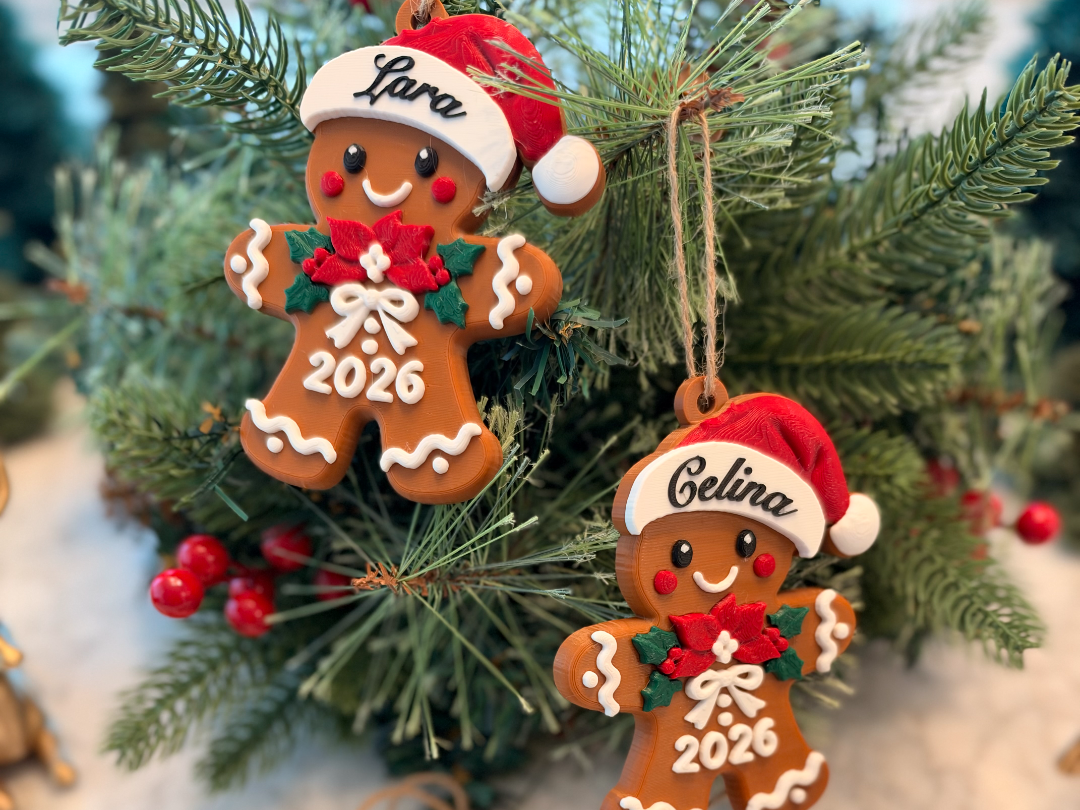
Personalized Gingerbread Ornament — Add Any Name
Peso
32g
Tiempo
2h 40m
Precio
Pregunta por WhatsApp por este modelo o uno similar
Te ayudamos a conseguir este diseño o uno parecido, con precio según color y acabado
Las dimensiones dependen del diseño. Confirmamos las medidas exactas por WhatsApp.
Este diseño es de su creador en MakerWorld y se muestra solo como referencia. Tecnoprints no es dueño del modelo ni de su licencia.
Descripción
A warm, personal touch for your tree—or a thoughtful keepsake gift. PHONE CUSTOMIZATION — NAME, YEAR AND FONT Click Customize and choose Gingerbread_Phone_Name_Year_Font.scad. Change Name and Date, select fonts under Fonts, then Generate. Blank text removes that name or date. Bold fonts are recommended for reliable printing. The generated lettering automatically fits the available space. PHONE PRINTING — MANUAL BROWN-TO-BLACK SWAP (A1) For the customizer's A1 export with 0.20 mm layers and a 0.20 mm first layer, finish layer 23 (Z 4.60 mm), then pause manually BEFORE layer 24 (Z 4.80 mm) starts. The brown base is finished, and black first appears in layer 24. Replace the brown filament with black, purge until clean black comes out, then resume. The MakerLab export does NOT contain an automatic pause. Watch the print and pause at the transition; do not wait until the black details are already printing. For an A1 with four AMS Lite slots, brown and black must use the same physical slot. If Bambu Handy does not allow that filament mapping, this five-color job needs preparation in Bambu Studio; manually pausing alone does not resolve the mapping. These layer numbers apply only to this unscaled 0.20 mm customizer export. Changing layer height, first-layer height, vertical scale or orientation changes the swap layer. The tested R3 profile uses 0.16 mm layers and swaps BEFORE layer 29 instead. DESKTOP EDITING — TESTED R3 PROFILE Download “R3 A1 - Editable name/date in Studio - PAUSE for black” and open the 3MF as a project. In Prepare, select the name part under Objects, then click the T (Text) tool. Change the text and repeat for the year. Re-slice after editing. This R3 profile uses a 4.5 mm base, 0.16 mm layers, 3 walls, 8% gyroid, 6 top / 4 bottom layers, aligned rectilinear top fill, and no supports or brim. A complete print was tested successfully. R3 MANUAL COLOR SWAP Start with AMS Lite slots: 1 red, 2 green, 3 ivory, 4 brown. The R3 print pauses before layer 29 (Z 4.68 mm), after the brown base finishes. Swap slot 4 from brown to black, purge until black runs clean, then resume. Check that the pause remains after re-slicing. Eyes and name can appear brown in the preview because they share slot 4. OTHER FILES Earlier profiles and customizers have different geometry, colors and pause heights. Follow the instructions for the exact file you use. The older four-color SCAD versions use brown for the eyes and name. FONTS You may choose your own font. The original photographed ornament used Snell Roundhand; to use that font on a computer, install a properly licensed copy locally. It is not required for the phone customizer. Personal use is free. Commercial licenses: https://sosoulstudio.com/makers Gingerbread Collection: https://makerworld.com/collections/38570156 Post your make—I would love to see your personalized ornament!
Tags
Diseñador
SoSoul Studio 3D