
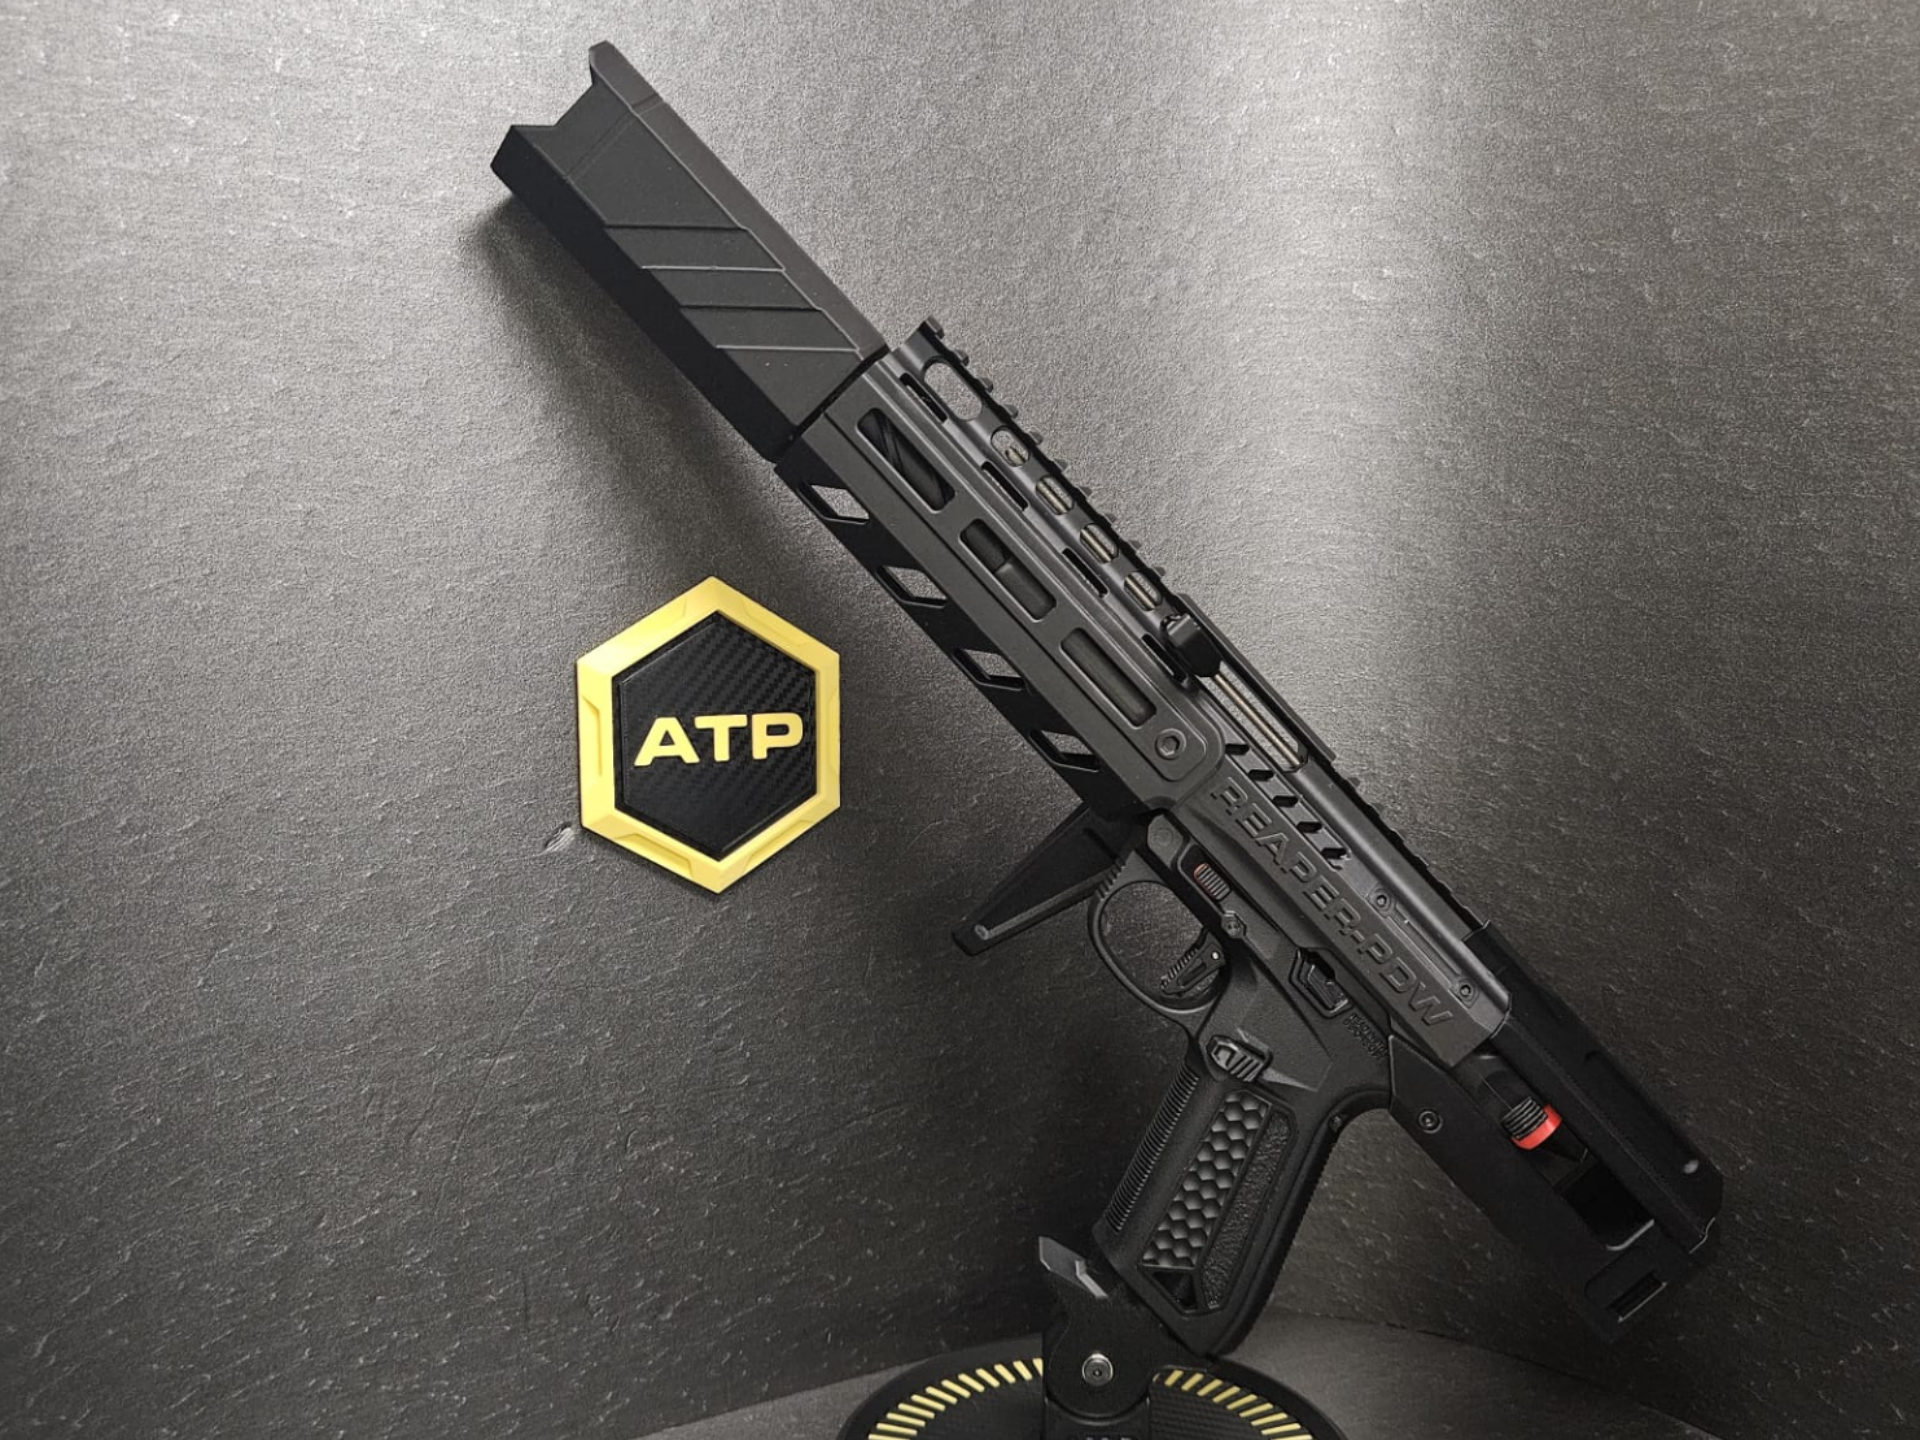
ATP AAP-01 REAPER-PDW Kit
Peso
291g
Tiempo
17h 51m
Precio
Pregunta por WhatsApp por este modelo o uno similar
Te ayudamos a conseguir este diseño o uno parecido, con precio según color y acabado
Las dimensiones dependen del diseño. Confirmamos las medidas exactas por WhatsApp.
Este diseño es de su creador en MakerWorld y se muestra solo como referencia. Tecnoprints no es dueño del modelo ni de su licencia.
Descripción
The ATP AAP-01 Reaper-PDW Kit is a fresh tactical facelift for the Action Army AAP-01, joining the Blackveil Series family. It transforms your pistol into an aggressive, compact primary weapon built for fast handling. Front-Charging Setup: Relocates the cocking action to the top section of the handguard for rapid, intuitive SMG-style reloads. Custom 73mm Outer Barrel Extension: Features a cosmetic spiral fluting and a knurled collar to line everything up perfectly. Tracer Integration: Built-in mock suppressor designed to seamlessly house a standard 28x60mm flame-simulating tracer (e.g., T238 Nano Flame). 🔗 Requirement: Designed to work as a complete structural set exclusively alongside the ATP Blackveil AAP01 Folding Stock to fully lock the front-to-back assembly. https://makerworld.com/en/models/3472532-atp-blackveil-aap01-folding-stock-picatinny-adap#profileId-3963793 QUICK DEMO: https://www.instagram.com/reel/DfDiO8iI1tt/?dlrf=MXI4b3pyZ3JrNm1vdA== Printing Disclaimer & Bed Advisory CoreXY Recommended: This project is designed, tested, and highly recommended to be printed on CoreXY printers (like Bambu Lab X1/P1 series) where the build plate only moves vertically. Bed-Slingers Warning (Bambu Lab A1, etc.): The main handguard stands at 251mm tall. If you decide to risk printing this on a "bed-slinger" style printer where the build plate moves back and forth aggressively, please be aware there is a high risk of the part detaching from the build plate due to sudden bed inertia. If printing on a bed-slinger, using extra custom supports, or heavily reduced acceleration settings is highly recommended to stabilize the tall print. Print at your own risk! Bill of Materials (BOM) & Hardware Required Stock Parts: 2x Original M3x5mm screws (saved from the stock rear sight). Screws: 1x M2x8mm Socket Head | 2x M3x6mm Countersunk | 3x M3x12mm Countersunk | 1x M5x10mm Countersunk. Rods & Nuts: 1x M4x250mm Threaded Rod | 2x M4 Nylock Nuts. Heatset Inserts: 2x M3x3mm Inserts | 1x M4x8mm Insert. 🔧 Step-by-Step Installation Guide Step 1 (Prep): Remove the stock thread cap, front sight, and rear sight. Save the 2 original M3x5mm screws. Step 2 (plate2 rear bottom sight): Thread the M2x8mm screw into the BBU locking tab hole. Mount the plate onto the upper receiver using the 2 original M3x5mm screws. Step 3 (plate1 handguard): Press the 2x M3x3mm heatset inserts into the handguard's rear holes. Slide the receiver into the handguard and secure gently with 2x M3x6mm countersunk screws. Step 4 & 5 (Charging Handle Prep): Thread 1x M4 nylock nut onto the M4x250mm rod, leaving 10mm of thread exposed past the nut. Install the M4x8mm heatset insert into the back of plate4 charging handle. Step 6 (Charging Handle Install): Slide the handle into the handguard slot. Insert the rod from the rear and screw it into the handle's insert while holding the charging handle all the way back position. Maintain this position until the end of the rod reaches the rear alignment hole on the rear sight bottom plate, then push the entire internal assembly forward. Step 7 (plate5 bbu rod link): Slide this piece onto the rod, align with the back of the BBU, and secure it with the M5x10mm countersunk screw. Keeping the pre-installed M4 nylock nut flush against the BBU rod link, adjust the charging handle's position by threading it until there is a precise 1mm clearance gap in front between the handle and the handguard. Step 8 (Locking): Lock the BBU link tight by threading the second M4 nylock nut onto the rod. Hold the rod with pliers while tightening to protect your 1mm adjustment. Test pull for smooth movement, ensuring the charging handle does not touch or hit the handguard body at all during its cycle. Step 9 (plate3 top rear sight): Mount the top cover over the rear sight assembly. Secure the front with 2x M3x12mm screws into the handguard preinstalled M3 Heat-sets, and the rear with 1x M3x12mm screw into your Blackveil Folding Stock dedicated M3 Heat-set. Step 10 (plate6 outer barrel extension): Screw the 73mm extension directly onto the native 14mm CCW outer barrel threads until snug. Step 11 (plate7 28mm tracer body): Thread this body onto the extension until it aligns with the handguard. ⚠️ Do not overtighten to avoid stripping the 3D-printed threads. Step 12 (plate8 tracer body front cap): Insert your 28mm internal tracer module into the shell and thread the front cap on to lock everything into place.
Tags
Diseñador
Adyz Tactical Prints