
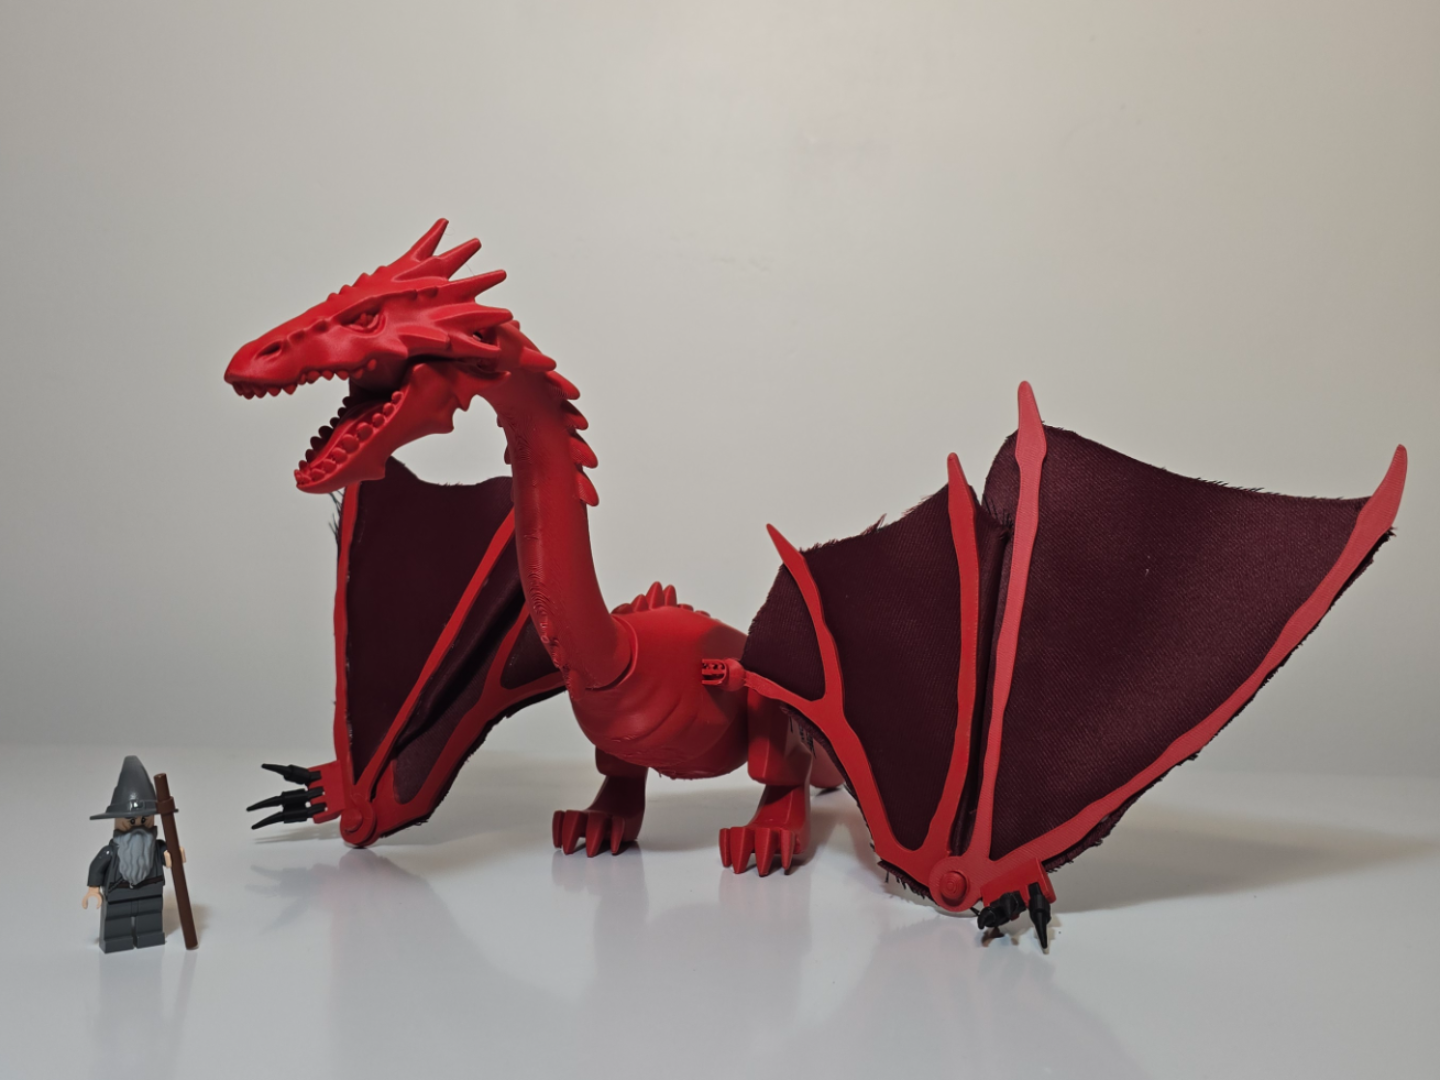
Brick Smaug
Peso
228g
Tiempo
10h 12m
Precio
Pregunta por WhatsApp por este modelo o uno similar
Te ayudamos a conseguir este diseño o uno parecido, con precio según color y acabado
Las dimensiones dependen del diseño. Confirmamos las medidas exactas por WhatsApp.
Este diseño es de su creador en MakerWorld y se muestra solo como referencia. Tecnoprints no es dueño del modelo ni de su licencia.
Descripción
Brick Smaug 1:1 scale. PLEASE TAKE NOTE: while this is an average-level print, assembly should be considered as intermediate to expert level. There are many small parts that can break easily due to the nature of FDM printing. The print profile uploaded is 30% infill with 3 outer layers, this is to increase the strength. Unlike injection molded bricks, the pins, clips, and ball joints are fragile with FDM printing! Use care when removing supports and when assembling! When assembling, if you use too much force, you will break the pins, clips, and/or joints! If your print tolerances are too tight, try increasing/decreasing the body piece. OR if you already have it printed, try using gentle heat, such as a heatgun (from a few inches away) to warm the plastic, then assemble. Using too much heat will melt your plastic. Boost MeWant more models like this? Boost this one! It helps me be able to create more fun models! Remember, this is FDM printing, not injection molding like major brick brands. Pins, joints, hinges, etc. are more fragile than popular brick brands injection molded bricks! On this model, the pins and clips are especially sensitive—don't use too much force. Using too much force will break smaller pieces! If you have trouble assembling, use a lighter for 1 or 2 seconds and snap the piece in place. Again, using too much heat/flame will melt plastic. Assembly Guide: Plate 1: Connect the jaw to the head. Plate 2: Connect the neck to the head from step 1. Plate 3: Connect the tail spike to the tail. Plate 4: Connect the tail piece and the neck/head to the body. Now that he is a worm, he needs legs. Plate 5: Connect the legs into the hip joints on the body. Plate 6 and 7: for each wing, connect the hinge so that each wing has two parts. NOTE: if you are having troubles, use a heatgun or lighter to gently warm the circle hole on wing part 2. Too much heat will melt your plastic! You can stop here if you want! If you want to go an extra step, grab some scrap fabric. You will need two pieces the size of the wings you printed. There is not a template for this—use your creative freedom! You can design the fabric wings how you want! Here is how I did it:Set one wing on the fabric of choice. Take a marker if you want to trace around the wing or simply use a scissors to cut the fabric around the wing. You will want the wing “outstretched” so that you can open and close the wing once assembled. Once you cut out your fabric, take some glue of choice (E6000 glue works great!) and spread the glue on the printed wing. DO NOT put glue on the hinge, this will prevent the wing from opening/closing. Set your wing with the glue onto the fabric and press down. Remember to keep the wing outstretched! Let the glue dry. Repeat this process for the second wing. Once the glue is dry, you can assemble the wings into the ball joint on the body. If you want, you can then add the “toes” on the wings. THESE CLIPS ARE FRAGILE! There are two options: large claws and little claws. Use whichever you prefer! Feel free to use name-brand brick claws/clips instead, they are compatible with this print! Happy printing! Boost Me
Tags
Diseñador
maker_rachael