
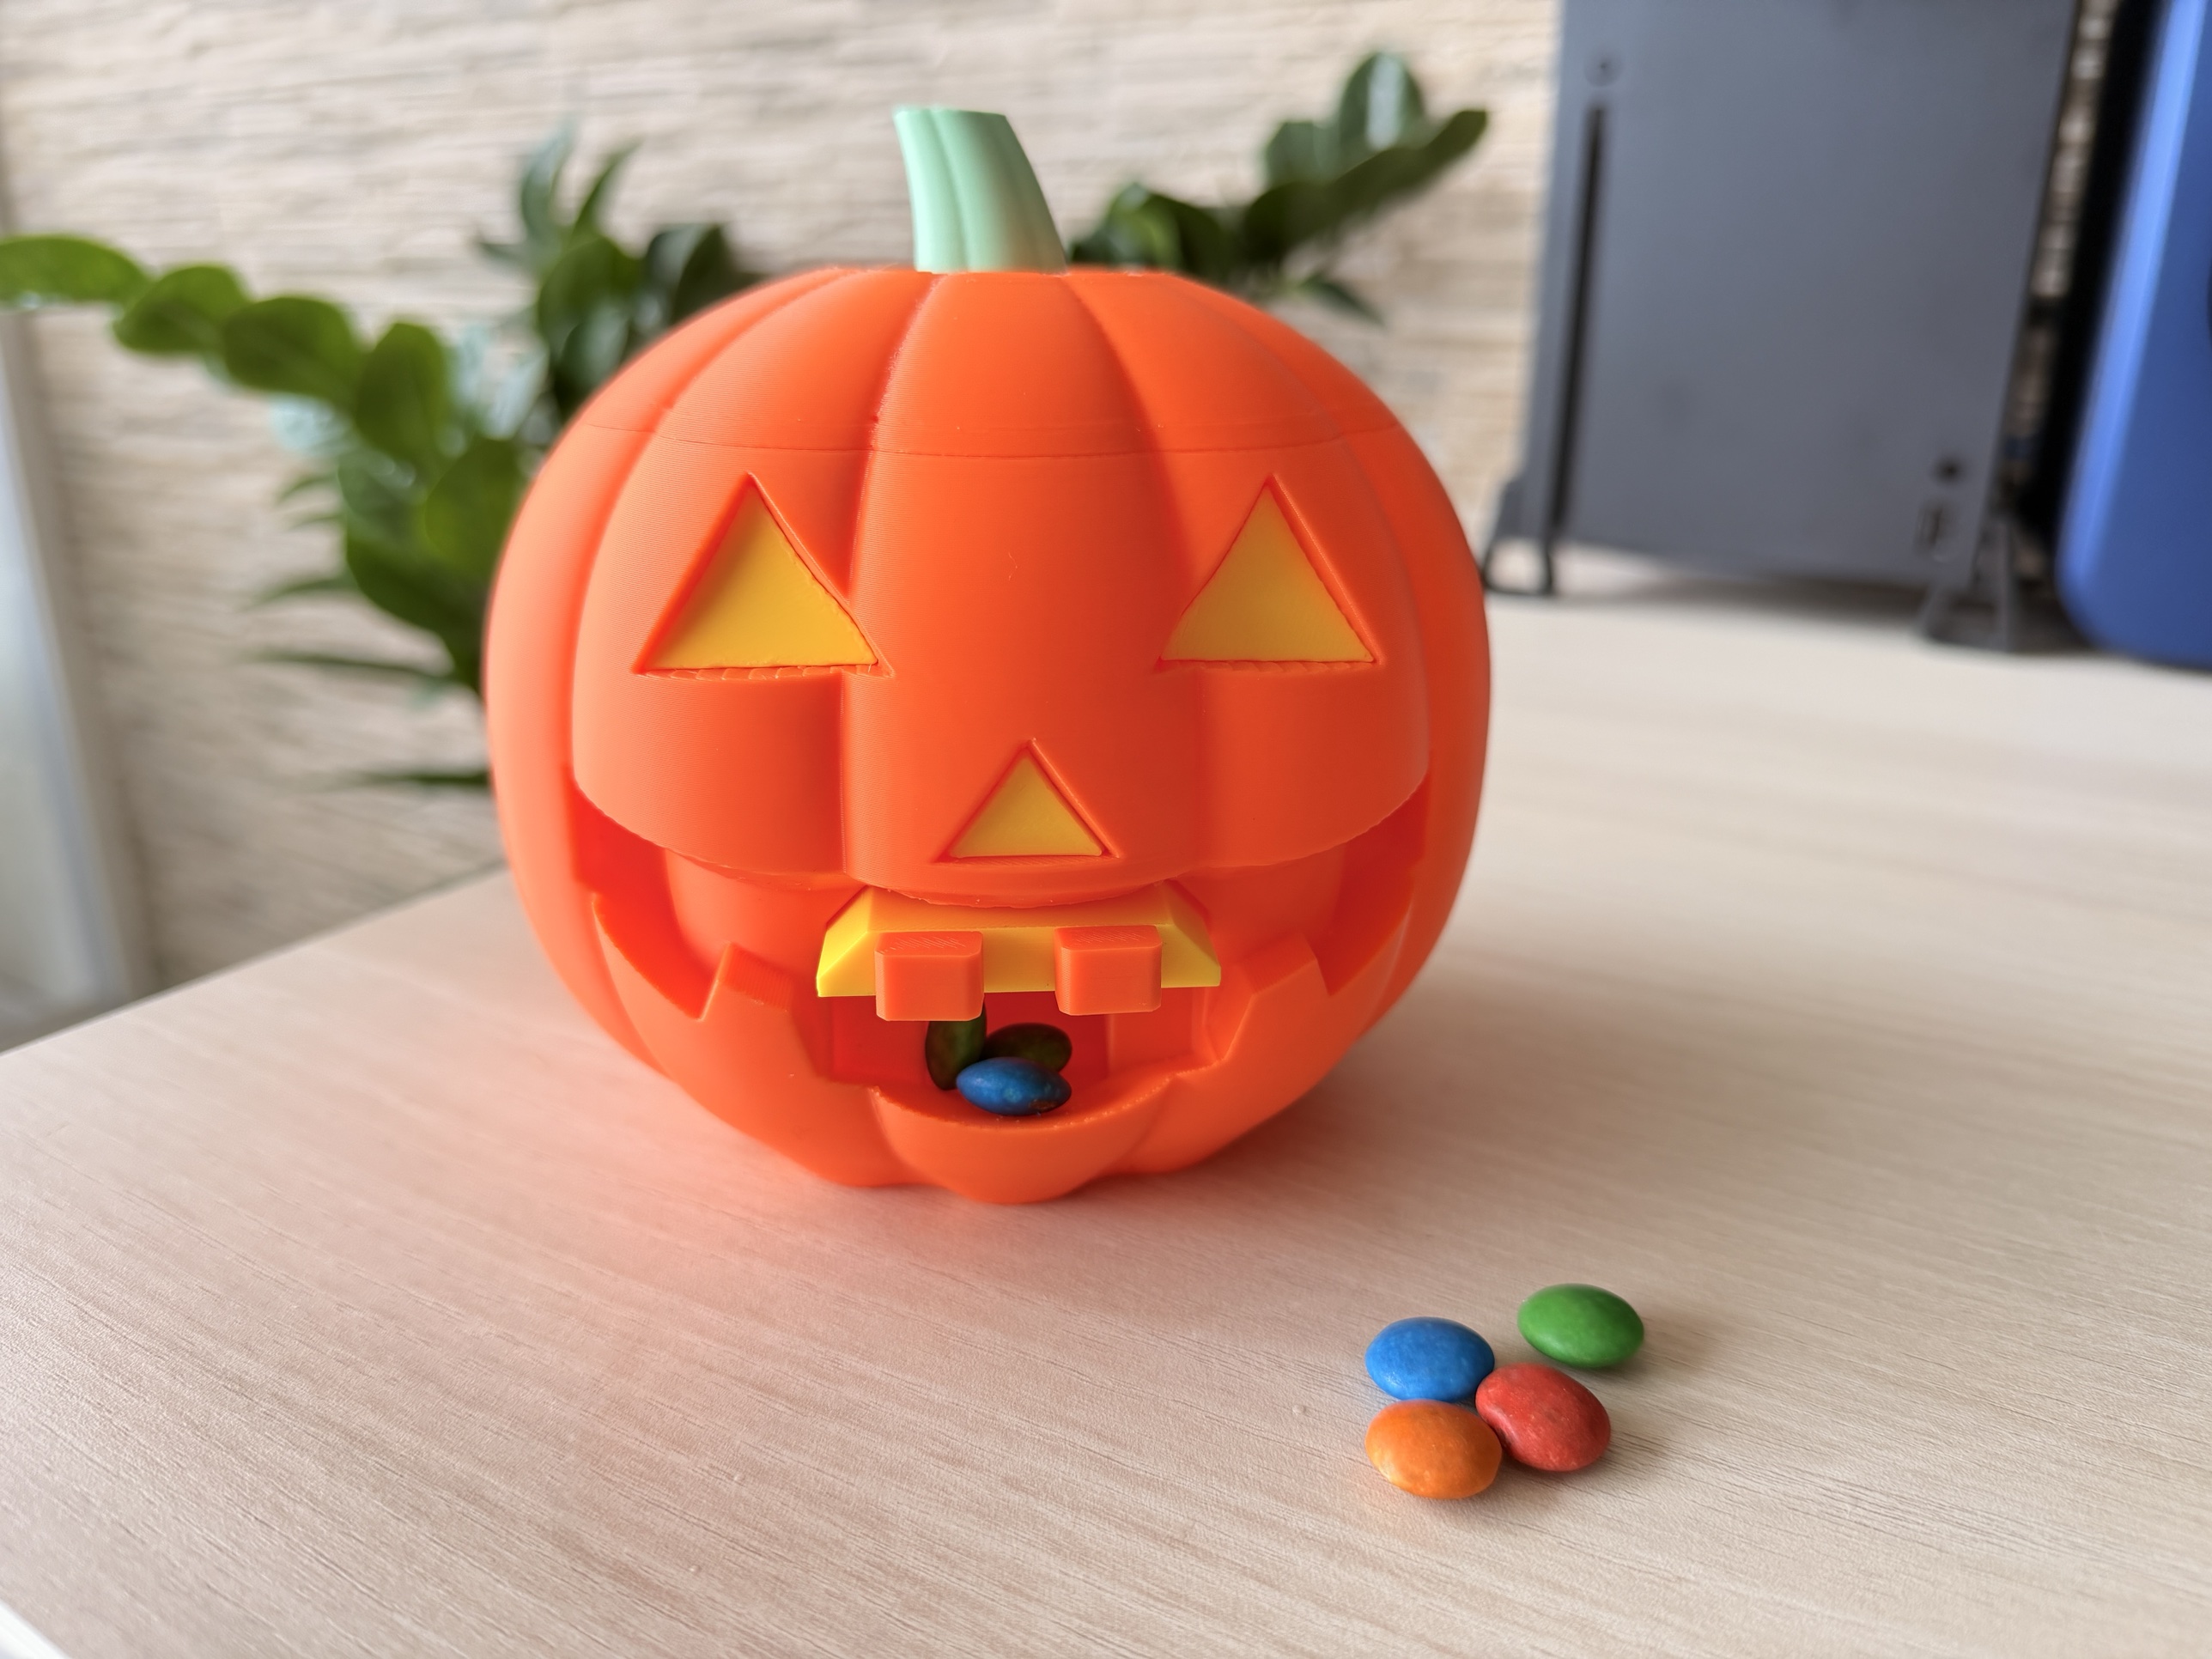
Jack o Lantern - Candy Dispenser
Peso
207g
Tiempo
7h 53m
Precio
Pregunta por WhatsApp por este modelo o uno similar
Te ayudamos a conseguir este diseño o uno parecido, con precio según color y acabado
Las dimensiones dependen del diseño. Confirmamos las medidas exactas por WhatsApp.
Este diseño es de su creador en MakerWorld y se muestra solo como referencia. Tecnoprints no es dueño del modelo ni de su licencia.
Descripción
Press the two teeth of this jack-o'-lantern and it spits out a candy. 🎃🍬 One per press, straight onto the floor of its wide open mouth, where you pick it up. Let go and the printed spring loads the next one. Fill it through the top: just lift the lid by the stem. ✨ Features Real pumpkin look: 10 lobes, flatter bottom, a bent ribbed stem, and carvings with orange walls and a yellow "candle light" plate at the bottom of the eyes and nose Mechanical candy dispenser: a yellow slider with a round pocket carries one candy from the reservoir to the chute. A printed leaf spring (7 leaves, part of the slider) brings it back. No metal springs, no screws, no hardware at all Press the teeth: the two square orange teeth are the button. The mouth is open all the way, so your finger follows the teeth for the full 23 mm stroke and the candy lands in plain sight Three sliders for three candy sizes: S for candy up to 11 mm (mini M&M's, Tic Tac, small mints), M up to 14 mm (M&M's, Skittles, Smarties), L up to 19 mm (Mentos, big lentils). Any candy up to 8 mm thick. Print the one you need, swap it in seconds. Tested with M&M's and the M slider; S and L are sized for other candies but not print-tested yet, so please post a Make if you try them Holds about 150 M&M's Size assembled: 133 x 136 x 136 mm (with stem). Body 103 mm tall, fits any 150 mm bed Practically no supports: the carvings have 60° roofs, the stem bends less than 30° from vertical, the body is printed solid (your infill does the rest). Supports are preset in the 3MF (tree, build plate only, bridges left alone) in case your slicer finds a spot Every part is one colour: 3 single-colour plates, no AMS needed. The yellow eye and nose plates press into the carvings from the outside Press-fit joints everywhere, glue optional 🧩 Parts (9 printed, 3 colours) Orange: pumpkin_body, pumpkin_lid, teeth_x2 Green: stem Yellow: one slider (S, M or L), pin, eye_left_plate, eye_right_plate, nose_plate Plus the candy. Nothing else: no hardware, no filament pins. The 3 face plates are optional. 🖨️ Ready-to-print profile (Bambu Lab H2C) The 3MF has 3 plates, one per colour, with per-part settings already set. Pick your printer, plate and the 3 filaments. Orange plate: body, lid and teeth. 0.2 mm layers, 3 walls, 10% gyroid. Body about 103 mm tall, 2 walls and 5% infill are enough Green plate: the stem, tip on the bed Yellow plate: the M slider for M&M's (4 walls, 100% infill, elephant foot compensation 0.1 mm), the pin standing on its head with a 4 mm brim and the 3 small face plates flat at 100%. Everything is PLA. For smaller or bigger candy, the S and L sliders are separate print profiles. Short bridges only: above the spring the channel has a 45° pointed roof (no bridge at all); where the slider plate runs, the ceiling sits on two 45° ledges, so the bridge is only 33 mm (the slider and its spring have matching chamfers, so the slider slides in from the mouth). The chute ceiling is 23 mm No brim (except the pin). Everything is PLA Per-part settings in other slicers: if your slicer ignores them, use the values above. Plain STLs are included, sorted by colour. 🔧 Assembly See the Assembly Guide (PDF, 7 steps) and the animated GIF. In short: Slide the 3 small yellow plates into the eyes and nose from the outside (optional) Slide the 2 orange teeth onto the pegs on the front of the slider you chose, pushing firmly: crush ribs inside hold them Push the slider into the mouth, spring first, round pocket up Lid off: hold the teeth pushed in about halfway and drop the pin, shaft first, into the hole in the floor of the reservoir, to the right of the funnel (looking at the face). Press it down until the head sits in its recess. Let go of the teeth Push the stem through the lid until it clicks, fill with candy, close 📐 Fits and clearances Eye and nose plates, teeth: 0.1 mm per side, press fit Stem peg: split 6.7 mm peg through the 7 mm hole in the lid, the barb clicks under it Lid: a small pointed wall on the rim of the body fits a groove under the lid (0.35 mm gap on each side), the lid rests flat on the rim and cannot slide off. Both print without supports Slider in its channel: 0.3 mm per side, sliding Pin: 3.9 mm shaft in 4.2 mm holes, held by gravity and its head; the lid and the candy keep it there 💡 Tips Slider sticks? Sand the top and bottom of the slider lightly. Check for elephant foot on the channel edges Two candies come out? Your candy is small for that slider: use the next smaller slider (S or M) Candy does not drop? It is too big or too thick for the slider: use the L slider, or candy up to 8 mm thick A candy sometimes jams? Let the teeth go back and press again, or give the pumpkin a little shake: a candy lying on edge over the pocket settles flat Print the yellow plates in a translucent filament and put a tea light LED behind the eyes for a real candle glow Food safety: FDM prints are not food safe. Use wrapped candy, or treat it as a party-table toy 📄 Files 3MF project for Bambu Studio (3 plates, per-part settings) STL files sorted by colour (stl_orange, stl_green, stl_yellow), with the 3 sliders Made for the MakerWorld Halloween 2026 contest, "The Pumpkiniest Pumpkin" category. 🎃 Same mechanism family as my Rising Skeleton Coffin candy dispenser. If you print it, please post a Boost and a Make with your photo!
Tags
Diseñador
Emanuele