
PocketShot
Peso
55g
Tiempo
2h 2m
Precio
Pregunta por WhatsApp por este modelo o uno similar
Te ayudamos a conseguir este diseño o uno parecido, con precio según color y acabado
Las dimensiones dependen del diseño. Confirmamos las medidas exactas por WhatsApp.
Este diseño es de su creador en MakerWorld y se muestra solo como referencia. Tecnoprints no es dueño del modelo ni de su licencia.
Descripción
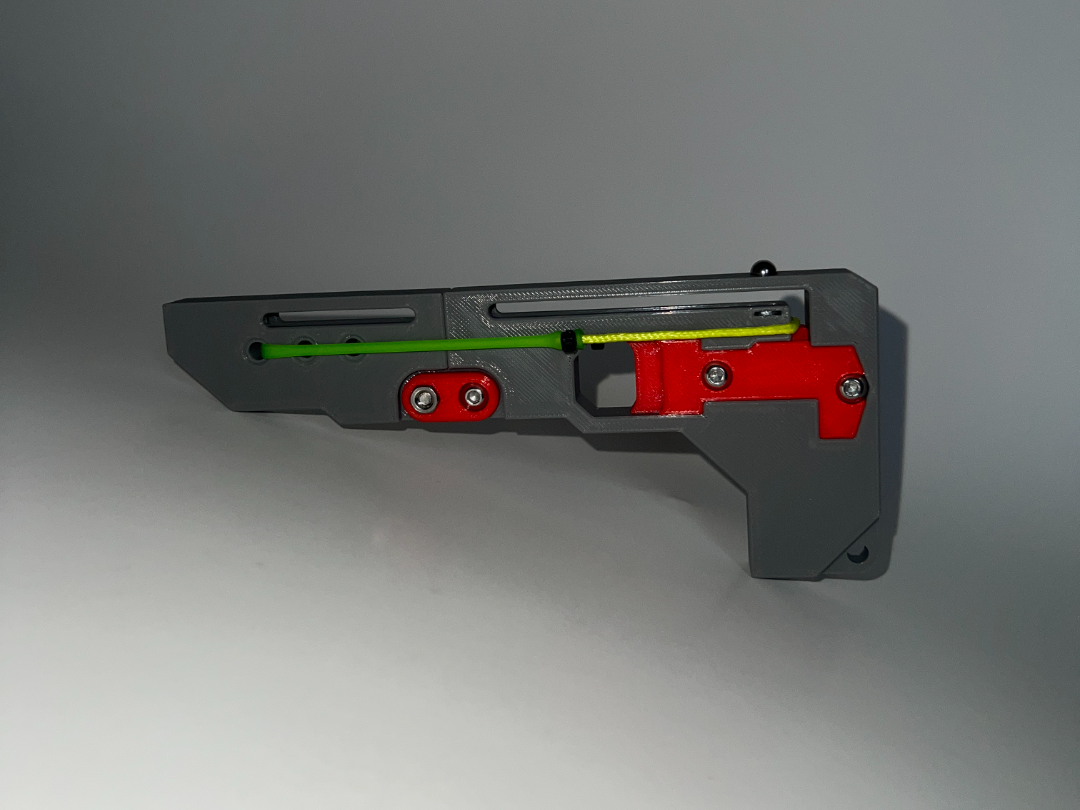
Boost MeIf you like my design, feel free to Boost my model! It's completely free and encourages me to continue making new models and supporting it!! Print your very own PocketShot, a folding slingshot that fits in your pocket! Note, some assembly required. Required Hardware: PETG FilamentI recommend using PETG or ABS Button Head Machine Screws (Note: I specifically listed Button Head style to reduce head height and prevent paracord getting stuck on it)M4x10mm (2pcs) M4x12mm (2pcs) Hex NutM4 (4pcs) Compression Springs0.3x4x10mm (1pc) 0.3x4x15mm (1pc) Round Rare Earth Magnet6mm OD x 1mm Thick Elastic Tubing3/16"OD x 1/16"ID commonly referred to as 1745 Elastic Tubing62mm length https://www.amazon.com/dp/B0FMD7FX5Q Paracord3mm diameter cut to 130mm length Zip/Cable Tie (2pcs)3in or 4in cable ties works best for me Step 1: Cut paracord to 130mm Step 2: Use a lighter to burn both ends of paracord. Make sure a small ball forms on each end as this acts as a barb keeping the cord in the tubing. Step 3: Cut Elastic Tubing to 62mm Step 4: Use needle nose pliers to insert one end of paracord into elastic tubing. It only needs to be in far enough so the ziptie can grab beside the barb. Step 5: Attach ziptie around elastic tubing/paracord making sure to clinch tightly beside “barb” created with lighter in previous step. Trim leftover material on ziptie Step 6: Assemble the Trigger, Release and both springs into the Frame 0.3x4x15mm is for the Trigger 0.3x4x10mm is for the Release Step 7: Place Trigger Cover, both Hinges and corresponding screws/nuts (M4x10mm) are for the Trigger Cover (M4x12mm) are for the Hinges Step 8: Attach Barrel Extension and corresponding Screw/Nut Step 9: Feed elastic tubing from Step 5 through the leftmost hole in the barrel extension. Step 10: Feed paracord through chamber slot in frame. Then feed other barbed end into elastic tubing on otherside following same instructions from Step 4. Then tightly attach ziptie around tubing. Step 11: Install 6mm x 1mm Magnet into small slot below ball hole. Make sure to press all the way in. Step 12: Stare in awe at the amazingness that you have created! To shoot, unfold barrel extension, put your thumbs behind the back of the hand grip, then use your index fingers to pull cord back on both sides until it drops down in the slot at the back. Insert ball into top holeand you're ready to fire. Keep in mind that the paracord will wear down over time, so I'd recommend making replacements. I applied compound bowstring wax to the middle of mine to make it slide more easily and reduce wear. Feel free to adjust the length of the paracord to change the firing speed. The lengths mentioned above worked best for me. Troubleshooting: If the balls aren't shooting straight, first check all three ends of the barrel and make sure no filament is built it. I had to use an exacto knife to cleanup the edges on a mine. You could also use a ¼" twist drill bit to clean it up. Note: Use as your own Risk!!! I am not responsible for any injurys, damage, etc sustained during the printing, assembly or use of this product. Don't shoot your eye out!!!
Tags
Diseñador
Rockfootball47