
Custom Logo Stamp | Add Your Own SVG Design
Peso
32g
Tiempo
1h 31m
Precio
Pregunta por WhatsApp por este modelo o uno similar
Te ayudamos a conseguir este diseño o uno parecido, con precio según color y acabado
Las dimensiones dependen del diseño. Confirmamos las medidas exactas por WhatsApp.
Este diseño es de su creador en MakerWorld y se muestra solo como referencia. Tecnoprints no es dueño del modelo ni de su licencia.
Descripción
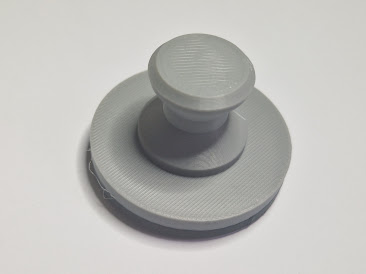
Your logo, with a handmade touch. 🖤 Turn your own design into a reusable stamp for packaging, gift tags, cards and other paper projects. Whether it’s a small-business logo, a personal symbol or a little illustration, it’s a simple way to make something feel more yours. The stamp combines a flexible TPU stamping face with a rigid PLA or PETG backing and handle. Add your own SVG design to the blank pad to create your personalised version. For ink stamping, the flexible face helps make contact with the paper while the rigid backing gives you something firm to press against. The TPU and rigid parts are printed separately and need to be joined after printing. A few tips for a clearer impression: - Choose bold shapes and avoid very fine details. - Mirror your design so the stamped result reads correctly. - Test on scrap paper to find the right amount of ink and pressure. How to add your own logo from an SVG file: You can personalise the blank TPU stamp pad with your own logo directly in Bambu Studio. 1. Prepare your SVG Use a simple vector design with solid, filled shapes. Convert any text and outlines to paths in your vector editor before saving the SVG. Avoid very fine details, as these may not print or stamp clearly. 2. Select the TPU stamp pad Open the supplied project and select the round blank pad on plate 02, labelled TPU - not the PLA backing. 3. Add your logo as a part Right-click the pad and choose Add Part → SVG, then select your file. This attaches the logo to the existing pad rather than importing it as a separate object. 4. Size and position the logo Adjust its size and centre it on the pad’s upper face. Leave a little space around the edge so the entire design fits within the stamping surface. 5. Create the raised stamping surface In the SVG settings, choose Join to add material rather than cut into the pad. Adjust Depth so the logo projects above the surface. Around 1–2 mm of raised relief is a reasonable starting point to test—not a fixed requirement for every design. Make sure the logo’s base touches or slightly overlaps the TPU pad. It must not float above it or sit completely buried inside it. 6. Mirror the design Mirror the logo horizontally once, so its stamped impression reads correctly. This is especially important for lettering. Skip this step if your SVG is already mirrored. 7. Assign TPU and check the preview Ensure both the pad and logo use TPU. Slice the plate and inspect the layers: the pad should print first, with the raised logo connected to it above. Check that fine lines and small details are actually present in the sliced preview. Print the backing separately in PLA or PETG for rigidity, then join it to the flexible TPU stamping face. Tip: Test the stamp on scrap paper first. Simpler logos with bold lines and open spacing generally give clearer ink impressions.
Tags
Diseñador
Yumi_Raven