
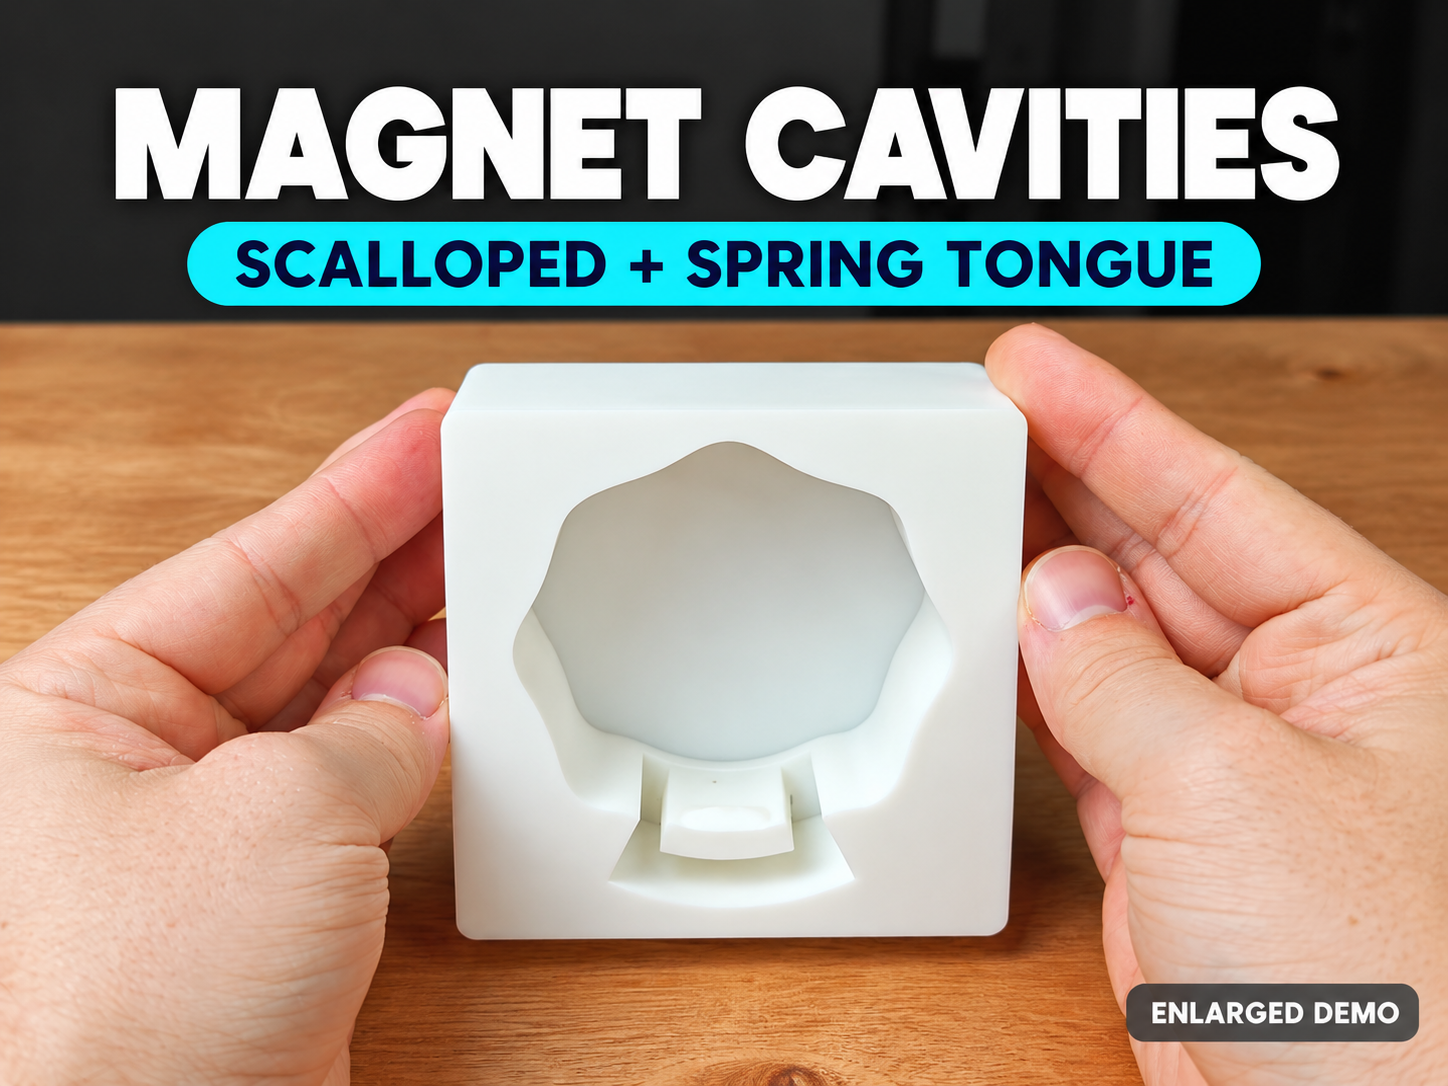
6×3 mm Magnet Cavity with Spring Grip + Fit Tester
Peso
5g
Tiempo
25m
Precio
Cotiza este producto por WhatsApp
Contáctanos y te damos el precio según color y acabado
Las dimensiones dependen del diseño. Confirmamos las medidas exactas por WhatsApp.
Descripción
6×3 mm Magnet Cavity with Spring Grip + Fit Tester Want to hide magnets inside your 3D prints? I designed this cavity with a small built-in spring that flexes as you insert the magnet and presses against it to help hold it in place. Use the included cavity files as negative parts in Bambu Studio to add the same feature to your own models. Pause the print, insert your magnet, and resume printing to seal it inside. The design is intended to help retain the magnet without glue when the fit is right. Print the tester first to find what works with your magnets, filament, and printer. Included in this download: 6×3 mm magnet fit tester: Check the fit with your actual magnets before committing to a larger print. Light spring cavity: The most flexible option, with lighter insertion resistance. Medium spring cavity: A middle option to try first. Firm spring cavity: A stiffer option if you need more grip. These options change the spring tension, not the magnetic strength. The magnets should be 6 mm in diameter and 3 mm thick. 1. Print the tester first. Keep it at 100% scale and use the same filament, nozzle, layer height, and relevant print settings you plan to use for your final model. Try several magnets from your pack, since their actual dimensions can vary. Look for a fit that lets the magnet seat fully with controlled pressure and stay in place. If the spring cracks, permanently bends, or needs excessive force, try a lighter option. If the magnet is loose, try a firmer option. Check that the small gaps around the spring printed clearly before judging the fit. 2. Add the cavity to your model in Bambu Studio. Open your model and set its final size and print orientation first. Right-click the model, select Add negative part → Load…, and choose the cavity file for your preferred spring option. A negative part removes material where it overlaps your model. The cavity file creates the empty space and clearance around the spring; the remaining material becomes the spring itself. Use the cavity file for this step, not the printable tester. Select the negative part under your model in the Objects list. Use Move to position it. Keep the cavity at its original scale for 6×3 mm magnets. 3. Check the position and sliced result. For this tutorial, orient the cavity so the magnet lies flat, parallel to the build plate, and can be inserted from above during the pause. Keep the spring in its intended printing orientation. For a hidden magnet, place the cavity entirely inside the model, leaving material underneath, around it, and above it. Make sure the spring’s base remains connected to the surrounding plastic and there is room for it to flex. Slice the plate and inspect the cavity layer by layer. Confirm that the magnet pocket is empty, the spring is present, and its clearance gaps remain open. If supports appear in the pocket or spring gaps, use a support blocker in that area and slice again. Other areas of your model may still need supports. 4. Add the pause at the correct layer. In Preview, use the vertical layer slider on the right to find the first layer that starts covering the magnet’s insertion opening. Check the layer immediately below it: the pocket must be deep enough for the whole magnet, the retaining spring must be ready to use, and the opening must still allow insertion. Select that first covering layer, right-click the + on the slider, and choose Add Pause. Bambu Studio pauses BEFORE printing the selected layer. For example, if layer 40 is the last open layer and layer 41 starts covering the opening, add the pause at layer 41. The printer finishes layer 40, pauses for the magnet, and prints layer 41 after you resume. Re-slice if prompted and confirm the pause marker remains in the correct place before sending the print. Save your setup as a 3MF project. There is no single pause layer that works for every model. Moving the cavity, changing the model’s orientation, or changing layer heights can change the required pause. Always check the final sliced preview. 5. Insert the magnet and resume. Have your magnets ready before the pause. Once the printer has stopped and the toolhead is parked, check the magnet’s polarity against the piece it will attach to. Press the magnet fully into the cavity using your fingers or a non-metallic tool. The magnet must sit securely at or below the surrounding printed surface, with clearance for the nozzle. If it sticks up or will not stay seated, resolve the fit before resuming. Avoid pushing hard enough to shift the print, and leave the build plate in place. Remove your hands and tools, resume the print, and watch until the cavity is sealed. A loose magnet can be attracted to metal parts of the toolhead and lift out. A few helpful tips: Keep polarity consistent. Use a marked reference magnet or an existing matching part so your accessories attract each other as intended. Scale the main model before adding the cavity. Scaling the completed assembly can also resize the magnet pocket and spring. Retest after material or setting changes. A fit that works in one filament may behave differently in another. Check the spring’s actual toolpaths if its small features disappear or fuse together. Consider the plastic between the magnets. More separation reduces attraction, while a very thin cover may be fragile. Test the connection with your intended cover thickness. Plan multiple cavities together. Cavities that become ready at the same height can share a pause. Different heights may need separate pauses. Keep glue out of the spring gaps. If you choose to add adhesive, avoid filling the space the spring needs to flex, and follow the adhesive’s instructions before resuming. For an exposed magnet pocket, you may be able to insert the magnet after printing if the opening remains accessible. The pause tutorial above is for sealing a magnet inside the print. Keep loose magnets away from children and pets. A friction fit alone should not be treated as childproof retention. If you try it, I’d love to hear which spring option, filament, and print settings worked for you!
Tags
Diseñador
SC3Dprinted