
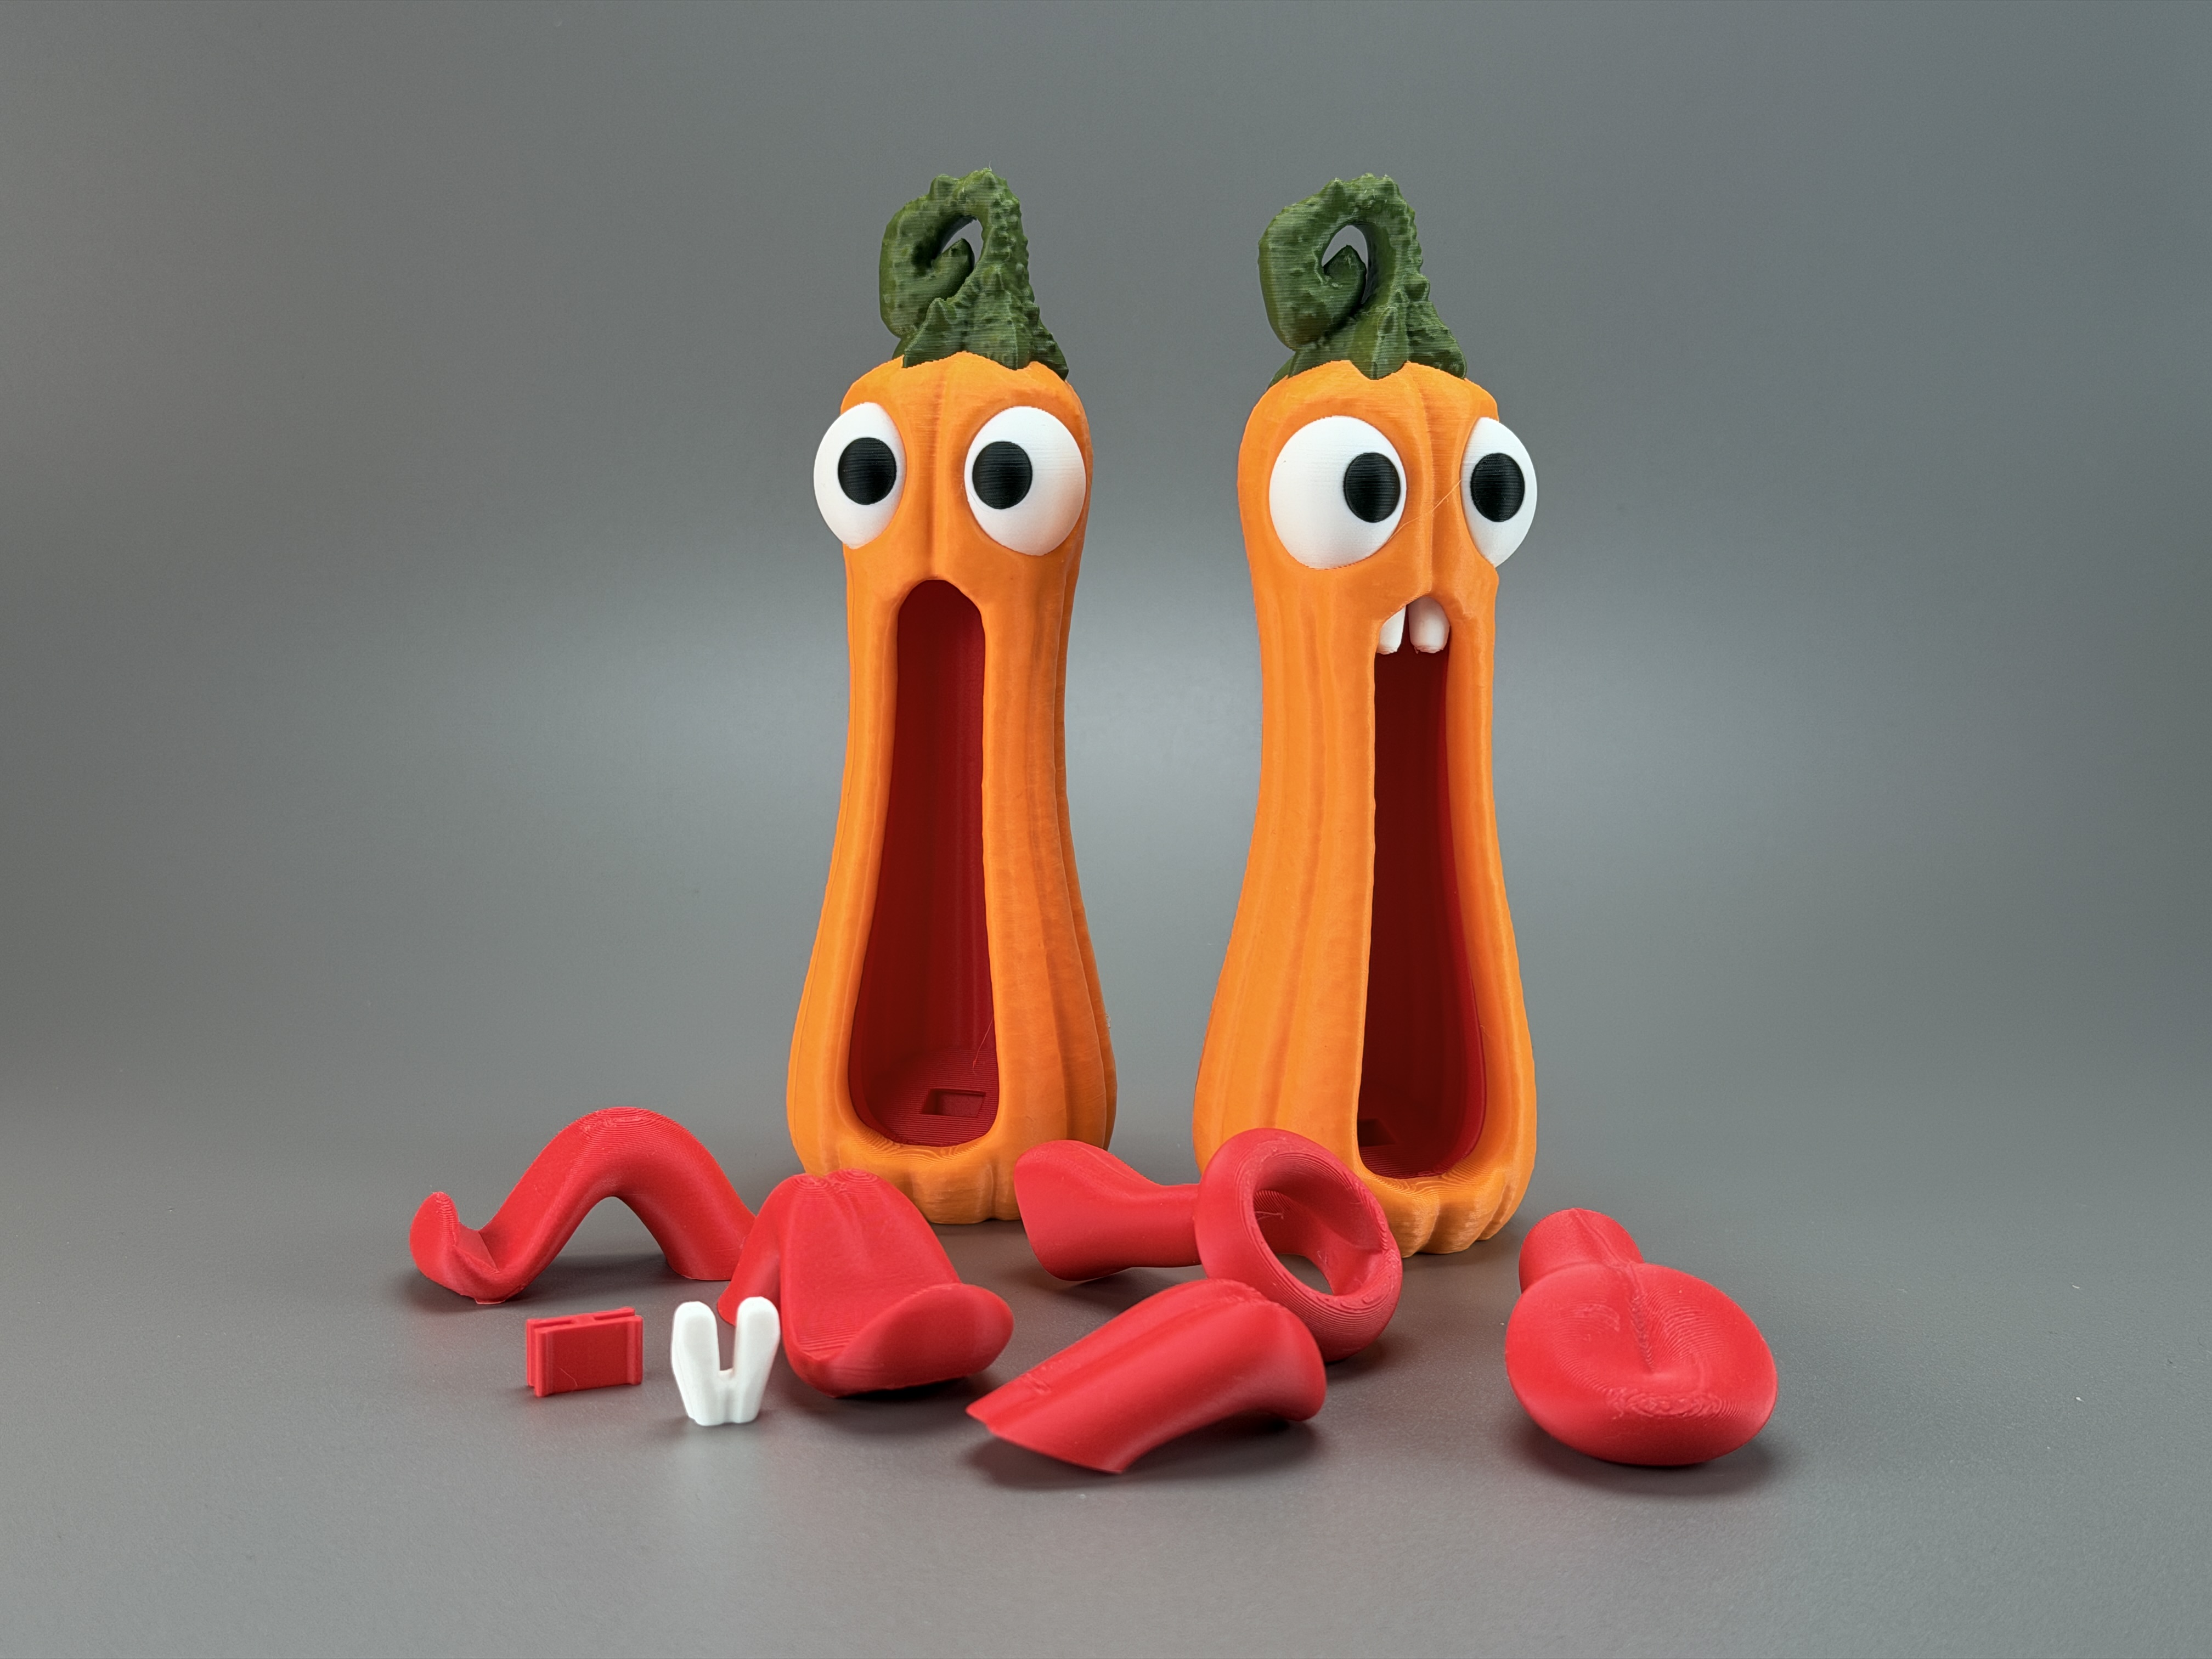
Crazy Pumpkin
Peso
425g
Tiempo
25h 44m
Precio
Cotiza este producto por WhatsApp
Contáctanos y te damos el precio según color y acabado
Las dimensiones dependen del diseño. Confirmamos las medidas exactas por WhatsApp.
Descripción
Please read first! Tongues: The pumpkin can be printed in different sizes and comes with 5 interchangeable tongue designs: Tongue 1: Can hold a pen. Tongue 2: Works like a small tray – you can place different items on the tongue. Tongue 3: Another design that can hold a pen. Tongue 4: Designed to hold business cards. Tongue 5: A regular tongue without any additional function. All tongues use the same connector system, so they can easily be swapped whenever you like! Multicolor 3MF File: In the Multicolor 3MF file, you have two options – the choice is yours! 🎃 On one build plate, you’ll find the Crazy Pumpkin with the teeth already in place, so they are printed directly together with the model. On another build plate, you’ll find the Crazy Pumpkin with separate teeth. These are printed individually and glued in afterwards for a cleaner and more precise result. Choose whichever version works best for you! 😊 ℹ Tips for printing: Filament: PLA Supports: Yes! (tree, on build plate only!) Layer height: 0,2mm or 0.16(0.15)mm Wall loops: 3 Infill: 15% Seam position: back Wall generator: Classic Detect thin walls: No! Brim: - BuildPlate: - ------------------------------------------------------ ❌‼Disclaimer‼❌ These files are provided for personal, non-commercial use only! This model is not suitable for young children or pets! Please store this model safely in environments with young children and pets, as small parts may pose a choking hazard or cause injuries. Avoid applying strong force, as it may damage the model and create hazardous fragments. After 3D printing, keep the model in a secure location out of reach of children and pets. Follow these precautions for safe use. ------------------------------------------------------ Colors and filament I used (5 Colors): PLA Matte / Orange PLA Matte / DarkGreen PLA Matte / Black PLA Matte / White PLA Matte / Red Or decide for yourself which colors and how many you want to use! ℹ This model is very filament wasteful please keep that in mind! When you decide to print my multicolor Pre-Sliced (3mf file) I would recommend printing several models at once, not just one, to reduce waste! ------------------------------------------------------ ℹ New multicolor version (3mf)! This model is no longer pre-painted in the slicer – you can now freely choose which color goes where directly in your slicer for a better look and easier handling! (Quick tip: identical colors next to each other won’t work – always place different colors side by side to avoid potential issues.) ------------------------------------------------------ Assembly Instructions Multipart: (Pumpkin Standard size: approx. 77 mm tall) There are letters on the parts to help you assemble everything correctly. The Orange Body Front and Orange Body Back parts can be pressed into the Red Body Inside with a little pressure. Before assembling the parts, apply some glue to the connecting surfaces. Make sure the Orange Body Front and Orange Body Back are properly aligned and straight before pressing them into place. Once everything is correctly aligned, carefully press the parts together and allow the glue to dry. Inserting the Tooth Multicolor + Multipart: An insertion tool is included to help position and glue the tooth correctly. Insert the tooth: Place the tooth into the insertion tool. The arrow on the tooth must point toward the back. Check the orientation & apply glue: Make sure the “B” for “Back” on the insertion tool is also facing toward the back. Then apply glue to the tooth. Insert the tooth: Carefully press the tooth into the upper opening using the insertion tool. Let the glue set: Hold the insertion tool in place for a few seconds until the glue has set. Only then carefully remove the insertion tool. Done! The tooth is now securely in place. Boost MeIf you enjoyed this model, please consider boosting it to support me to further develop creative and more cute looking designs🥰. Thank you!
Tags
Diseñador
3DPrintyi