
Junior Space command Playset
Peso
3220g
Tiempo
126h 26m
Precio
Cotiza este producto por WhatsApp
Contáctanos y te damos el precio según color y acabado
Las dimensiones dependen del diseño. Confirmamos las medidas exactas por WhatsApp.
Descripción
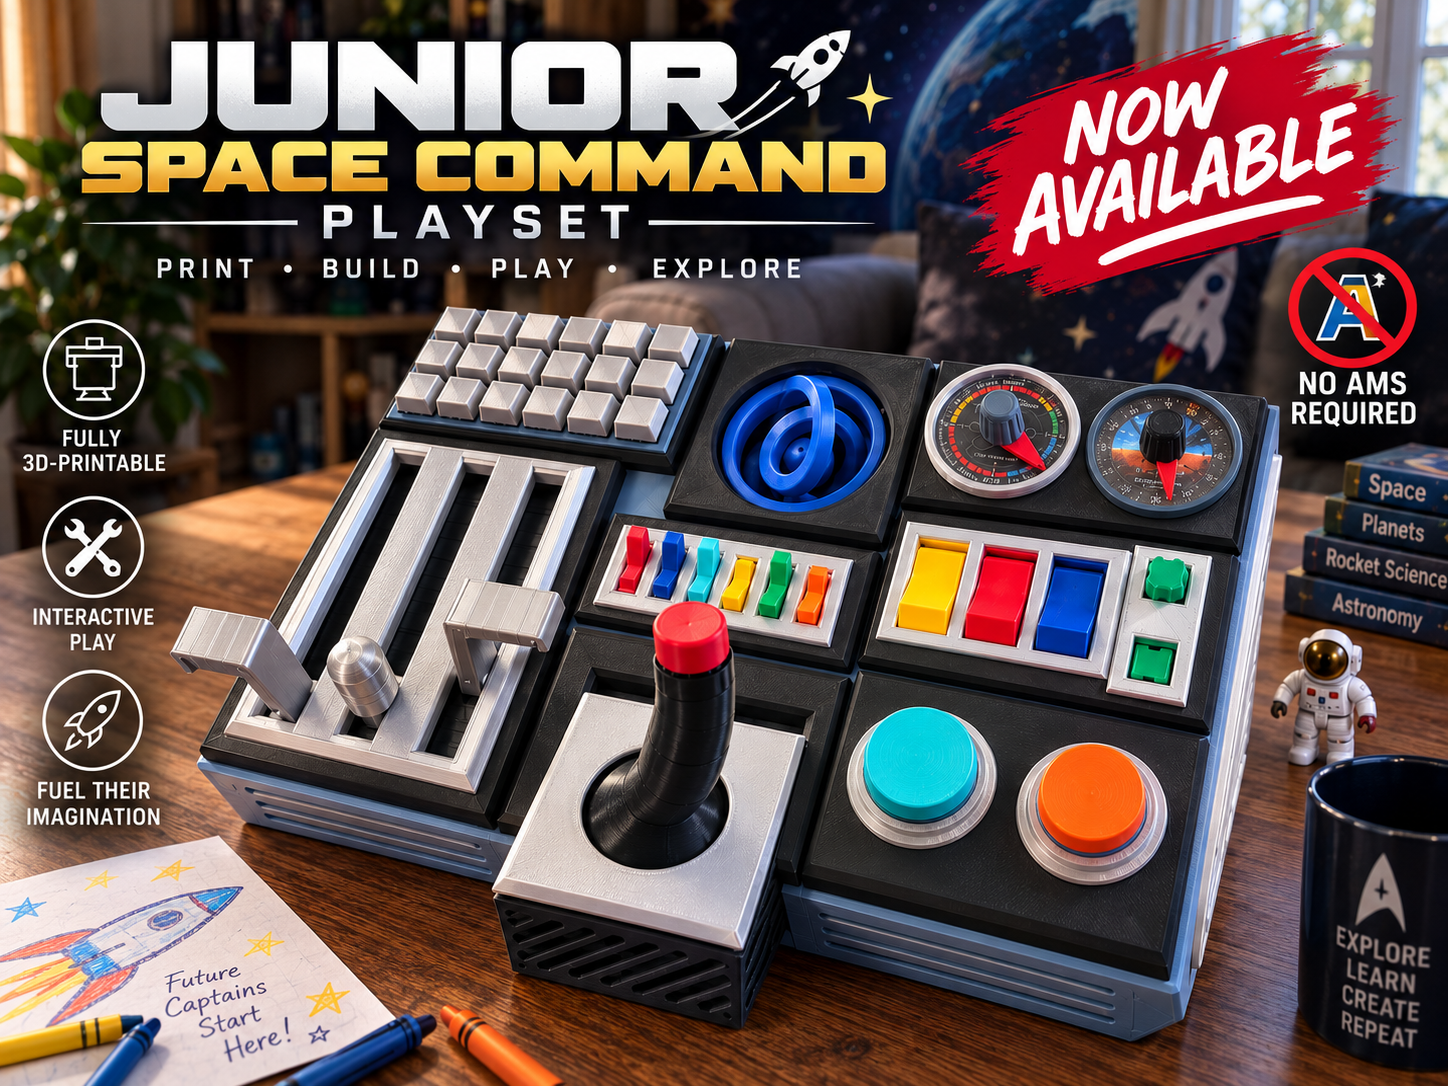
🚀 Junior Space Command Playset No AMS required. Junior Space Command started on my sectional. When my son Alexander got into Ben 10, he started acting out the adventures himself. Whenever there was a spaceship or control-room scene, he'd race from one arm of our sectional to the other, pressing imaginary buttons, operating imaginary controls, and piloting whatever spacecraft existed in the story in his head. As his Dada—and an engineer—I did what you'd probably expect. I leaned into it. I started designing him a spaceship console. What began as a few controls quickly turned into the Junior Space Command Playset: a completely 3D-printable cockpit filled with switches, buttons, throttles, gauges, a navigation gyroscope, a command keypad, and a flight stick. And Alexander is obsessed with it. Somewhere Between the Screen and Imagination There was a particular idea I wanted to preserve while designing this. I didn't want to build a perfect replica of a spacecraft cockpit from a movie or television show. But I also didn't want to make something that looked like a generic preschool activity board. I wanted it to live somewhere between what we see on a screen and what a preschooler's imagination sees. To an adult, it's obviously a collection of 3D-printed mechanical controls. To a four-year-old? That's the throttle. That's navigation. That's the flight stick. That button absolutely does something important. And wherever the ship goes after you press it isn't something I need to design. That's his part. Admittedly, my own inner four-year-old had considerable input during the engineering process too. 😏 🕹️ Built to Be Touched I deliberately kept Junior Space Command focused on physical interaction rather than electronics. The switches flip. The buttons press. The gauges rotate. (Clockwise only, as a learning opportunity) The throttles move independently. The navigation gyro tumbles. The flight stick moves. There are no screens telling a child what is happening next. The controls provide the suggestion. Their imagination provides the spacecraft. 🖨️ No AMS Required Although the finished console uses quite a few colors, no AMS or multicolor printer is required. The model is separated by color and component type so everything can be printed normally on a single-material FDM printer and assembled afterward. The modular construction also means individual control assemblies can be printed, tested, replaced, modified, or even redesigned without reprinting the entire console. 🔧 About the Design This became a considerably larger engineering project than Dada originally intended. 😂 The console is built from individual modules, including: Two-axis flight stick Three independent propulsion controls Mechanical nested-ring navigation gyroscope Two rotating instrument gauges Two oversized action buttons Three large rocker switches Six smaller system switches Two auxiliary controls Command keypad The instrument faces are printable graphics installed underneath physical pointers, and SVG artwork is included for additional labels and customization. Some mechanical components use fairly close-fitting interfaces, so make sure support material and interface surfaces are cleaned thoroughly before assembly. I recommend testing each moving module before installing it into the main console. 👨🚀 Junior Space Command This project ultimately isn't about accurately simulating a spacecraft. It's about giving a kid enough physical vocabulary to invent one. A throttle that moves. A switch that clunks. A gauge with a pointer. A stick to grab. A giant button that's obviously begging to be pressed. The rest happens inside their head. Watching Alexander turn the arm of a couch into the bridge of a spaceship reminded me that children don't need us to build the entire world for them. Sometimes they just need us to give their imagination something to grab onto. So that's what I tried to build. Print it. Build it. Hand over command. Junior Space Command awaits its next captain. 🚀🖖 Safety note: Junior Space Command is a 3D-printed playset and is not certified children's equipment. Inspect printed components periodically for wear, damage, or loose/broken parts and supervise play as appropriate for the child's age. Makers are responsible for their own material selection, print quality, assembly, and determining suitability for their intended use. ( Just be a parent -.^ ) ⌨️ A Note About the Keyboard & Buttons - (Important!) For the keyboard shown in my photos, I used inexpensive mechanical keyboard-style clicker/fidget buttons purchased separately from Amazon. They give the command panel a wonderfully satisfying physical click and worked well for this first version. Keyboard buttons used in my build (Amazon) However, I do not intend for the final design to depend on purchased buttons. I'm actively looking for a reliable, high-fidelity print-in-place mechanical key/clicker design that can reproduce a similarly satisfying action entirely with printed parts. Once I find—or develop—one that performs consistently enough for me to be comfortable including it, I'll update the keyboard geometry and add a fully 3D-printable option to the project. Until then, the linked buttons are what I used and what you see installed in the photographs. Playset Stickers and be found here: https://drive.google.com/drive/folders/1mnQsPT15tDm18eDJJD889dOBdvvxo4kA?usp=sharing Assembly considerations: For the Gauges, print and stick your designed stickers to the Gauge Face Plate before assembly. Insert the assembly rod into the face plate, press the red pointer from the top, and tap in the physical clicker as shown. After you can use an Adhesives to connect the face plate to the gauge housing. Thruster mechanics The Thruster wheels have built-in bearings. Insert the wheels, then the axles, after. Make sure all three are assembled and in place before applying the press-fit faceplate for the thrusters. See below.
Tags
Diseñador
Noblesite