
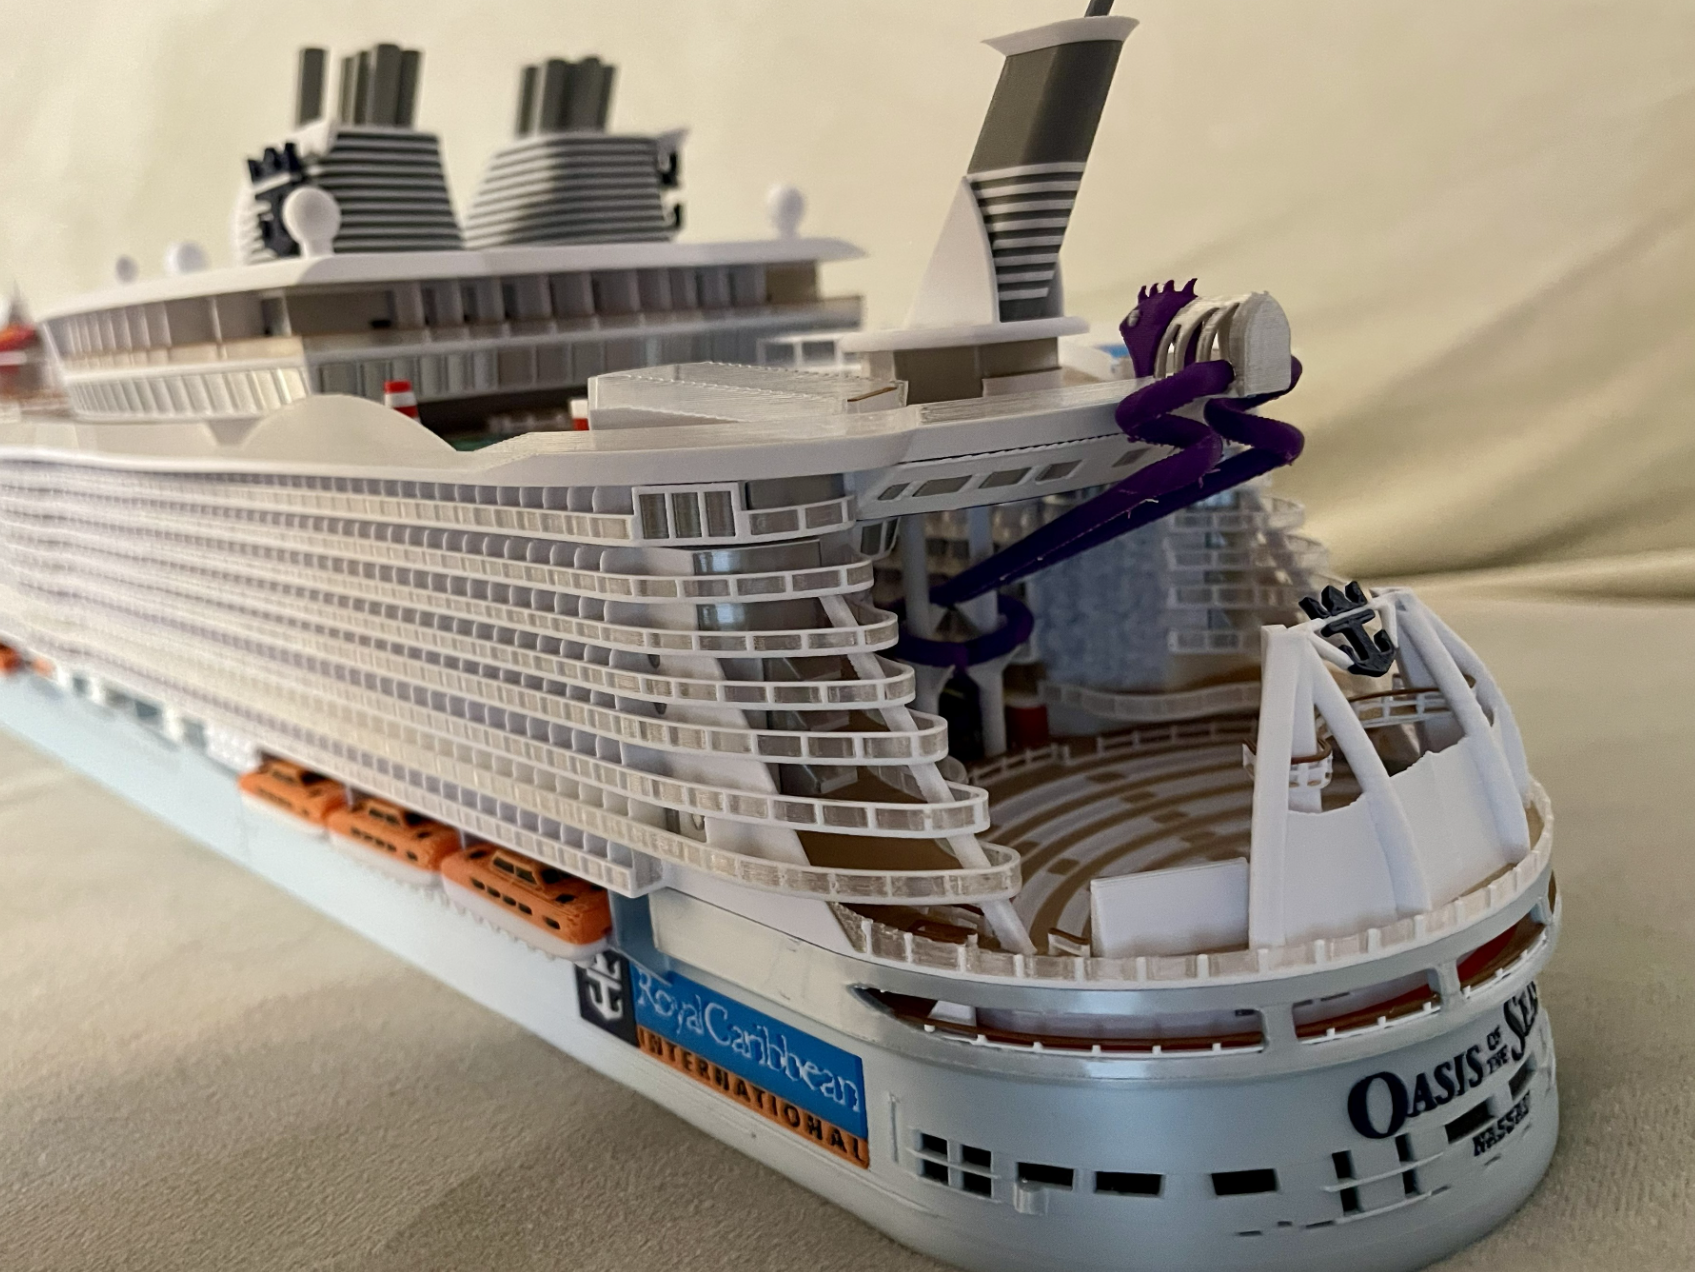
Royal Caribbean Oasis of the Seas 1:500 CruiseShip
Peso
2783g
Tiempo
152h 37m
Precio
Cotiza este producto por WhatsApp
Contáctanos y te damos el precio según color y acabado
Las dimensiones dependen del diseño. Confirmamos las medidas exactas por WhatsApp.
Descripción
If you have printed my other ship, HAL Rotterdam/Konningsdam/N Statendam, this one will be a little more chalenging. There are more supports, small details, seperate pieces and parts to glue together than before. The full blown version of the ship uses total 19 colors with a max of 8 colors per build plate. There are instructions for a 4-color per plate version. The profiles use the 256mm for bed all printer compatability (except A1 mini). I used my H2C to print the prototypes and will say that "everything prints fine on my printer". I do realize that different printers and different filament may not always print as expected. Any feedback on parts that are not working for you will be appreciated. I will tweak the model for improvements that make printing more stable on all printers. From start to finish this ship took about 10 months to design. Things and details get lost after so much time. There are probably mistakes/typos in the assembly instructions also. Please let me know and I will correct. I use OnShape to design these ships. I have seen that this model has been copied several times in OnShape and that is the price I pay for using the free tier account. This model is only published here, so if you see it elsewhere it is not from me. COLORS---------------- 01: white: bambu lab pla basic jade white 02: black: bambu lab pla basic black 03: hull blue: inland silk pla light grey 04: light blue: inland pla light blue 05: pool blue: inland pla+ blue 06: orange: creality pla orange 07: teak brown: inland pla pro brown 08: dark brown: inland pla+ brown 09: silk silver: inland pla silk silver 10: red: bambu lab pla basic red 11: yellow: inland pla+ yellow 12: dark green: inland pla+ green 13: purple: inland pla+ purple 14: marble: inland pla marble 15: transparent: inland pla+ natural 16: grey: bambu lab pla basic grey 17: light green: bambu lab pla basic bambu green 18: pink: bambu lab pla basic hot pink 19: logo blue: inland pla+ dark blue Did you know there is a 36 build plate limit in Bambu Studio. Because of that, there are 2 profiles with all the pieces, "decks" and "parts". I am going to refer to the pieces by "profile_name-plate_name". PRINTING DECKS PROFILE----------- (full color version) Just print everything (4 color version) "decks-5 A": Use white, hull blue, logo blue, teak brown. Substitute white for red, teak brown for dark brown. "decks-5 B": Use white, hull blue, logo blue, teak brown. Substitute white for red. "decks-5 C": Use white, hull blue, pool blue, teak brown. Substitute white for red, teak brown for dark brown, white for silk silver. "decks-6 A": Use white, hull blue, teak brown, silk silver. Substitute silk silver for transparent. "decks-6 B": Use white, teak brown, silk silver. Substitute silk silver for transparent. "decks-6 C": Use white, black, teak brown, silk silver. Substitute teak brown for dark brown, white for red, silk silver for transparent. "decks-7 A": Use white, hull blue, teak brown, silk silver. Substitute silk silver for black, teak brown for dark brown, silk silver for transparent. "decks-7 B": Use white, teak brown, silk silver. Substitute silk silver for transparent. "decks-7 C": Use white, teak brown, silk silver, yellow. Substitute teak brown for dark brown, silk silver for transparent, yellow for red. "decks-8 A C": Use white, teak brown, silk silver. Substitute silk silver for transparent. "decks-8 B": Use white, teak brown, silk silver, dark green. Substitute silk silver for transparent. "decks-9 A C": Use white, teak brown, silk silver. Substitute silk silver for transparent. "decks-9 B": Use white, teak brown, silk silver. Substitute silk silver for transparent. "decks-10 A C": Use white, teak brown, silk silver. Substitute silk silver for transparent. "decks-10 B": Use white, teak brown, silk silver. Substitute silk silver for transparent. "decks-11 A C": Use white, teak brown, silk silver. Substitute silk silver for transparent. "decks-11 B": Use white, teak brown, silk silver. Substitute silk silver for transparent. "decks-12 A C": Use white, black, teak brown, silk silver. Substitute silk silver for transparent. "decks-12 B": Use white, teak brown, silk silver. Substitute silk silver for transparent. "decks-14 A": Use white, black, teak brown, silk silver. Substitute silk silver for transparent. "decks-14 B": Use white, teak brown, silk silver. Substitute silk silver for transparent. "decks-14 C": Use white, teak brown, silk silver, light blue. Substitute silk silver for transparent, light blue for pool blue. "decks-15 A": Use white, teak brown, silk silver, pool blue. Substitute teak brown for dark brown, silk silver for transparent, white for hull blue, white for grey. "decks-15 B": Use white, teak brown, silk silver, pool blue. Substitute teak brown for dark brown, silk silver for transparent, white for light blue. "decks-15 C": Use white, teak brown, silk silver, purple. Substitute teak brown for dark brown, silk silver for transparent, white for light blue, white for red. "decks-16 A": Use white, teak brown, silk silver. Substitute teak brown for dark brown, silk silver for transparent. "decks-16 B": Use white, teak brown, silk silver, pool blue. Substitute teak brown for dark brown, silk silver for transparent. "decks-17 A": Use white, teak brown, silk silver. Substitute silk silver for transparent. "decks-17 C": Use white, teak brown, silk silver, black. Substitute teak brown for dark brown, silk silver for transparent. PRINTING PARTS PROFILE----------- (full color version) Just print everything (4 color version) "parts-keys": The keys are labelled to avoid confusion. Please remove the painting on them and only use one color if poop is a problem for your printer. "parts-hull logos": Use white, logo blue, light blue, orange. Substitute logo blue for black. "parts-06 abyss": Use white, black, teak brown, silk silver, purple. Substitute teak brown for dark brown. "parts-15 putt": Use light green, dark green, light blue, red. Substitute red for white. "parts-18 slide perch": Use white, teak brown, silk silver. Substitute silk silver for transparent, white for orange, white for pink, white for light green. This is “parts-hull logos” printed on H2C using .4 then .2 nozzles. The top is .4 and the lower is .2mm. The .2 does look better but the .4 is perfectly acceptable to me. ASSEMBLY-------------------- Hull: Apply "parts-hull logos" to "decks-hull C". Assemble "decks-hull A", "decks-hull B" and "decks-hull C" pieces together. Insert "parts-keys" labeled "H" into slots. deck 5: Assemble "decks-5 A", "decks-5 B" and "decks-5 C" pieces together. Place assembly onto hull. Insert "parts-keys" labeled "5" into slots. The large "parts-05 lifeboats" apply to the edges of all deck 5 pieces. The small "parts-05 lifeboats" get applied to the square perch on each side of "decks-5 B". deck 6: Assemble "decks-6 A", "decks-6 B" and "decks-6 C" pieces together. Place assembly onto deck 5. Insert "parts-keys" labeled "6" into slots. Apply "parts-06 carousel" onto round spot on "decks-6 C". Apply "parts-06 abyss" into open space on "decks-6 C". Apply "parts-06 logo" onto perch at rear of "decks-6 C". deck 7: Assemble "decks-7 A", "decks-7 B" and "decks-7 C" pieces together. Place assembly onto deck 6. Insert "parts-keys" labeled "7" into slots. Apply "parts-07 helipad" onto "decks-7 A". deck 8: Assemble "decks-8 A", "decks-8 B" and "decks-8 C" pieces together. Place assembly onto deck 7. Insert "parts-keys" labeled "8" into slots. deck 9: Assemble "decks-9 A", "decks-9 B" and "decks-9 C" pieces together. Place assembly onto deck 8. Insert "parts-keys" labeled "9" into slots. deck 10: Assemble "decks-10 A", "decks-10 B" and "decks-10 C" pieces together. Place assembly onto deck 9. Insert "parts-keys" labeled "10" into slots. deck 11: Assemble "decks-11 A", "decks-11 B" and "decks-11 C" pieces together. Place assembly onto deck 10. Insert "parts-keys" labeled "11" into slots. Apply "parts-11 rock walls" to "decks-11 C". deck 12: Assemble "decks-12 A", "decks-12 B" and "decks-12 C" pieces together. Place assembly onto deck 11. Insert "parts-keys" labeled "12" into slots. Apply "parts-12 park walls" to "decks-12 B". deck 14: Assemble "decks-14 A", "decks-14 B" and "decks-14 C" pieces together. Place assembly onto deck 12. Insert "parts-keys" labeled "14A", "14B", "14C" into slots. deck 15: Assemble "decks-15 A", "decks-15 B" and "decks-15 C" pieces together. Place assembly onto deck 14. Insert "parts-keys" labeled "15A", "15B", "15C" into slots. Apply "parts-15 aft stack" to perch on "decks-15 C". Apply "parts-15 court and flowriders" to spaces on "decks-15 C". Apply "parts-15 putt" to space on "decks-15 C". Spread top of "parts-06 abyss" slides and insert to "fish" at rear of "decks-15 C". deck 16: Assemble "decks-16 A", "decks-16 B" and "decks-16 C" pieces together. Place assembly onto deck 15. Insert "parts-keys" labeled "16A", "16B", "16C" into slots. Apply "parts-16 wing" to "decks-16 B". deck 17: Place "decks-17 A" onto deck 16A. Place "decks-17 C" onto deck 16C. Insert "parts-keys" labeled "17A", "17C" into slots. deck 18: Place "decks-18 A" onto deck 17A. Place "decks-18 C" onto deck 17C. Place "parts-18 slide perch" onto "decks-18 A". Solarium: Place "parts-15 solarium" onto "decks-15 A". Water slides: Place "parts-15 Slides 1 2" onto "decks-15 B". Align the slide with the post sticking up from deck 15. There is a snug fit where it will be perfect. Place "parts-15 bowl slide" onto "decks-15 B". Align the spiral stairs under "parts-18 slide perch" Assure all 3 slides fit on top of in the spaces provided for them on "parts-18 slide perch". Funnels: Place "parts-18 funnels" onto "decks-18 C". Apply "parts-18 logos" onto "parts-18 funnels".
Tags
Diseñador
jgetz524