
AMD BC250 DIY Steam Machine | Field-Tech Case
Peso
1491g
Tiempo
48h 51m
Precio
Cotiza este producto por WhatsApp
Contáctanos y te damos el precio según color y acabado
Las dimensiones dependen del diseño. Confirmamos las medidas exactas por WhatsApp.
Descripción
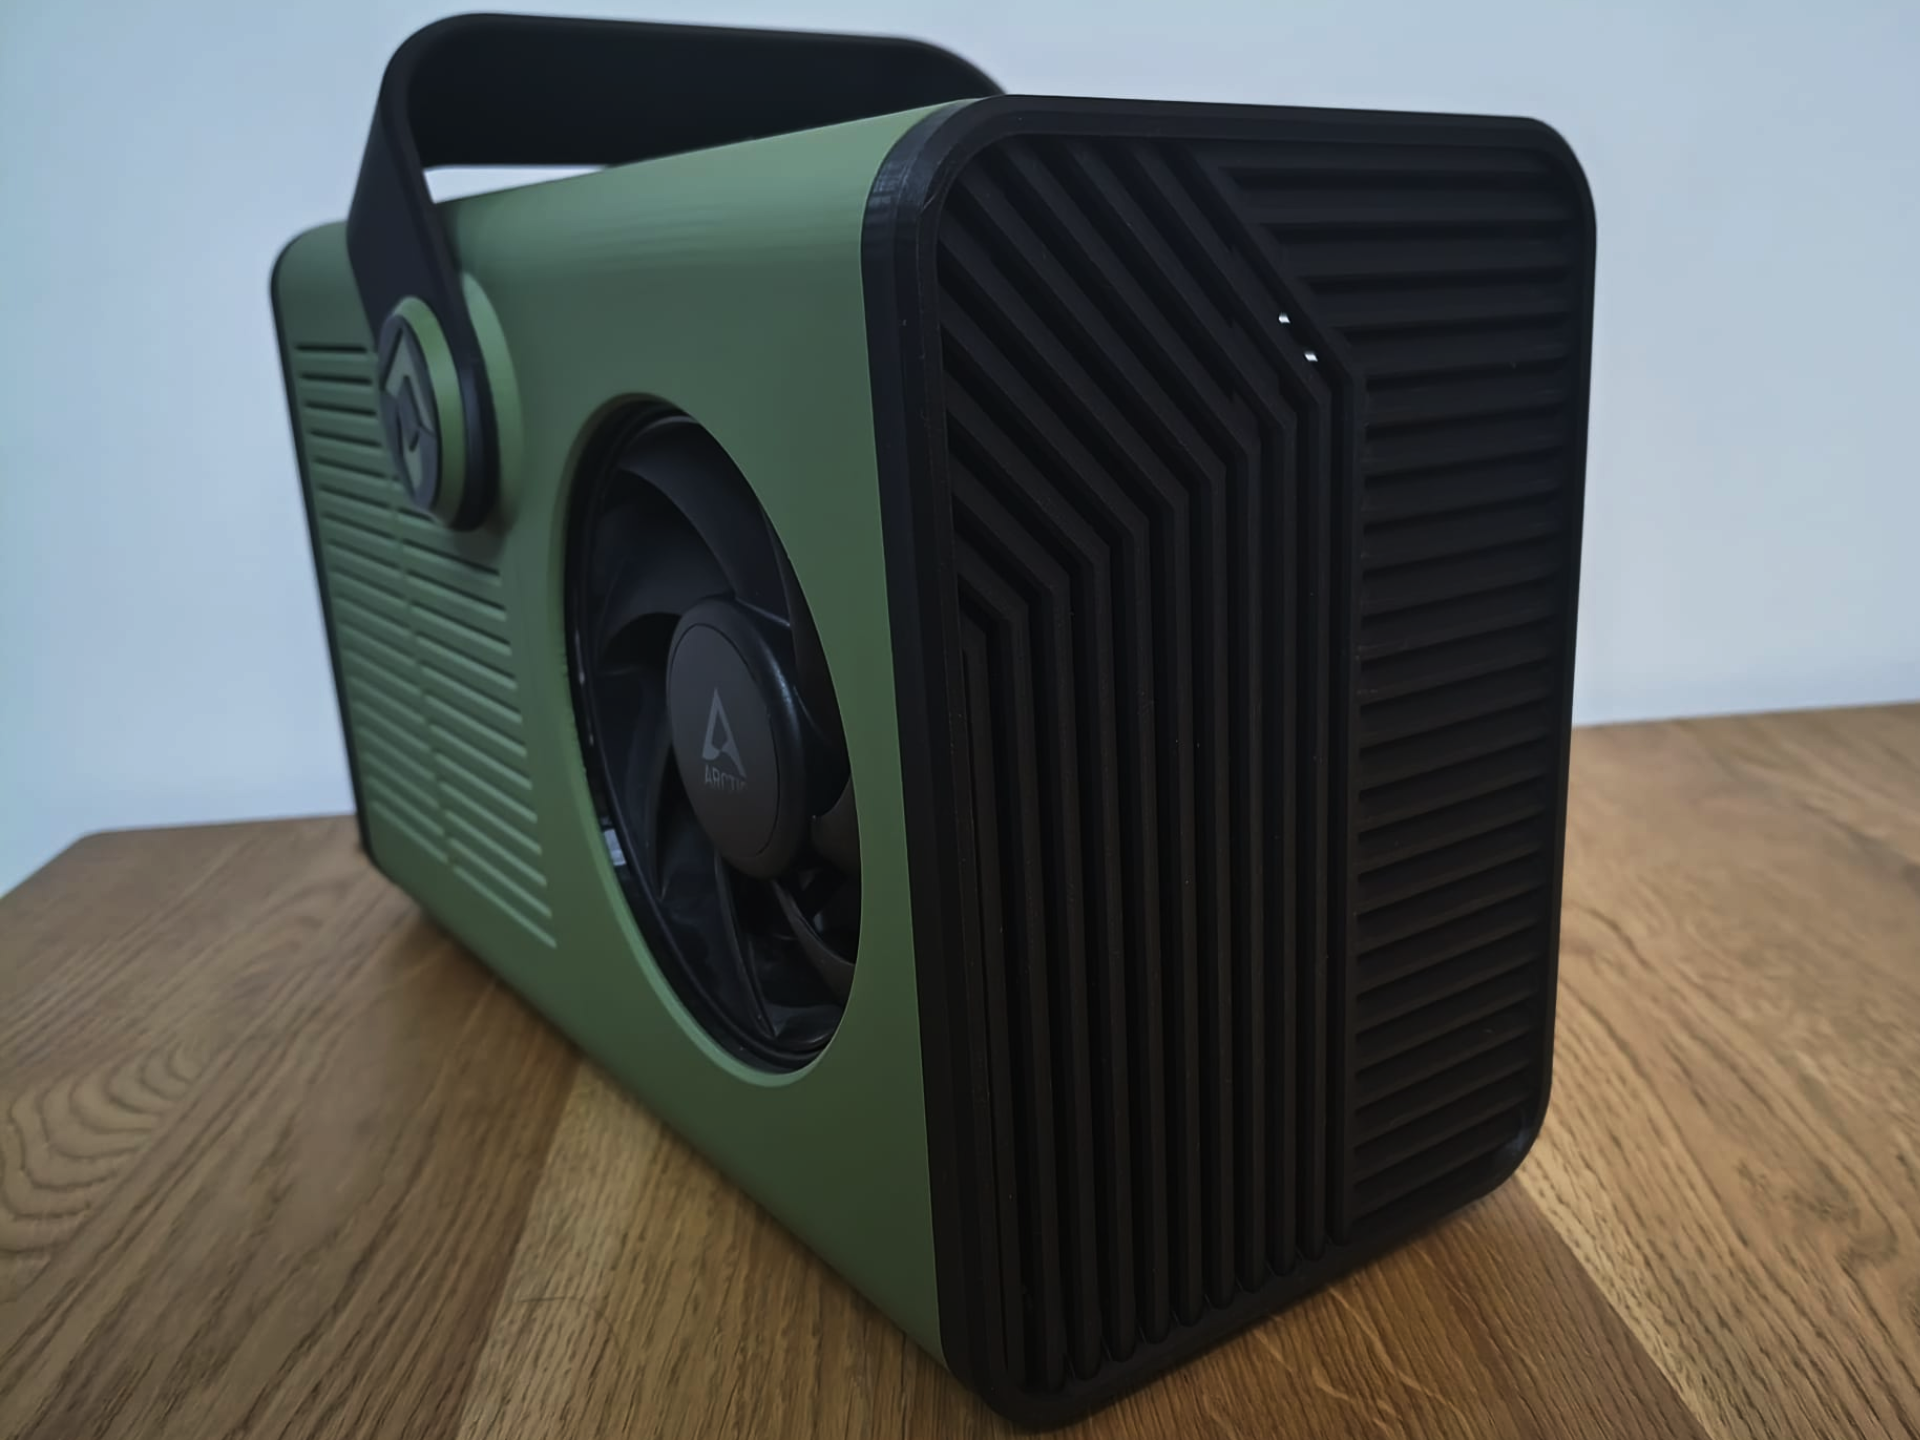
This project started because I wanted a Steam Machine-style PC for the living room, but current hardware prices made me reconsider. Instead of buying a finished system, I decided to build something cheaper, more unusual and much more fun. The AMD BC250 turned out to be a surprisingly capable base for this kind of machine. Since I already had an M.2 SSD, my complete build came in at under €180 / $210. Of course, the final price depends heavily on current AliExpress deals and promotions, especially for the BC250 board and the Mean Well PSU, which make up a large part of the total cost. THE CASE I wanted the enclosure to look like a finished piece of hardware rather than a mining board hidden inside a generic PC case. The result is an industrial field-tech design with a heavy front grille, exposed ventilation and a large carrying handle. Printed in olive green matte, it gets an especially rugged, field-equipment-like character. The handle is not just decorative — it is fully functional and structurally integrated into the case, so you can actually carry the complete system with it. The enclosure is designed around: AMD BC250 Mean Well LRS-350-12 2× Arctic P12 Pro PST 120 mm IEC C14 inlet with integrated switch and fuse holder M.2 SSD In my own build I also added a small heatsink to the M.2 SSD. UPDATE - FRONT PANEL V2 I’ve now uploaded a new version of the front panel: Front Panel V2. The original front panel was fully closed, without any perforation. The V2 version has been redesigned to provide additional airflow through the case, while still keeping the same overall style and visual character as the original panel. The new angled slats work a bit like louvers, helping to reduce direct visibility into the case while still allowing air to pass through. If you want to use the new panel, simply skip the front panel (PLATE 5) when printing the “FULL CASE” profile and print it separately using the “Front Panel V2” profile. All other case parts remain unchanged. You can see a comparison between the original front panel and Front Panel V2 in the photos below. COOLING This case was designed around the stock BC250 heatsink with two Arctic P12 Pro PST fans in a direct push-pull configuration. The visible front fan works as intake, while the hidden fan near the I/O shield works as exhaust, forcing air directly through the heatsink. I recommend the P12 Pro PST because the BC250 cooler is quite dense, so static pressure matters more than unrestricted airflow. Slightly opening the heatsink fins can also help improve airflow. In my build, the fans are controlled by a custom temperature-based script. My current Gaming Mode curve is: GPU temperature PWM Approx. fan speed Below 60°C 90 ~1400–1500 RPM 60–64°C 115 ~1650–1750 RPM 65–69°C 135 ~1800–1900 RPM 70–74°C 155 ~1950–2050 RPM 75–79°C 180 ~2200–2300 RPM 80–84°C 210 ~2500–2600 RPM 85°C+ 255 ~3000 RPM The controller uses 2°C hysteresis and checks temperature every 2 seconds. Outside Gaming Mode, the fans run at PWM 90. RPM values are approximate and may vary slightly between individual fans and controllers. My current setup is 8C/16T, 40 CU, 1950 MHz and 950 mV. These values and the fan curve are tuned specifically for my individual BC250 board, so other units may require slightly different settings. In the AAA games I have tested, I can usually target 60 FPS at high or medium / medium-high settings, with GPU temperatures commonly around 60–70°C. To show the cooling headroom of this case, I also tested the system with the FPS limit removed, while keeping the exact same cooling profile and fan curve. In the same scene in Onimusha: Way of the Sword, the 60 FPS capped run stayed at around 57°C, while the uncapped run reached around 140 FPS and approximately 69°C. See the Onimusha: Way of the Sword comparison below. Onimusha: Way of the Sword DEMO (1080p, RT OFF, MEDIUM SETTINGS, uncapped FPS) Onimusha: Way of the Sword DEMO (1080p, RT OFF, MEDIUM SETTINGS, 60 FPS lock) Cyberpunk 2077: Phantom Liberty (1080p, RT OFF, HIGH SETTINGS, uncapped FPS) Crimson Desert (1080p, RT OFF, MEDIUM SETTINGS, uncapped FPS) The uncapped run is not how I normally use the system — it was simply a way to show how the cooling performs under a much heavier GPU load without changing the fan curve or using a more aggressive cooling profile. Using fewer unlocked CUs, or keeping the stock 24 CU configuration, should generally result in lower power consumption and temperatures. The downside is lower GPU performance, so you can also expect fewer FPS compared with a fully unlocked 40 CU setup. EASY ACCESS I also wanted the system to be easy to service. To access the internals, simply remove 4 screws from the rear and slide the outer shell off. HANDLE CAPS The default print profile includes the AMD-logo handle caps. Separate print profiles are available for: Steam logo Plain / no logo So if you want a different look, you only need to print another set of caps — not the whole case again. REQUIRED HARDWARE 1× Mean Well LRS-350-12 2× Arctic P12 Pro PST 120 mm - You can use different 120 × 120 × 25 mm fans if you prefer, but cooling performance may be worse. 1× M.2 SSD 1× IEC C14 inlet with integrated switch and fuse holder 1× suitable fuse 1× good-quality 8-pin PCIe power cable 1x PC power cord C13 1x Internal power cable - Use a good-quality, appropriately rated 3-core mains cable to connect the internal IEC inlet to the power supply. 1x M2 SSD Heatsink (OPTIONAL) Displayport to HDMI adapter (OPTIONAL) - If you want use HDMI as display. Wi-Fi Adapter or Wi-Fi / Blutooth (OPTIONAL) - If you want use WI-FI. I recommend the TP-Link Archer TX10UB. It works properly under Linux and, in my setup, did not require any additional driver installation. It also includes Bluetooth. 1 x Artic P12 Pro LN (OPTIONAL) - If you want to use the PSU cooling fan mod, you can use a different 120 × 120 mm fan. The fan thickness is not critical, but you will need to use mounting screws of the appropriate length. SCREWS, NUTS, WASHERS & MAGNETS Part Type Qty M3×3 Socket Head Cap Screws 8 M3×12 Socket Head Cap Screws 18 M3×14 Socket Head Cap Screws 8 M3x20 Socket Head Cap Screws 4 M4×6 Button Head Screws 4 M6×10 Screws 2 Fan screws Fan Mounting Screws 8 M3 nuts M3 Nuts 8 M6 nuts M6 Nuts 2 M3 washers (OPTIONAL) M3 Washers 30 10×3 mm magnets Round / Disc Magnets 8 POWER CONNECTION The complete wiring layout is shown in the diagram below. For all power connections, I strongly recommend using properly crimped terminals instead of bare stranded wire. Use fork or ring terminals for the Mean Well PSU and insulated female spade terminals for the IEC C14 inlet. I also do not recommend cheap PCIe 8-pin adapters for powering the BC250. In my build, I use a 16 AWG PCIe cable from a be quiet! power supply, cut at the PSU-side connector while keeping the BC250-side 8-pin connector intact. The individual wires are then terminated and connected directly to the Mean Well output according to the diagram. Always verify +12 V, GND, L, N and PE before powering the system, and never work on mains wiring while connected to AC power. MEAN WELL PSU FAN MODIFICATION - OPTIONAL The original Mean Well fan is very loud, especially in a living-room setup. In my build I replaced it with an Arctic P12 Pro LN 120 mm fan, which made a big difference to the overall noise level. The PSU uses a 2-pin fan connector, so the replacement fan needs to be either rewired or connected using a suitable 4-pin to 2-pin adapter. For mounting the 120 mm fan you will also need: 4× long radiator fan screws approximately 30 mm long These are the same type commonly used for mounting fans to AIO or custom water-cooling radiators. Important: this modification requires opening a mains-powered PSU and should only be performed by someone with the necessary electrical knowledge and a clear understanding of the risks involved. HARDWARE & SOFTWARE SETUP For the full BC250 hardware and software setup, I followed: ElektricM - AMD BC-250 Documentation - the main reference for the entire project. ElektricM - BIOS flashing guide - modded BIOS, CMOS reset and recommended firmware settings. GabriWar - bc250-core-cu-unlock - CPU core unlock research and tools. mendesrr - bc250-acpi-fix-updated-8c - updated ACPI tables for the 8-core configuration. WinnieLV - bc250-cu-live-manager - runtime CU routing and persistence. duggasco - bc250-40cu-unlock - 40 CU research, register information and validation tools. filippor - cyan-skillfish-governor - GPU frequency/voltage management. Using this guides, I managed to unlock healthy 40 CUs and enable 8C / 16T. I’m currently putting together a longer write-up about the whole project and the steps I went through. It won’t be a copy-paste guide, because I don’t really feel experienced enough with Linux to present it that way. I just want to show the path I took, what I tried, what worked for me, and what I learned along the way.
Tags
Diseñador
Tikom