
Full Scale, Wearable Doom Slayer Praetor Armor
Peso
111g
Tiempo
10h 57m
Precio
Cotiza este producto por WhatsApp
Contáctanos y te damos el precio según color y acabado
Las dimensiones dependen del diseño. Confirmamos las medidas exactas por WhatsApp.
Descripción
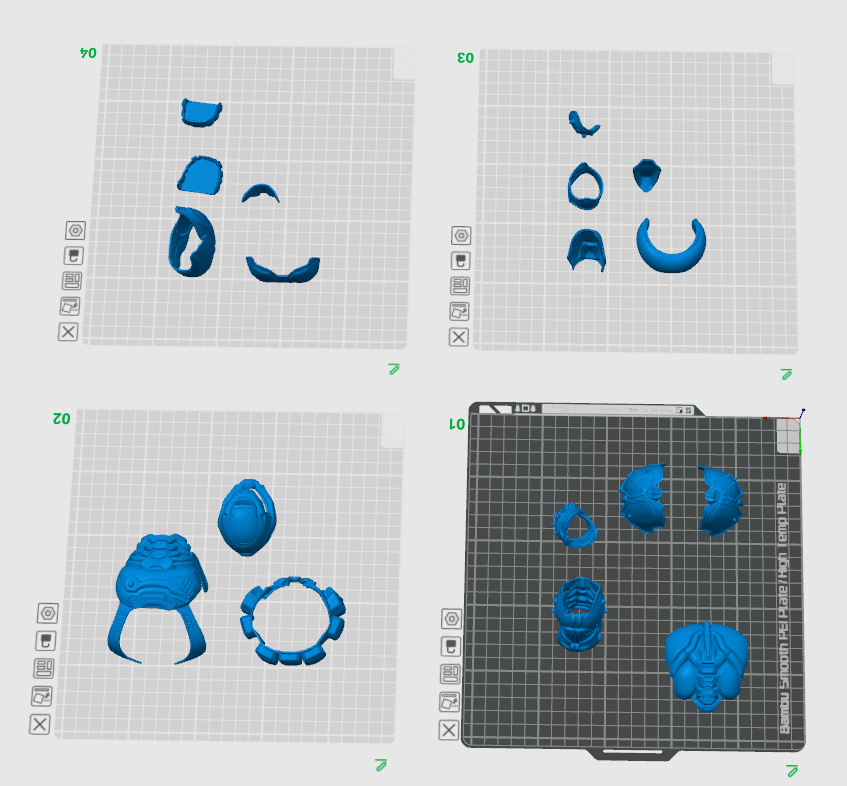
Boost MeWant more full size wearable cosplay???? BOOST THIS MODEL so I can quit my job and make this kinda fun stuff full time! And follow me on Instagram for more EVERY DAY! : ) Doom Slayer Praetor Armor WATCH THIS FIRST: Detailed Description of the Model Bring the iconic wrath of hell's worst nightmare into the physical realm with this fully optimized, high-detail 3D-printable Doom Slayer Praetor Armor set. Meticulously modeled for maximum fidelity, surface texture accuracy, and structural integrity, this digital armor kit includes all core components: the signature helmet, chest cuirass, shoulder pauldrons, arm guards, heavy tactical belt, thigh guards, knee poleyns, greaves, and boot sabatons. To achieve the ultimate battle-ready finish and durable construction, we highly recommend printing the structural panels using SUNLU Standard PLA or SUNLU PETG for excellent layer adhesion and impact resistance. If you want that aggressive, metallic sci-fi finish straight off the build plate, check out SUNLU Silk PLA variants to make the surface pop with sci-fi sheen. For parts requiring assembly or reinforcement, secure your pieces firmly using ARKA KRAFTPROTZ UNIVERSAL Superglue. For high-stress structural joints on heavy cosplay builds, reinforce them seamlessly using a plastic welding kit. If you are new to using hot-fusion staples, watch this quick real-time demonstration in this Instagram video: Plastic Welder in Action. Functionality & Use Designed specifically for cosplay, conventions, display props, and collector showcases, this armor provides an authentic anatomical fit. Because every maker's body dimensions are unique, the files are currently uploaded at a standard scaling baseline. When scaled back to 100% from their current preview sizing, these pieces are proportioned to fit an athletic 6 foot 2 inch, 175 lbs frame. YOU MUST SIZE AND SCALE THIS TO YOUR SPECIFIC BODY! To make this effortless, take precise measurements using these custom-built Cosplay Calipers. For a complete walkthrough on how to download, scale, slice, print, and assemble your suit like a pro, follow along with this comprehensive guide: How to 3D Print Cosplay Armor Guide. Furthermore, if you are working with multi-color features or need to optimize your layout files, check out this tutorial on How to remesh and color prints effectively in Bambu Studio. History & Lore The Praetor Suit is the legendary armored battle gear worn by the Doom Slayer across DOOM, Doom Eternal, Mighty Doom, and Doom: The Dark Ages: Revelations. Gifted to the Slayer at the dawn of his unending crusade against the demonic hordes, the suit absorbs energy from fallen foes and adapts dynamically to new threats, serving as both an impenetrable bastion and an instrument of brutal vengeance. Alternative Uses & Remixing Ideas While tailor-made for first-person shooter cosplay, components of this sci-fi tactical armor can be creatively remixed for other genres. Swap out individual plates to design custom futuristic military gear, cyberpunk security enforcer uniforms, post-apocalyptic scavenger suits, or galactic bounty hunter builds. Search keywords like sci-fi tactical armor, cyberpunk costume parts, futuristic body plating, and mecha cosplay components to explore these creative directions. Keywords & Hashtags Keywords: Doom Slayer, Praetor Suit, cosplay armor, 3D printable armor, video game props, sci-fi costume, helmet STL, tactical body armor. Hashtags: #DoomSlayer #PraetorSuit #CosplayArmor #3DPrinting #CosplayDIY #SciFiProps #MakerWorld And if you've come this far, maybe you're willing to come a little further... - Andy Dufresne #TeachAManToFish If you are BRAND NEW to 3D printing, click here: https://youtu.be/7zYCPrTGIaY If you want to learn 11 Slicer Tricks I Wish I Knew Sooner: https://youtu.be/nDSTR_NQC_0 If you want to learn to do what I do (and stay out of my inbox so you can make your own changes to this file), click this link: https://youtu.be/iFfUVc33sTk You are always welcome to reach out and ask me questions, but know, that AI is INFINITLY smarter than me, so consult any reputable AI model first before asking me!!! #EmpowerYou : ) YouTube How to 3D Print Cosplay Armor: Download, Scale, Slice, Print & Assemble | Complete Guide Open in YouTube How to 3D Print Cosplay Armor: Download, Scale, Slice, Print & Assemble | Complete Guide Stephen Thorwart Opens in a new window Want to 3D print a full set of cosplay armor but aren't sure how to get from downloaded files to something you can actually wear? In this complete start-to-finish tutorial, I walk through my entire process for downloading, scaling, preparing, slicing, printing, and assembling the armor files available on my Timberlake Creations MakerWorld profile. 🔗 DOWNLOAD MY 3D PRINTABLE DESIGNS: Timberlake Creations on MakerWorld. Go to this link: https://makerworld.com/en/@TIMBERLAKEBiz And near the center of the screen, click "3D Models" to see all my work!!! This video is designed to answer many of the questions I get about my armor files: • Where are the files and how do I download them? • Which files do I actually need? • Are all of the armor parts included? • What size are the original models? • What scale should I print the armor at? • How do I scale armor specifically to MY body? • How can I make a large armor piece fit on my printer's build plate? • How should armor pieces be oriented? • When should I use supports? • How do I reduce the chances of a failed print? • How do I assemble the finished pieces? I also show some of the tools and software I use throughout the process, including: 🔹 Bambu Studio – scaling, orientation, slicing, supports, build-plate setup and preparing files for printing 🔹 Blender – working with and modifying 3D models 🔹 Meshmixer – manipulating, cutting and preparing STL files 🔹 Autodesk Fusion 360 – CAD work and more precise modifications 🔹 Cosplay Calipers – taking measurements and transferring those measurements to your digital armor 🔹 3D Print Welding Kit – joining printed armor pieces together I also cover several simple things that can dramatically improve your chances of getting a successful armor print: ✓ Find the flattest possible printing surface ✓ Use Bambu Studio's Orient / Lay on Face tools ✓ Use glue or other build-plate adhesion methods when appropriate ✓ Slow the print down when the geometry requires it ✓ Add supports where they're actually needed ✓ Check your model carefully after slicing ✓ Use the right-click tools in Bambu Studio to manipulate and prepare individual parts ✓ Don't blindly hit PRINT just because the slicer lets you! One of the biggest mistakes with cosplay armor is assuming that downloading the STL is the hard part. It isn't. Scaling, orientation, slicing and print preparation can make the difference between a clean wearable armor piece and 14 hours of extremely expensive spaghetti. This video takes you through the workflow I actually use so you can understand not just WHAT buttons to press, but WHY you're pressing them. Whether you're printing a helmet, chest armor, gauntlets, shoulder armor, leg armor or an entire cosplay suit, the same basic workflow applies. If you're using a Bambu Lab printer such as the X1 Carbon, P1S, P1P, A1, A1 Mini, H2D or another FDM printer, most of these techniques will translate directly to your setup. If one of my MakerWorld armor designs brought you here, I'd love to see your finished build. Post your make, leave a rating, and tag Timberlake Creations so I can check it out. 👍 LIKE if this helped you avoid a failed armor print. 🔔 SUBSCRIBE for more 3D printing, cosplay armor, Bambu Studio and design tutorials. 💬 QUESTIONS? Drop them in the comments — they may become the next tutorial. #3DPrinting #CosplayArmor #BambuLab #BambuStudio #Cosplay #3DPrintedArmor #MakerWorld #STLFiles #ArmorPrinting #3DPrintingTutorial #Blender #Meshmixer #Fusion360 #TimberlakeCreations Opens in a new window How to Color ANY 3D Model in Bambu Studio, OrcaSlicer, Cura, Pursa | Easy Painting Tricks Stephen Thorwart Opens in a new window Want to color complicated 3D models in Bambu Studio or OrcaSlicer without spending HOURS manually painting individual triangles? 🎨🖨️ In this quick 3D printing tutorial, I’ll show you the painting and mesh tools I actually use to simplify, color and clean up detailed models inside slicers like Bambu Studio, OrcaSlicer and Snapmaker Orca. We’ll start by looking at MODEL COMPLEXITY and mesh detail, then work through some of the most useful multicolor painting tools — including Fill, Edge Detection, Height Range, Gap Fill and individual triangle painting. Most importantly, I’ll show you a simple Edge Detection trick using your mouse wheel that can make coloring complicated models MUCH faster. For this example, I’m working on a multicolor keychain for a local high school. It has raised details, multiple surfaces and plenty of geometry, making it a perfect example of the problems you’ll encounter when painting more complicated STL or 3D models. ━━━━━━━━━━━━━━━━━━━━ 🎨 WHAT YOU'LL LEARN ► SIMPLIFY MODEL / MESH DETAIL Before painting, it helps to understand the geometry you're actually working with. Using Simplify Model and Wireframe lets you see the facets or triangles making up your model. Reducing the mesh can make certain operations easier, but there's a tradeoff: reduce it too far and curved surfaces and detailed areas can start looking rough or faceted. For models like this, I generally prefer keeping as much detail as practical. ► PAINTBRUSH TOOL The basic painting tool works exactly like you'd expect: select your filament/color and paint directly onto the model. There are also options for painting surfaces beyond just the immediately visible top surface. ► TRIANGLE PAINTING Your model's mesh is made up of individual triangles, and the triangle tool lets you select them individually. This gives you extremely precise control — but on complicated models it can also become painfully tedious. We'll use it where it makes sense rather than trying to paint an entire model triangle by triangle. ► HEIGHT RANGE Height Range is one of the most useful tools for models with raised lettering, logos or other details. Instead of manually painting every surface, you can select a specific vertical range and quickly color surfaces within that height. For keychains, badges, signs, logos and similar models, this can save a huge amount of time. ► FILL + EDGE DETECTION This is one of the BIG tricks in the video. Edge Detection determines how aggressively the slicer identifies the boundaries of the area you're trying to fill. Too low and you may end up with spotty areas that don't completely fill. Too high and the color can spill into areas you don't want. Instead of constantly changing the number manually, hold CTRL and use the SCROLL WHEEL on your mouse to adjust the Edge Detection value while working on the model. Gradually increase it until the slicer fills as much of the desired area as possible WITHOUT jumping across the boundary. Simple trick. Massive time saver. ► GAP FILL If you remember ONE tool from this tutorial, remember Gap Fill. After using Fill or Edge Detection, highly detailed models can leave tiny unpainted islands or gaps inside the area you're coloring. Increase the Gap Fill area and the slicer can automatically fill many of those missing sections. This can turn an incredibly tedious painting job into something much more manageable. ► CLEANUP & INDIVIDUAL TRIANGLES Unfortunately, sometimes there's no magic button. After using Fill, Edge Detection and Gap Fill, you may still have a handful of tiny areas that need manual cleanup. That's when individual triangle painting becomes useful. Click or drag across the remaining facets, clean up the problem areas and you're done. ━━━━━━━━━━━━━━━━━━━━ 🔗 SOFTWARE / OEMs MENTIONED Bambu Lab — Bambu Studio & 3D printers https://bambulab.com/ OrcaSlicer — Open-source 3D printing slicer https://www.orcaslicer.com/ Snapmaker — 3D printers & Snapmaker Orca https://www.snapmaker.com/ Snapmaker Orca https://www.snapmaker.com/snapmaker-orca ━━━━━━━━━━━━━━━━━━━━ ⏱️ CHAPTERS 00:00 – Coloring Detailed 3D Models 00:15 – The Model We're Painting 00:27 – Simplify Model & Mesh Detail 00:35 – Understanding Wireframe & Facets 01:10 – Starting the Painting Process 01:17 – Paintbrush Tools 01:37 – Height Range Painting 01:53 – Fill & Edge Detection 02:13 – The CTRL + Mouse Wheel Trick 02:30 – Finding the Best Edge Detection Setting 02:53 – Fixing Missing Areas 03:00 – Gap Fill: HUGE Time Saver 03:25 – Manual Cleanup 03:40 – Painting Individual Triangles 04:04 – The Tools That Matter Most 04:18 – How Mesh Detail Affects Painting 04:24 – Edge Detection on a Simplified Mesh 04:55 – Final Tips ━━━━━━━━━━━━━━━━━━━━ #3DPrinting #BambuStudio #OrcaSlicer #BambuLab #Multicolor3DPrinting #3DPrintingTips #3DPrinter #Snapmaker #SnapmakerOrca #3DPrintingTutorial #Maker Opens in a new window
Tags
Diseñador
Timberlake Creations - Business