
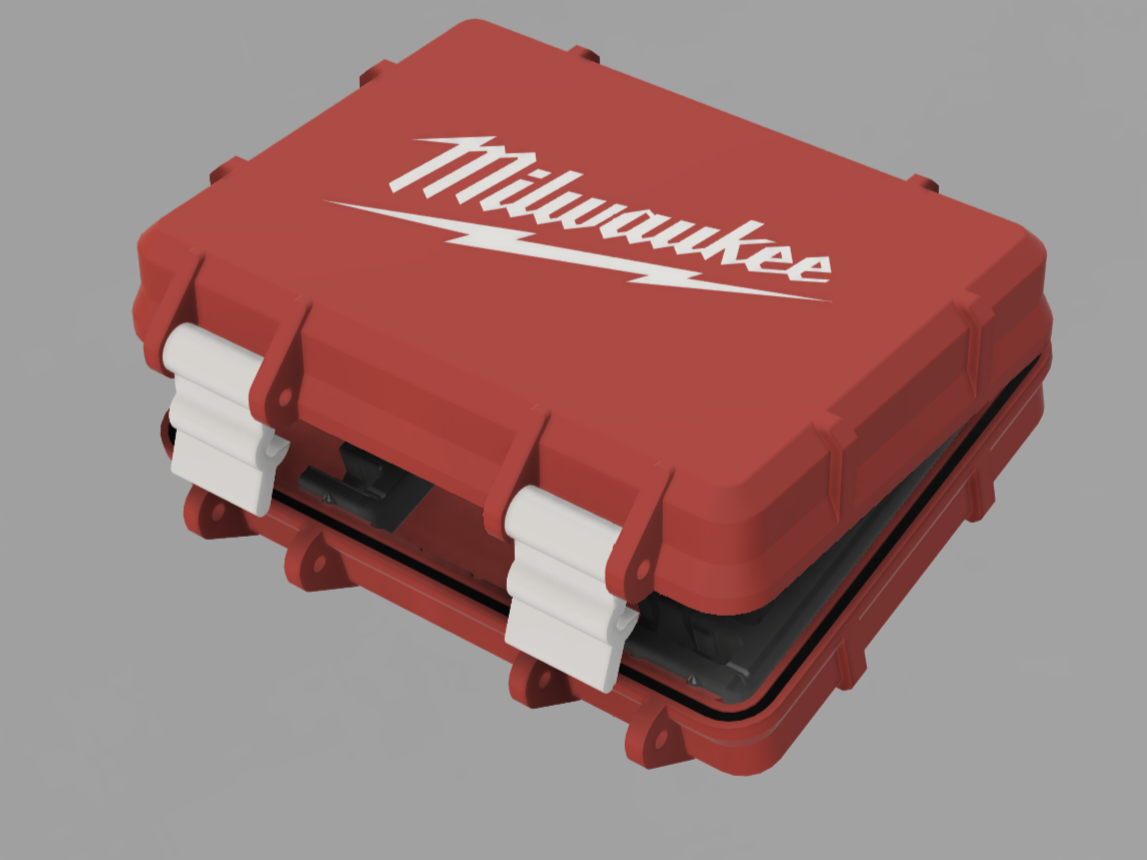
Storage Box 4 all Milwaukee Shockwave bit holders
Peso
108g
Tiempo
3h 42m
Precio
Cotiza este producto por WhatsApp
Contáctanos y te damos el precio según color y acabado
Las dimensiones dependen del diseño. Confirmamos las medidas exactas por WhatsApp.
Descripción
After I designed so many versions of hex bit holders in a previous post, that fits in the Milwaukee original boxes (narrow or wide), or in gridfinity bins, i decided I want some custom solutions to store theese holders , not just in original boxes. I could only find on MW a 1:1 original Shockwave narrow version box, very well reproduced, but I wanted options for the wide holders too, for drill bits, and most important, i wanted option for slim boxes. So, i adapted a rugged box with latches and seal, to only work for my holders, in 2 width options, more heigths variations, and as long as possible to print if I want to store longer bits than 150mm. The seal can be TPU, rubber/foam 2mm cord, or it works ok without it. You will get here only boxes of any size you might possibly need from the Customize panel, where you’ll find plenty instructions, beginner friendly, but for bit holders you see in photos, use my link below and get from there what you need, after you understand there how to customize for your fit and need: https://makerworld.com/en/models/3233066-milwaukee-shockwave-bit-holder-gridfinity-bins#profileId-3662160 In my print profiles here, you have few different Brand Logo for the slimest and thinest box I could make for the single rows bit holders. It’s more of a test print or a gift idea, but can also be functional to have that size of box too where you can fit up to 100mm bits, or variations. More details in each profile description. My parametric file from the Customize panel, doesn’t give you any logo. It is very simple to add yourself a SVG logo from computer, in your slicer, after you generate the size box you want. Beginers should ask A.I. if you don’t know. First - right click- Split - to Objects what came from the generator, to drop them all down on plates. Then Right click on your bottom view face lid - Add part - SVG ). Scale and orientate it, set it 0.4mm depth or 2 layers so no useless filament changes to AMS , apply colours to objects and that’s it. I have my filaments calibrated for shrinkage. If you don't have them, we will have tiny different results in fitments, so the print profiles boxes will need customization if too tight fit for you. The bit holders works perfect with tight fits in theese 3d printed boxes, just read instructions when you customize. !!! HELPFULL TIP for when you customize the inner length (not written there): The side grid of holes that retain the bit holders, always starts 5mm away from one end inner wall, and only if you make the inner length a multiple of 10mm, that grid of holes will end at same 5mm near the other end wall. This trick allows you to change your mind if you want to reverse the first bit holders upside down, depending if you are left handed or not. See what i mean in the Festool pics where box is 115 and not 110 like the others. Holders start ok, but there you cannot reverse them upside down without loosing 5mm space. *****UPDATE : Added the option to get a Gridfinity pattern on the bottom of the box from a second file in the Customize Panel. The box floor in both parametric files, has limited wall parameters (2.4 to 3.2mm) and 0.8mm of them is reserved in this situation, so only the rest goes to sink in your actual Gridfinity base plate. It's enough to stay put. For small boxes 3.2mm walls are overkilled anyway… This box, when placed on a base plate, will never take more than 3 Gridfinity grids on one side because of the limited bit holder lengths, and can go to whatever length you can print. Please share any experience to know if i need to change anything. After generating a new one of this kind, same rules will be applied for Split in your slicer and for logo if you need !
Tags
Diseñador
Mihai B Mike