
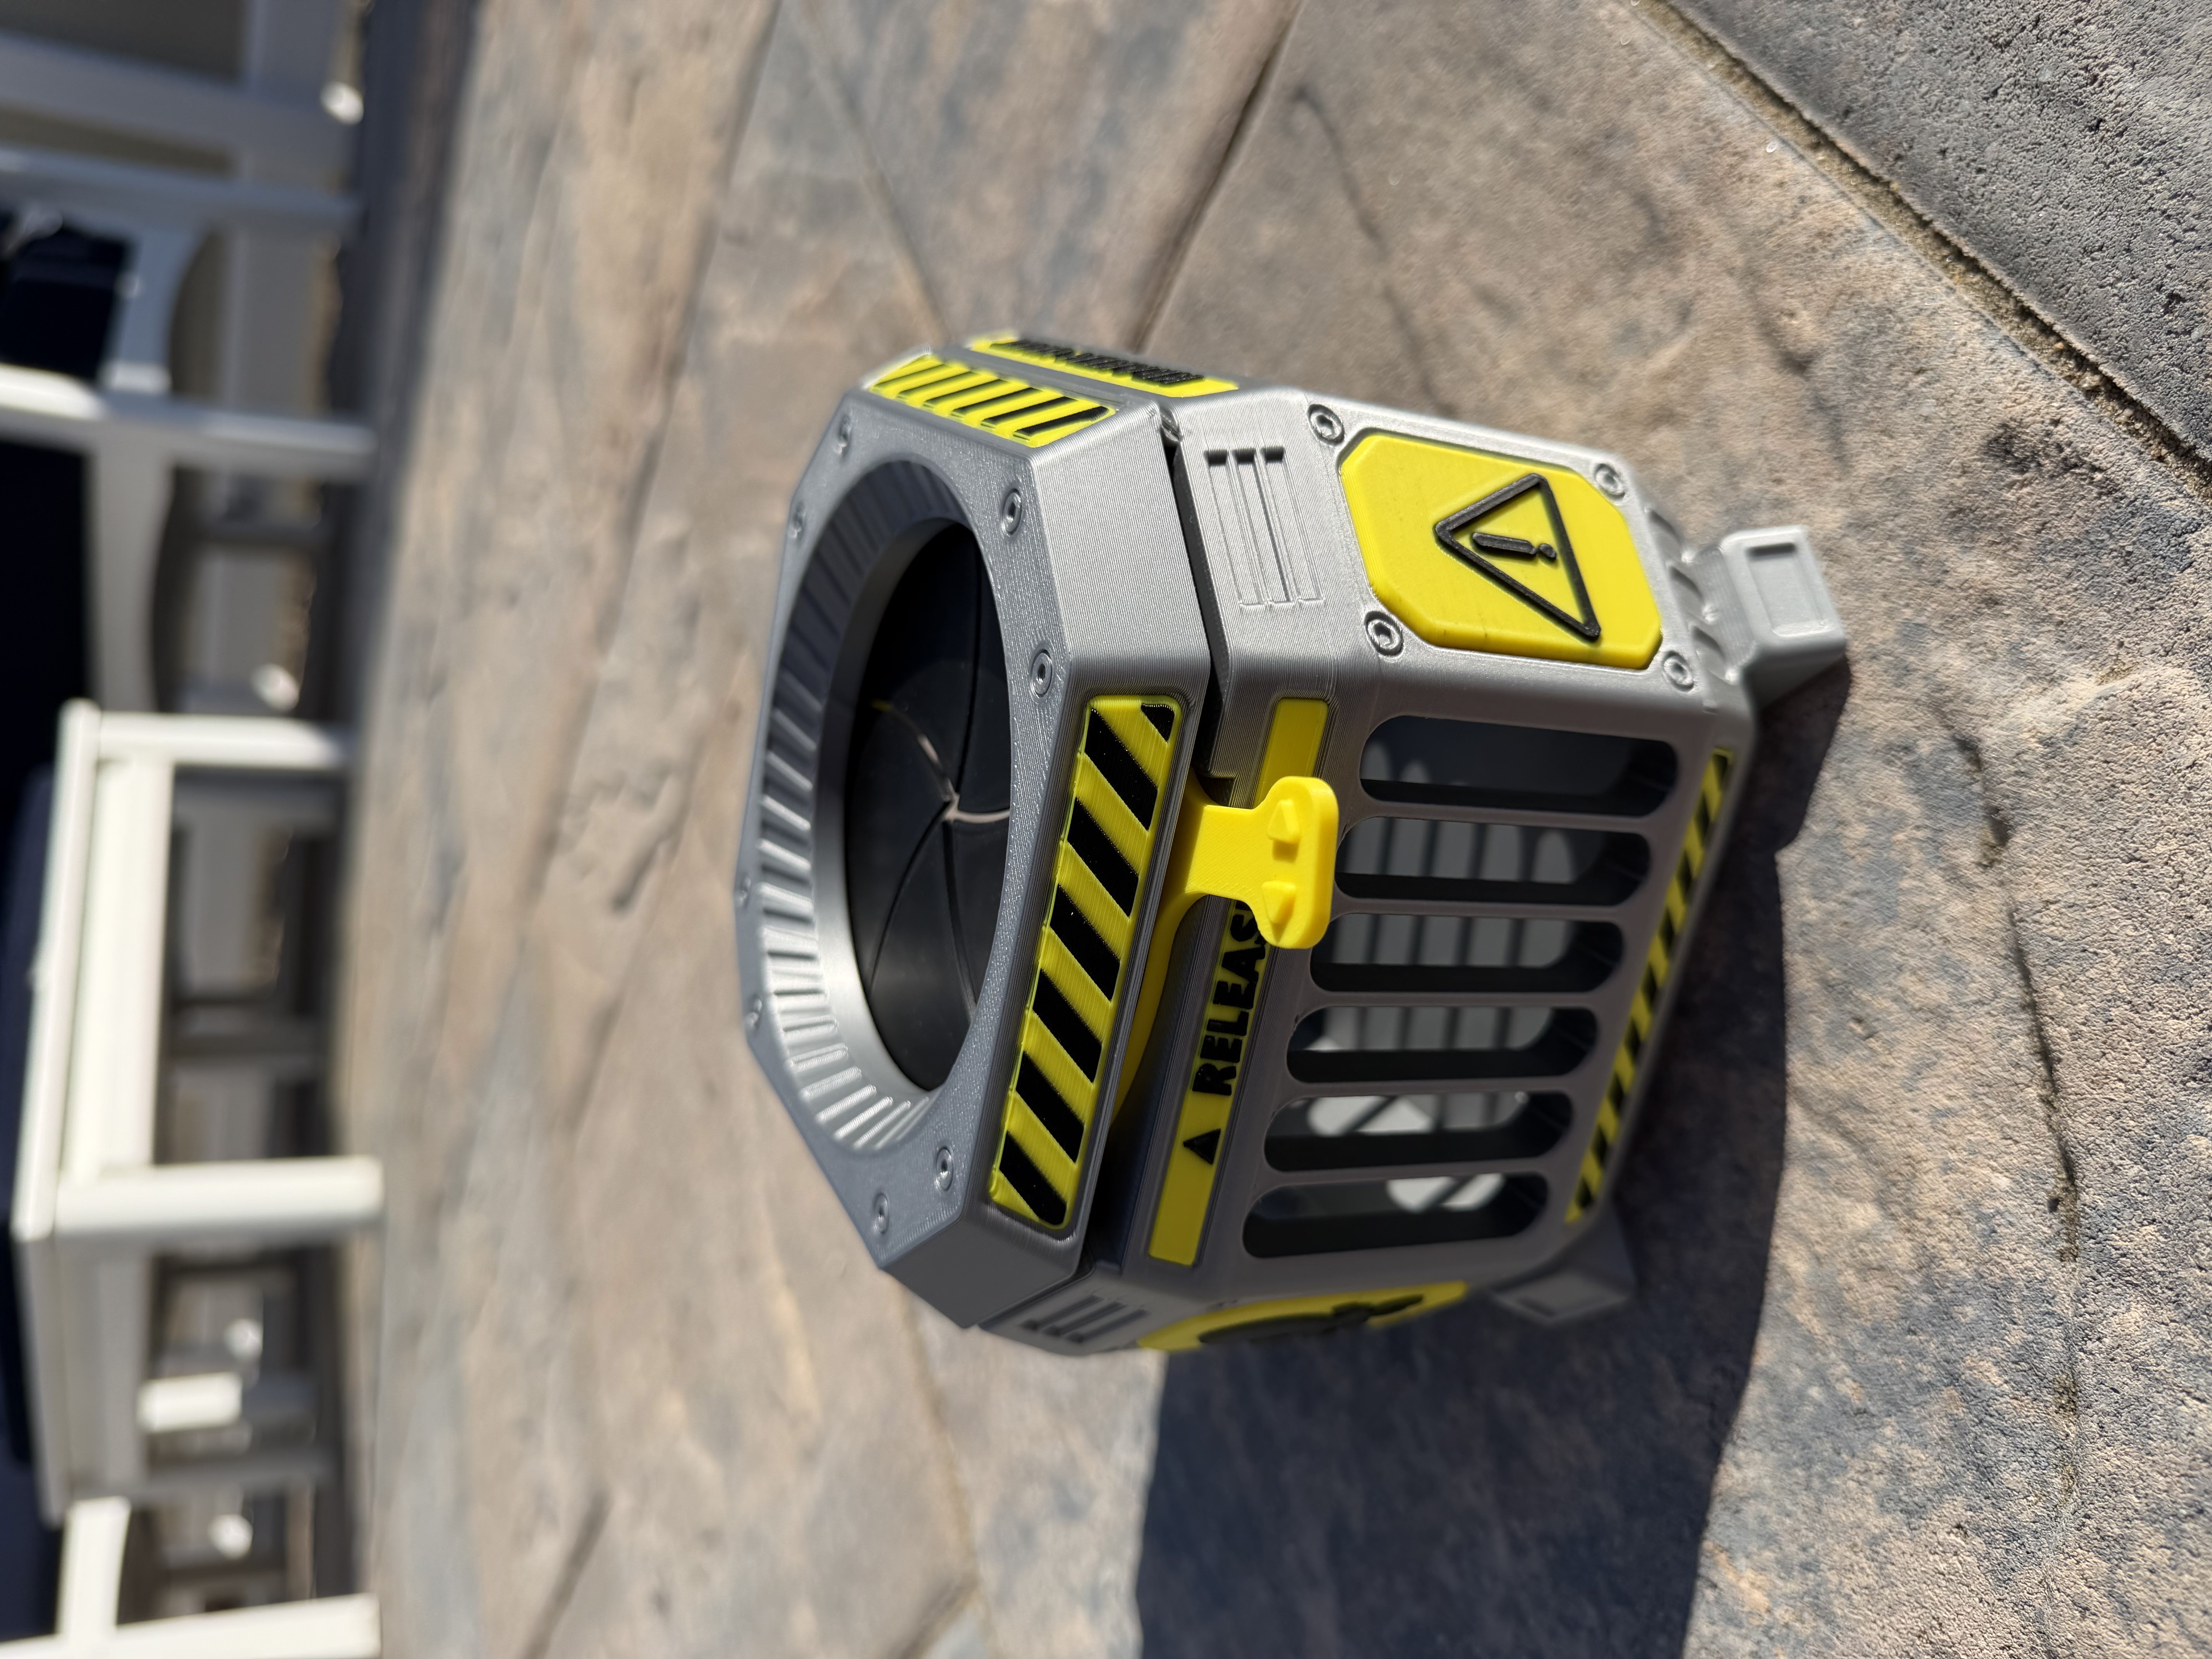
Release the Kraken! Mechanical Iris Pool Game
Peso
476g
Tiempo
19h 0m
Precio
Cotiza este producto por WhatsApp
Contáctanos y te damos el precio según color y acabado
Las dimensiones dependen del diseño. Confirmamos las medidas exactas por WhatsApp.
Descripción
SINK IT. LOAD IT. RELEASE IT! 🐙🌊 Release the Kraken is a mechanical underwater containment cage with a fully working 3D-printed iris. Load it with floating toys, sink it to the bottom of the pool, turn the release lever, and watch everything escape to the surface! I tested it with ping-pong balls, tennis balls, paddle balls, and other floating toys. Rubber ducks, bath toys, beach toys, and pretty much anything else that floats should work too. The game my kids discovered was trying to collect everything and reload the cage without the toys already inside escaping again. They spent hours doing it. Two Versions POOL VERSION - Add ballast, sink it, and release! The pool version includes a ballast compartment in the bottom. I used 12 steel furniture plates, which worked perfectly in my testing. I’ll add the exact plates I used below (affiliate link). The ballast cover installs under a small retaining lip and is secured using the screws included with the furniture plates. Ballast: https://amzn.to/4qJk36Q DESK / DISPLAY VERSION - No ballast. No hardware. This version keeps the complete working iris mechanism and makes a fun mechanical desk toy or display cage. No hardware is required to assemble this version. Designed for Easy Printing No supports No glue No hardware required for the display version Fully 3D-printed working mechanical iris Snap-fit lid Prints on virtually any printer, including the A1 Mini Single-color, dual-color, and tri-color versions included Tri-color is especially well suited to nozzle-changing printers like the H2C or U1 Dual-color is a great option for machines like the H2D or X2D The tri-color versions really bring out the warning panels, hazard stripes, numbering, and containment-unit details, but the model was designed to still look good in a single color. Assembly Assembly is simple, and an exploded diagram is included below and in the model video. For the pool version, install the ballast first. Place the weights inside the cavity, slide the narrow end of the ballast cover underneath the retaining lip, and secure it using the screws supplied with the furniture plates. Next, place the drive ring over the pegs on the base. Then install the iris blades. ⚠️ Important Iris Assembly Note The iris blades only work in one orientation. The side marked TOP must face upward. Each blade connects at two points: DRIVE RING PEG → CIRCULAR HOLE BASE PEG → SLOT If a blade is reversed, the iris will not open properly. Once all of the blades are installed, snap the lid into place. The lid uses three snap-fit connections: two round and one rectangular. After assembly, work the iris open and closed several times. Depending on your filament and printer tolerances, the mechanism may be slightly stiff at first and should loosen up after a few cycles. Pool Use Open the iris, load the cage with floating toys, close it, and sink the containment unit to the bottom. Turn the lever and... CONTAINMENT BREACH! 🐙 Everything inside races toward the surface. Race different objects, assign points to different colors, try to reload the cage underwater without anything escaping, or just fill it with rubber ducks because that is funny.
Tags
Diseñador
5er