
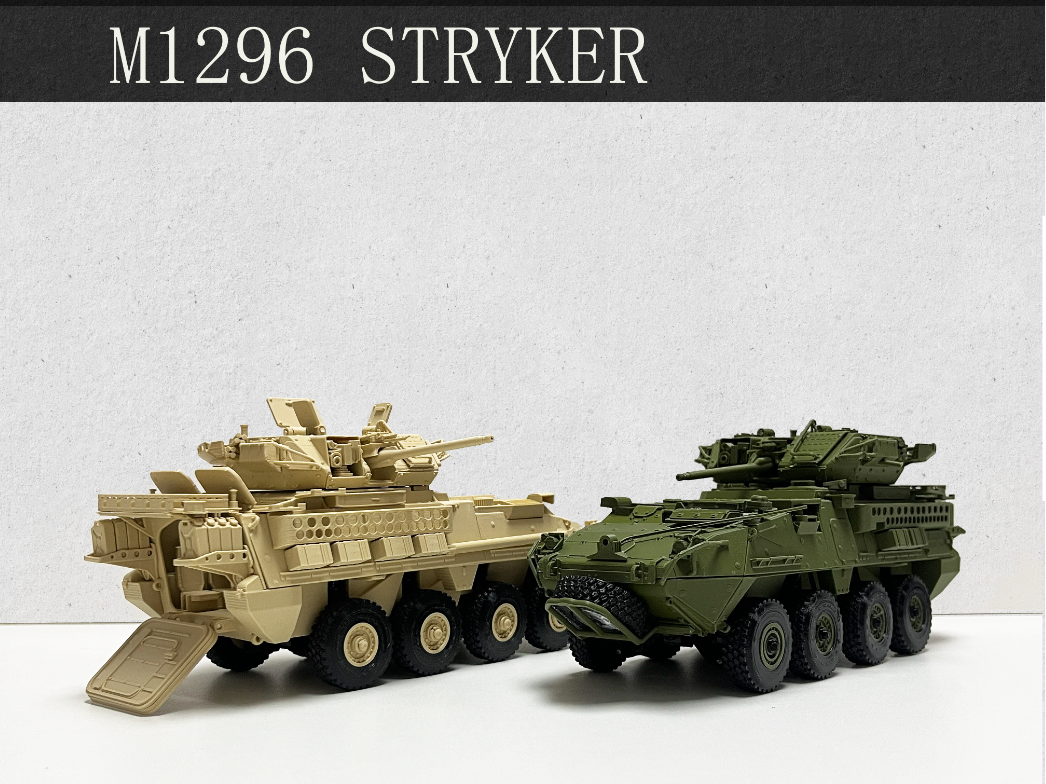
M1296 Dragoon · 1:35
Peso
279g
Tiempo
23h 30m
Precio
Cotiza este producto por WhatsApp
Contáctanos y te damos el precio según color y acabado
Las dimensiones dependen del diseño. Confirmamos las medidas exactas por WhatsApp.
Descripción
Here's the English translation of your M1129 Stryker Mortar Carrier release post: The exciting third vehicle in the Stryker series is officially here – the M1129 "Mortar Carrier" is released! All parts have been repeatedly verified and print-tested by the designer before upload. Project Introduction M1129 Stryker Mortar Carrier · 1:35 Scale 3D Printed Model AspectDetailsScale1:35Recommended FilamentsHull & superstructure: PLA / Suspension system: PETG (recommended)NoteSuspension can also be printed in PLA, but rebound and travel will be significantly reduced. Choose based on your needs.Movable FeaturesArticulated suspension (independent travel on all 8 wheels) · Rear ramp opens · Wheels rotate · Turret traverses (with elevation/depression) · Front axles 1 & 2: spring suspension · Rear axles 3 & 4: torsion bar suspensionPart BreakdownFull assembly kit📖 Model Background The M1129 "Mortar Carrier" (MC) is the Stryker family's dedicated fire support platform, armed with a 120mm mortar to provide rapidly responsive indirect fire for Brigade Combat Teams. This kit recreates the vehicle at 1:35 scale, with the hull layout based on the Stryker common architecture. The rear compartment is specifically configured for mortar operations, with roof hatches that can be opened to display the mortar in action. ✨ Designer Upgrades Building on the Stryker DNA, this kit features several design improvements: 🔧 Suspension System Upgrades Rear two axles upgraded to torsion bar suspension: Compared to the spring setup in previous kits, torsion bars provide a more linear spring rate curve, resulting in a more stable ride height and smoother wheel travel when rolling. Front two axles retain spring suspension to maintain the same visual feedback as earlier variants. Fully articulated design: Aside from the bump stops, all suspension components are movable. With just adhesive assembly, the full range of motion is functional – easier to build and more durable for play. 🔍 Hull Detail Enhancements The exterior maintains the classic Stryker family appearance, with the rear compartment hatches adjusted to match the mortar carrier configuration. Newly added stowage tools and external accessory details. 🪑 Opening Rear Ramp The rear ramp can be opened, revealing the mortar baseplate and stowage layout inside, showcasing the fighting compartment configuration. 📌 Filament Selection Guide Suspension arms, torsion bars, C-clips, and other load-bearing/repeatedly moving parts: PETG is strongly recommended for durability. Hull, turret, hatches, and other exterior parts: PLA works well for sharper detail reproduction. Not recommended: Printing torsion bars or spring components in PLA – they will creep and lose elasticity under sustained load. 🔧 Pre-Assembly Preparation & Tuning Pre-Assembly Prep Carefully remove all supports and brim edges, paying special attention to pivot holes, clip slots, turret ring raceways, and other critical areas. Residual support material will directly affect functionality. Moving Joint Break-In Some moving joints (e.g., turret elevation, suspension swing arms, hatch pivots) may feel tight initially – this is normal. Cycle each joint several times to "break it in" until movement smooths out before final assembly. Do not force – excessive torque can snap pivot pins. If still too tight, lightly sand the pivot surfaces with fine grit sandpaper. Sand a little, test-fit often. Pro tip: Taper the tip of filament pieces used as hinge pins – they'll feed through much more easily. Recommended Assembly & Testing Sequence Test suspension independently first – check all eight wheels for consistent travel and binding. Join upper and lower hull only after suspension is confirmed working properly. Test hatch pivot fit separately before installing them. Test turret elevation mechanism before inserting it into the turret ring, then finalize by snapping it into the raceway.
Diseñador
Workshop 617