
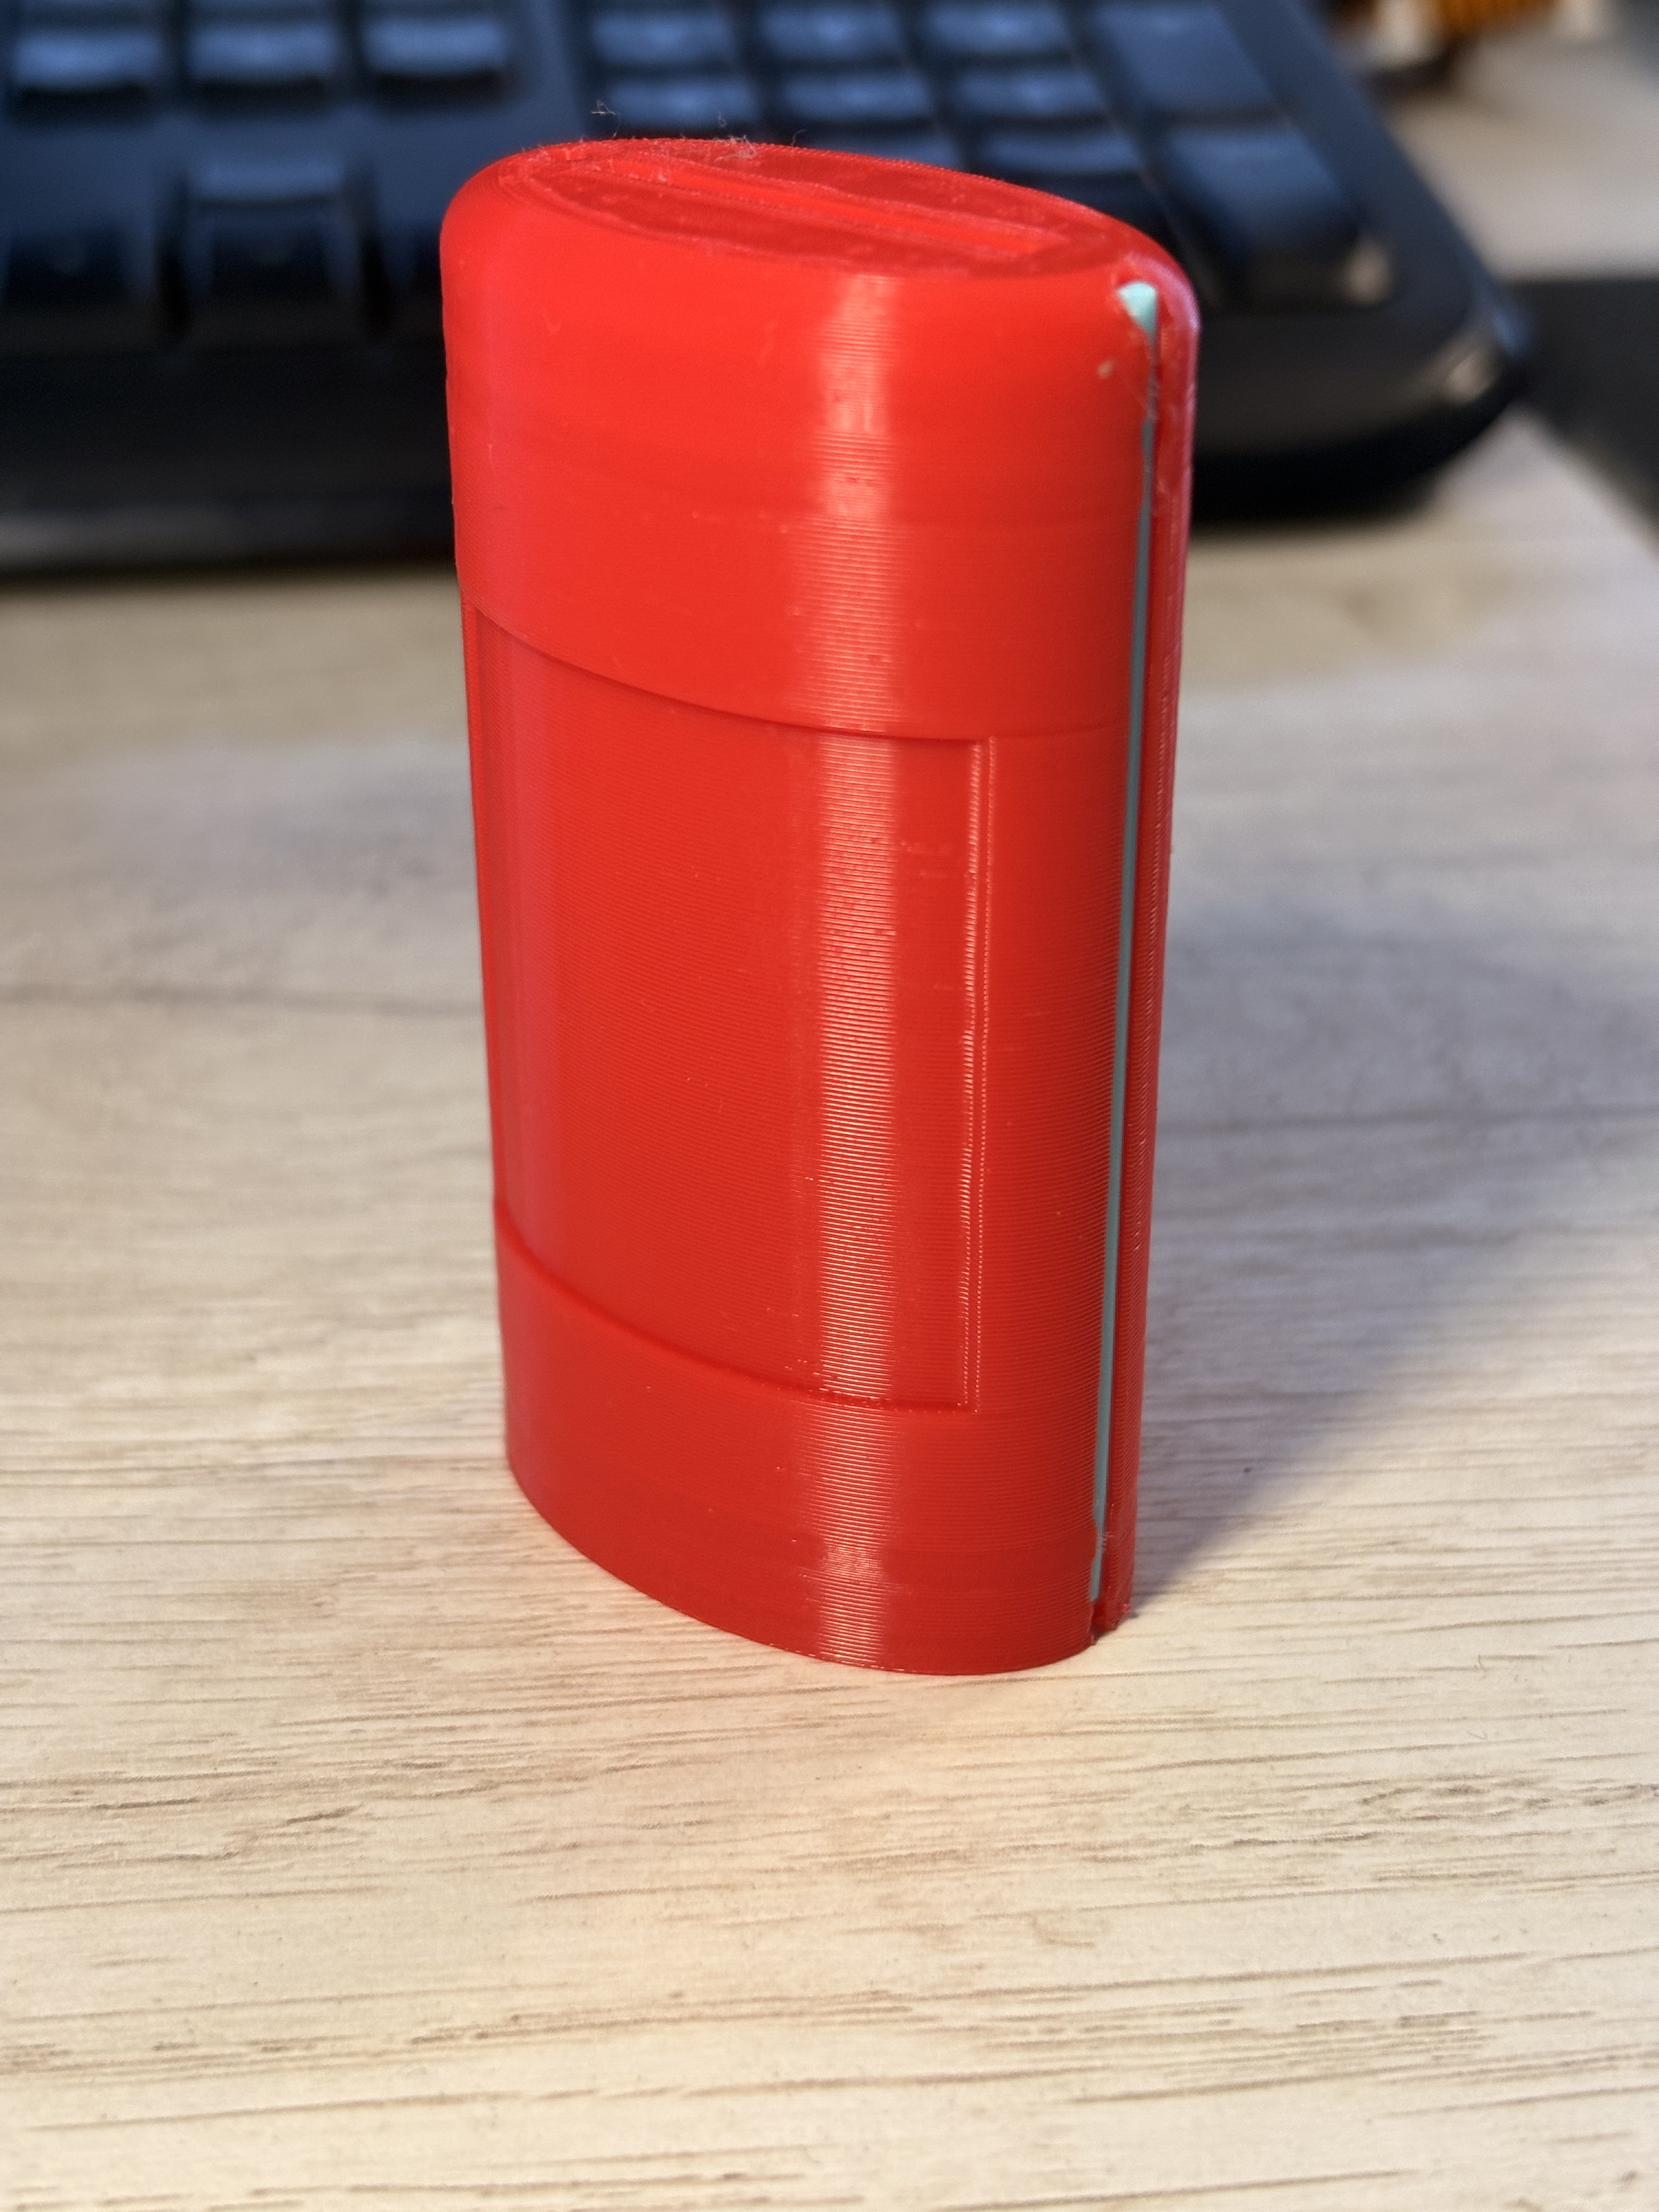
Snap-Off Blade Breaker & Safety Disposal Container
Peso
26g
Tiempo
1h 2m
Precio
Cotiza este producto por WhatsApp
Contáctanos y te damos el precio según color y acabado
Las dimensiones dependen del diseño. Confirmamos las medidas exactas por WhatsApp.
Descripción
Snap-Off Blade Breaker & Disposal Container – Permanent Lock A compact and simple way to safely collect used utility knife blades and snapped blade segments. This container was designed to let you insert and snap off used blade sections directly into the container, keeping the sharp pieces safely trapped inside instead of leaving them loose on a workbench or throwing them directly into the trash. It also accommodates common small utility knife blades, including the style used in many folding utility knives. 🔪 How it works Insert the used blade or blade segment through the opening and snap it off so the sharp piece falls directly inside the container. Keep using it until the container is full. When it is time to dispose of it, insert a short piece of 1.75 mm filament into the locking channel. Once fully inserted, the container becomes extremely difficult to reopen without physically destroying it. For the locking filament, PETG is strongly recommended because of its flexibility and toughness. 🧵 Two versions included Standard Version The regular compact container. When it is full, simply use a short piece of filament to permanently lock it before disposal. Spare Filament Version This version includes a small storage channel on the side of the container for the locking filament itself. The idea is simple: if you give the container to someone who doesn't own a 3D printer or normally have filament nearby, the piece required to close it permanently is already stored with the container from day one. Just insert a short piece of PETG filament into the side holder and leave it there until the container needs to be sealed. ⚠️ Safety Warning Plates Two separate warning plates are included, one for each side of the container. They use the ISO 7010-W022 warning symbol for sharp elements, making it immediately clear that the container contains something capable of causing cuts. This is especially useful after disposal: if somebody handling or sorting waste finds the container, the warning provides an additional indication that it should not be opened or broken apart. For the best appearance, print the warning plates with the build-plate-facing surface as the visible exterior face, then glue one plate onto each side of the container. 🖨️ Printing The design is intended to be simple and easy to print. Container: PLA or PETG Permanent locking pin: PETG strongly recommended (as PLA will get brittle with time) Filament diameter: 1.75 mm The warning plates can be printed separately in white, yellow and black. No complicated hardware is required — the final locking mechanism only needs a small piece of standard 1.75 mm filament. ⚠️ Important This design is intended for used utility knife blades and non-medical cutting blades only. It is not intended for medical needles, contaminated sharps or biohazardous waste. Do not force blades that are too large for the opening, and always keep your hands away from the blade path while snapping a segment. Once sealed, dispose of the container according to your local regulations for used blades and sharp objects. A tiny workshop accessory, but hopefully one that prevents a loose blade from ending up somewhere it shouldn't. 🙂 ----------------------------------------------------------------------- COMMERCIAL LICENSE Would you like to sell physical prints of this design? Commercial selling rights are now included with any of my Ko-fi membership tiers. While your eligible membership remains active, you may sell physical prints of: This Model and its different printing profiles All my other eligible original designs New eligible designs released during your active membership The commercial license applies only to physical printed products. Redistribution, sharing, uploading, modification for digital resale, or resale of the original digital files is strictly prohibited under every membership tier. Access the commercial license through any of my Ko-fi memberships. ----------------------------------------------------------------------- 🛠️ Assembly & Setup The assembly is very simple, but I strongly recommend checking the filament-lock tolerance before printing the full container. 1. Check the filament-lock tolerance An optional tolerance test file is included. Print this first if you are unsure whether your printer's tolerances will work correctly with the locking system. Insert a piece of 1.75 mm filament through the test channel. It should fit tightly and require some force to move, since the final lock is intentionally designed with a lot of friction. If the fit is not correct, adjust X-Y Hole Compensation in your slicer: Positive value → larger hole Negative value → smaller hole Make small adjustments until the filament fits tightly without requiring excessive force. The goal is not to make the filament slide freely. A tight fit is important because this same friction is what makes the final container very difficult to reopen. 2. Print the container version you need Two container versions are included. Standard Version Use this version if you normally have access to 1.75 mm filament. When the container is full, simply cut a short piece of filament and use it to permanently lock the container. Backup Filament Version This version includes a small holder along the side for storing the filament that will eventually be used to seal the container. I especially recommend this version if you are printing the container for someone who does not own a 3D printer or may not have filament available when the container eventually needs to be closed. 3. Print the warning plates Print two warning plates, one for each side of the container. The surface that was printed directly against the build plate must face outward when installed. The opposite surface — the side that was facing upward during printing — is the side that will be glued to the container. When positioning the plate, orient it so that one point of the warning triangle points toward the blade-entry opening. 4. Glue the first warning plate Apply a small amount of cyanoacrylate (CA / superglue) inside the recessed area on one side of the container. I recommend attaching the plate gradually instead of trying to glue the entire curved surface at once. First, position and glue one edge of the warning plate. Make sure the orientation is correct and hold it firmly in place until the glue has completely set. 5. Wrap and glue the remaining side Once the first edge is securely attached, carefully press the warning plate around the curved surface of the container. Work progressively toward the opposite edge until the plate sits completely inside the recessed area. Add a small amount of CA glue where necessary and hold everything in position until fully cured. Repeat the same process for the second warning plate on the opposite side. 6. Add the backup locking filament If you printed the Backup Filament Version, insert a piece of 1.75 mm filament into the side holder. Push it fully into the storage channel and cut it to length. I strongly recommend using PETG filament for this piece because its toughness and flexibility make it much better suited for the final locking mechanism. The filament can now remain stored with the container until it is needed. 7. Permanently seal the container when full Only perform this step when the container is full and ready for disposal. Take a piece of 1.75 mm filament and insert it into the locking hole/channel at the top of the container. The fit is intentionally very tight. Push the filament in gradually. Using pliers makes this considerably easier: grip the filament close to the entry point and push it in a little at a time. Continue until the filament has been fully inserted through the locking channel. Because of the intentionally high friction, the filament becomes extremely difficult to remove once installed. Cut off any remaining excess filament. ⚠️ Once locked, the container is intended to remain permanently closed. Do not perform this step until you are ready to dispose of it. Boost MeIf this helps you, please leave me a Boost! Thanks!!! ------------------------------------------------------------------------------------------------------------------------------------------------ ☕ If you liked this design and want to support my work, you can buy me a coffee on Ko-fi. 🇦🇷 Si te gustó este diseño y estás en Argentina, podés apoyarme invitándome un Cafecito.
Tags
Diseñador
FM3D