
Life Size AVP- 6ft tall Printable Predator Model!
Peso
6813g
Tiempo
185h 40m
Precio
Cotiza este producto por WhatsApp
Contáctanos y te damos el precio según color y acabado
Las dimensiones dependen del diseño. Confirmamos las medidas exactas por WhatsApp.
Descripción
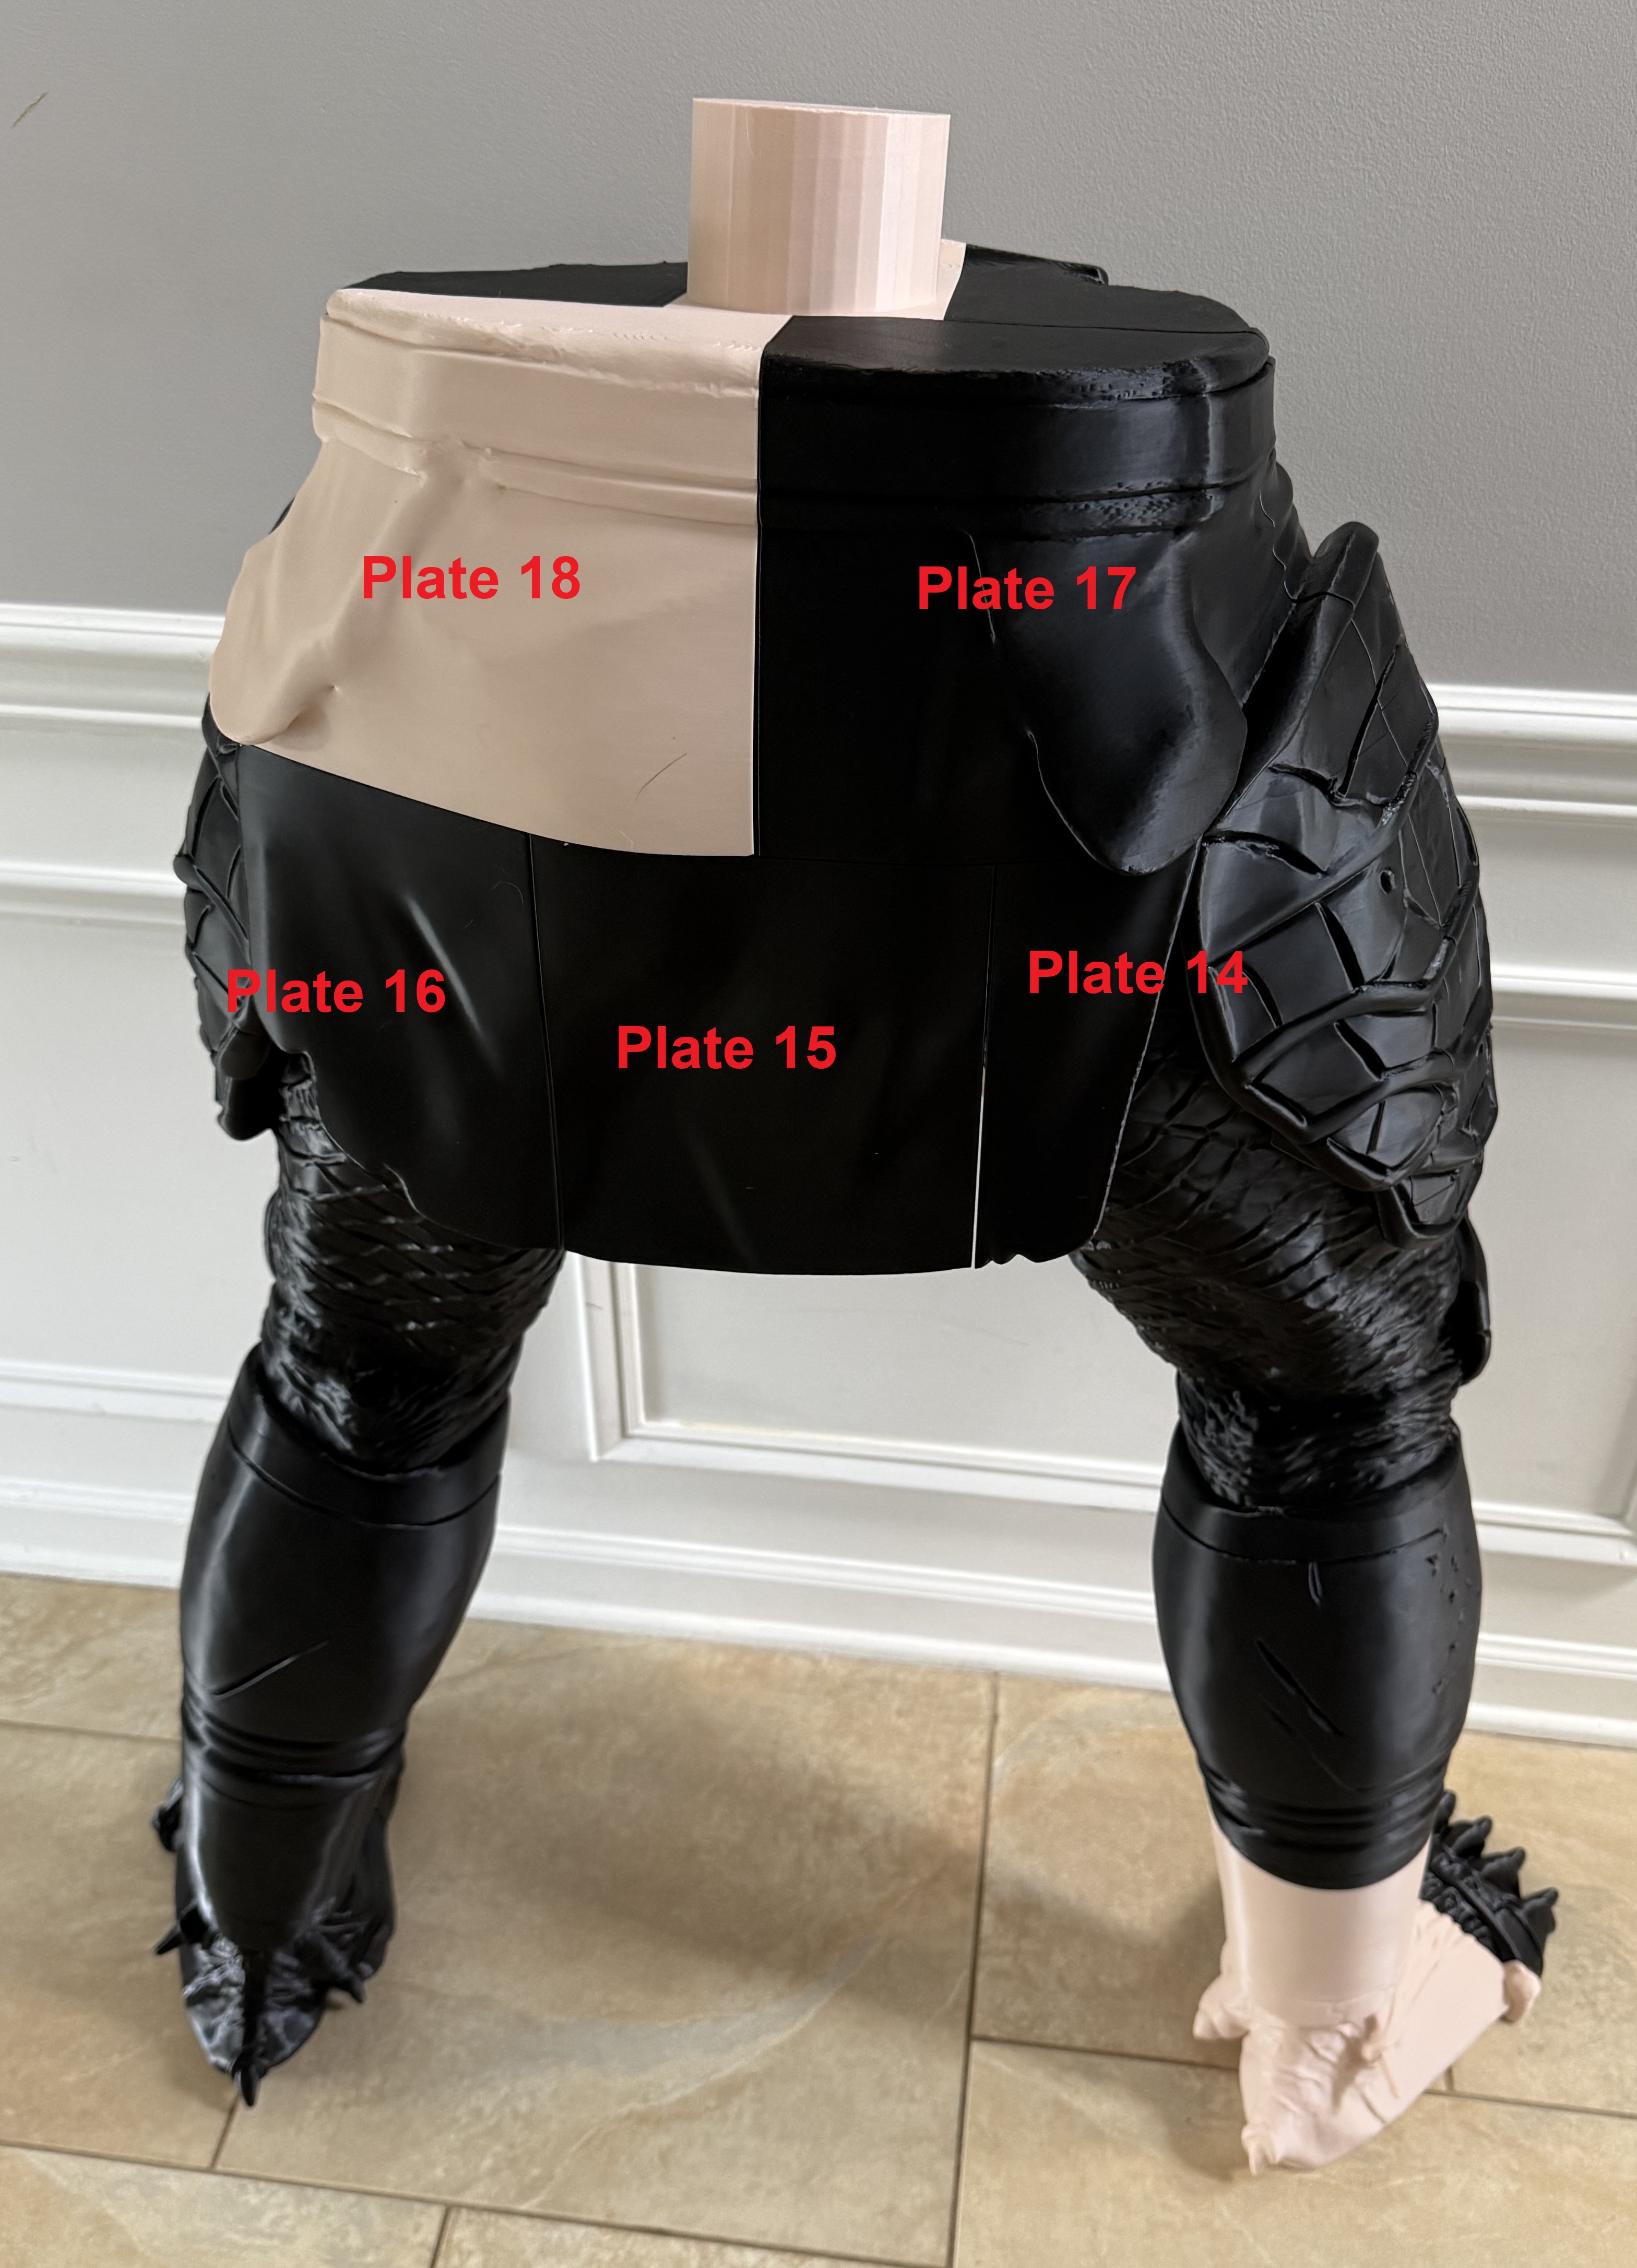
Predator Life Size - 6ft tall! The Model Well, it's official… I have caught the Life-Size model print bug… BAD. My first ever larger print was the Alien (Xenomorph) that I posted a couple of weeks ago (Life Size Xenomorph Alien Model - 5ft Tall! - Free 3D Print Model - MakerWorld) and since printing that one out I decided that at some point it would only be fitting to release a life sized Predator to go along with it… I thought this would be a late year project.. But.. as soon as the Alien was completed I got to work with some test prints of a Predator I was modeling for a smaller print.. a few days later I had it detailed and sliced up and ready to print…. and this one would end up stading 6' 2" tall (188cm)!! I learned a couple of lessons with the Xenomorph model - print in PETG Basic and slice up the model for the P/X series printers, not just the H2d/A2L. Unlike the Xenomorph, this model can be printed by just about anyone (with the exception of A1mini users.. sorry guys, it's just unreasonable to cut the pieces up small enough to fit here). I think even the A1 should be capable of printing most pieces. Disclaimer: -Please note that this is an ADVANCED model print, requiring a lot of time and materials not only to print, but also to assemble and finish to make look realistic. I purchased my filament on sale but even with the discounted pricing there is approximately $200 usd in PETG Basic in this print. The glue/epoxy, putty, primer, paint & clearcoat materials are not yet calculated but are likely to easily reach another $100. Please take all this into consideration before printing. -ONLY WORKS WITH BAMBU SLICER* - Please note that the only way the voids for the assembly pegs can be generated is using the Bambu Slicer and will not currently work with any other slicer to my best knowledge. The assembly pegs are generated using Bambus NEGATIVE parts file which creates the negative cut only during slicing of the model, and if using other slicers you will just have flat surfaces with no place to insert the pegs. Printing I used all 6 of my machines to print this model out - H2D, X2D, X1C, P1S, A2L & A1. I was able to physically print all the pieces over the course of 5 days of non-stop printing and swapping filament rolls. This model was printed exclusively with Bambu PETG Basic and is WAY stronger than the xenomorph. This should also give me much better heat/weather resistance to be able to display this model outside for Halloween, however, please note that it was intended to freely stand indoors without added supports and for outdoor display you would need to come up with some sort of bracing/tie down method to keep it upright. I am planning to fabricate 2 flat support plates with a metal rod that will be heated and insert molded into the bottom of each foot to offer some added support. Due to the large number of sliced parts across several separated body segments, I am including a tracking sheet with estimated print times & filament usage so you can better plan/track your printing. Even with this method I ended up double-printing 1 piece, so be mindful and plan accordingly. I used this estimated print time breakout to better plan my prints so that I could be more efficient - i.e.: you don't want an 11 hour long print finishing 20 minutes after you go to sleep and sit idle for 7 hours, instead, you can print a 6 hour print to complete later in the evening before starting the 11 hour print so it can be done when you wake up, giving you the ability to quickly start another print in the morning. Assembly -To reiterate - this is an advanced model and requires quite a lot of assembly/gluing/post processing, printing out all the part is the easy first step* I highly advise doing a dry test-fit of parts before you start gluing things together. Please note that the Hexagonal Peg inserts were done slightly undersized for easier insertion, however, some may require a little sanding to allow for easier installation. -It is also highly advised to work in the provided segments before putting the entire model together - i.e.: Left Leg, Right Leg, Right Arm, Left Arm, Torso & canon mount. Most pieces are very easy to figure out where they go, however some can be tricky. Due to this, I have provided some reference images of each section that shows which build plate goes where. Please reference the images as you are doing the dry-fit before committing to gluing the parts together. The Upper Body is designed to slide onto the designed cylinder insert of the Lower Body, giving you the opportunity to have the model Break Down into 2 parts if needed for storage. If you want to make it sturdier, you could glue the two half's together. IMPORTANT* - due to some pieces having Assembly Pegs on multiple faces of the part there is SOME sequence of assembly that needs to be followed, this is particularly true to the Upper Body/head assembly. Please do a dry fit of parts to ensure you are familiar with the sequence of assembly so that you don't end up with a peg that cannot be inserted. Ultimately, if you end up missing one or two pegs it should still be perfectly fine, they are really there for alignment purposes and you should still be able to have a fully glued together model without some of them, but it's better to get them all in if possible. Once all the parts have been test-fitted the parts can be glued together. The process I used was using the really thing Acrylic Cement to bond the Hexagon Peg into one of the body parts, and then use a 5-minute 2part Epoxy that I would mix right on the mating surface of each part before firmly pressing the parts together, securing them and allowing them to cure before moving onto the next set of parts. Continue this process until all the large body segments are together. There are a couple of accent pieces that I advise to NOT glue on until after the painting is completed - The should canon, wrist blades and 2 of the accent wires that connect on the left arm. Build plate assembly reference: Arms: Lower Body Upper Body Advanced Finishing/Model Painting I will preface this by saying that I AM NOT A PROFESSIONAL MODEL PAINTER/BUILDER, just sharing MY part of the process. There are likely much better steps to take to achieve better results, this is just what I did. Once the model is printed out and glued together you are almost to the half-way point (depending on how realistic you want to make this model). My next step is to remove all the visible seams where the parts have come together. I do this by using a 2-part epoxy putty that is mixed and pressed onto the model, using water to allow for smoothing/pushing into the crevices. The process is long, but necessary. Once the putty has cured it is time to sand the model. Most of these seams will need to hand sanded until desired surface finish is achieved. With sanding on the seams out of the way, the next step is to apply a Sandable Filler Primer on the entire model. This will allow for another pass at sanding some problematic areas before moving to the paint. The model in the images was painted with a variety of spray can base colors, followed by an air brush set of colors to add all the details to the skin and netting. I won't go into depth on the process I used, again, not a professional and there are tons of youtube videos on how to paint models. I will note that I used a Gloss Clear coat on the body section, and a Matte clear coat on the head and all armor.
Tags
Diseñador
ShapeShift 3D Creations