
Modular Under-Desk Cable Management (No Drilling)
Peso
1322g
Tiempo
61h 32m
Precio
Cotiza este producto por WhatsApp
Contáctanos y te damos el precio según color y acabado
Las dimensiones dependen del diseño. Confirmamos las medidas exactas por WhatsApp.
Descripción
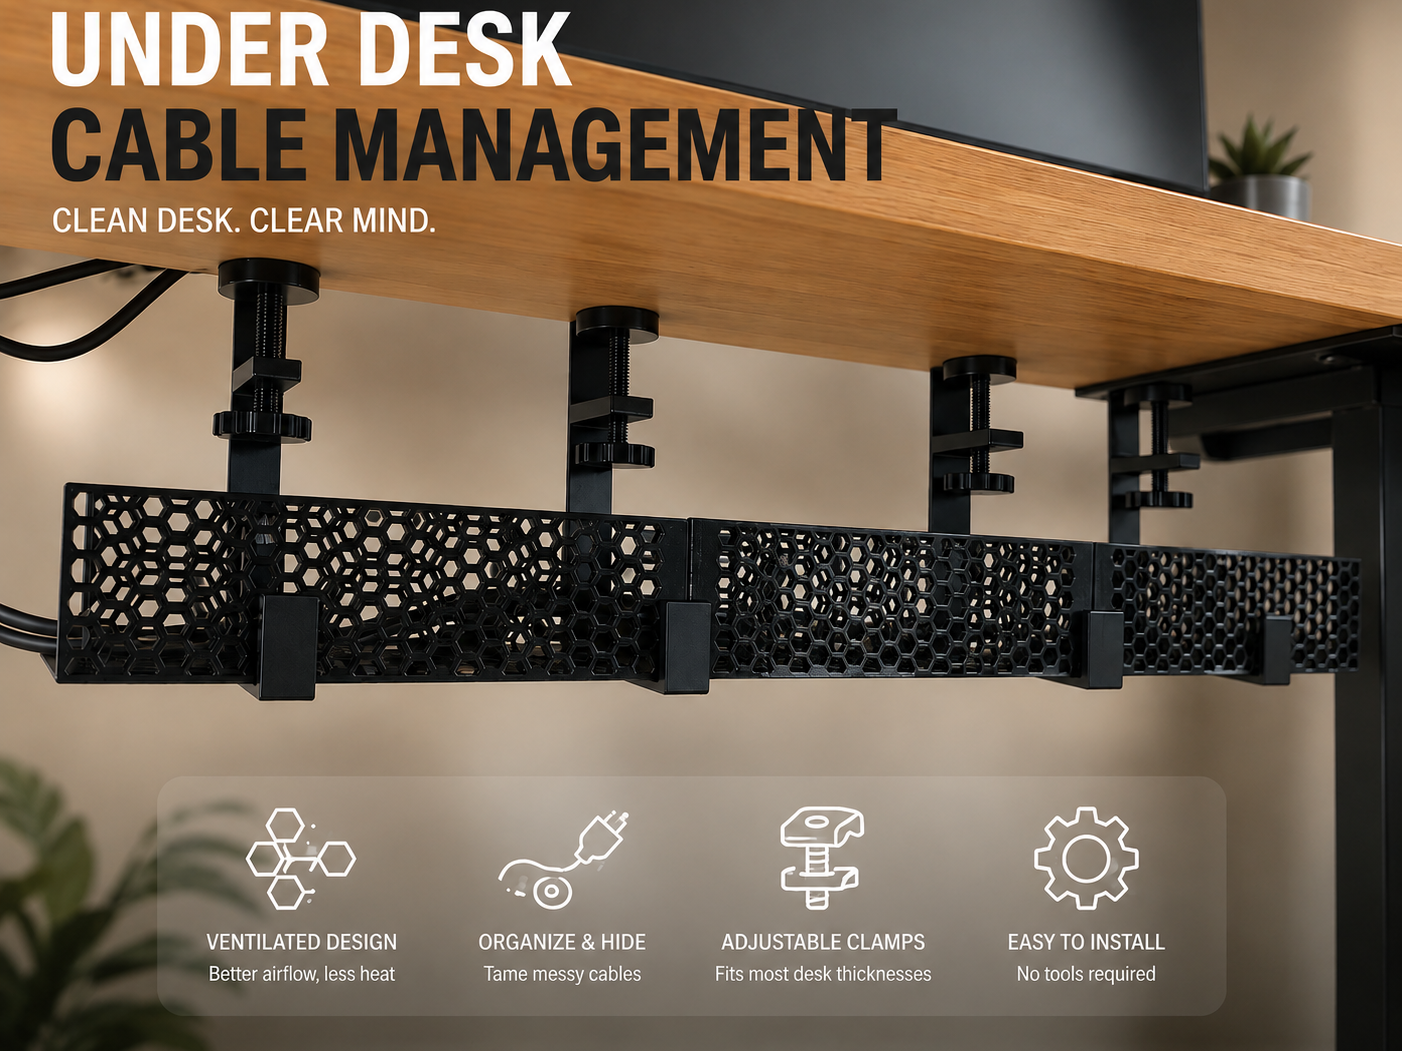
Modular Under-Desk Cable Management (No Drilling) Keep your workspace clean and organized without damaging your desk! This modular under-desk cable tray system fixes cable clutter easily and safely using a desk clamp system. 🧹 Clean up the cable mess without drilling into your desk I created this under-desk cable management system because I needed somewhere to put all the cables, power bricks, adapters and other electronics under my desk. I couldn't find a solution that worked the way I wanted, so I decided to design my own. The result is a modular, clamp-on cable basket system that attaches directly to the desk without drilling any holes or permanently modifying the tabletop. I've been using my own printed version for about a week now, including with a fairly heavy load of cables and power supplies, and so far it has worked very well. 📦 Modular design The system is made from several parts: Cable baskets Desk hangers Clamps Basket connectors Screws / pins, depending on the version you choose The basket is modular, so you can make it as short or as long as you need. Basket configuration The system consists of: 2 × End baskets — approximately 25 cm each 1 × Middle basket — approximately 24 cm This gives a total length of approximately: 2 end pieces: 50 cm 2 end pieces + 1 middle piece: 74 cm If 50 cm is enough for your setup, you can simply print the two end pieces and skip the middle section. If you need more space, just print additional middle sections and extend the system to the required length. This makes the design suitable for both small and very large cable setups. 🔩 No drilling required One of the main reasons I designed the system this way was that I didn't want to drill holes into my desk. The entire construction is attached using clamps that grip the tabletop. The clamp consists of two parts: A threaded handle/screw A protective "hat" The clamp screws into the hanger and then tightens against the underside of the tabletop. Important: protect your tabletop I recommend putting a piece of rubber or another suitable non-slip material between the clamp and the tabletop. For my own version, I had an old bicycle inner tube/tyre, so I cut a piece of rubber from it and glued it on the contact surface. This helps: Prevent scratches Increase grip Prevent the clamp from sliding Protect the tabletop surface You don't need to tighten the clamps hard. The purpose of the screw is to hold the system securely in place. 🔗 Two basket connection options I created two versions for connecting the baskets to the hangers. Version 1 — Bolted connection ⭐ Recommended (Required plates marked as Bolt in the Slicer) This is the version I recommend, especially if you plan to put a lot of weight into the baskets. The basket is secured to the hanger using a bolt through the connection point. There is a 6 mm hole, so an M6 bolt should work well, although you can use another suitable bolt if you have one that fits. After using the system for a while, I also added an additional connector between the hanger and basket to make the connection more secure. This additional connector is visible in my Fusion 360 design, but it was added after I took some of the original photos, so it is not visible in the real-life photos. There is also a connector for the upper part of the basket. Important Do not overtighten the screws. The screws are primarily there to keep the parts in position. Tightening them firmly by hand should be sufficient. Version 2 — Fully printed connection (Required plates marked as Pin in the Slicer) This version is intended for users who don't expect to put a lot of weight into the basket. Instead of bolts, this version uses printed pins and connectors to secure the baskets. The advantage is that you can print the complete system without needing additional hardware. For heavier loads, however, I recommend Version 1 with bolts. ⚖️ Load distribution The system is strong, but remember that it is still a 3D-printed structure. I printed my version in PETG and loaded it with a lot of cables and power supplies. In my own setup, some of the hangers visibly bend slightly under load. The hangers are designed and oriented for this type of loading. However, I recommend distributing the weight across the entire basket system rather than concentrating everything in one section. I definitely didn't follow my own advice here as I put a lot of weight into one basket, so my real-life example is more heavily loaded than I would recommend. 😄 For the best results, spread heavier items across the entire length of the system. Hangers The hangers are the parts where I recommend paying particular attention to print orientation. They are designed to be printed in the orientation provided so that the layer direction helps them handle the load. I used automatic tree supports. However, support is not required for the threaded section of the clamp as the thread prints successfully without support. Because the hangers are relatively narrow, I would also recommend using a brim if you are not completely confident in your bed adhesion. 🧩 How the system is assembled The clamps attach to the hangers, and the cable baskets attach to the hangers. The hangers are designed to be printed in a specific orientation so that the printed layers handle the load appropriately. Once it is installed, gradually add your cables, power supplies and other equipment instead of putting everything into the basket at once. After loading it, check that: The clamps are holding the hangers securely. The hangers are sitting correctly on the tabletop. The basket connections are fully engaged. The load is distributed reasonably evenly. 🔧 Clamp assembly Each clamp consists of: Handle with threaded screw Protective hat First screw the handle into the hanger. Then place the protective hat onto the contact end of the screw. The hat is designed to prevent the screw from rotating against the tabletop when you tighten the clamp. This helps protect the desk surface and provides a more stable contact point. Again, I strongly recommend adding some rubber or another suitable non-slip material between the clamp and your tabletop. 💡 Installation tips Before installing I recommend assembling the entire cable basket system on the floor or another convenient surface first. Then place the assembled system underneath your desk. After installation Start adding your cables gradually. Don't immediately fill the basket with everything you have. Once everything is inside, check the clamps and connections again. Don't overtighten The clamps only need to hold the system securely. Distribute the weight For the best results, distribute heavy power supplies and adapters across the length of the basket. 📏 Expand it as much as you need One of my favourite things about this design is that you're not locked into one specific size. 50 cm → print two end sections. 74 cm → print two end sections + one middle section. Longer than 74 cm → simply add more middle sections and hangers. So you can build the cable basket to fit your desk rather than trying to make your desk fit the organizer. 🎯 What it's designed for This basket is especially useful for: Power strips Laptop chargers PC power cables USB hubs Cable adapters Extension cables Power bricks Monitor cables USB cables Other loose electronics and cables The goal isn't to perfectly route every single cable. It's much simpler: Put the messy stuff into the basket, get it off the floor and out of sight, and enjoy a cleaner desk. ⚠️ Disclaimer This is a 3D-printed structure, so its strength depends on the material, print settings, orientation, printer and assembly. I recommend checking your own print and connections before loading it heavily. For heavier setups, I recommend PETG, 5 walls, 15% gyroid infill and the bolted Version 1 connection. Always make sure the clamps are securely positioned and use a protective/non-slip layer between the clamp and your tabletop. 🖨️ Printing recommendations I printed the parts in PETG because I wanted the additional durability compared with PLA. My settings: Material: PETG Walls: 5 for hangers, 4 for everything else Infill: 15% Infill pattern: Gyroid
Tags
Diseñador
Urabes