
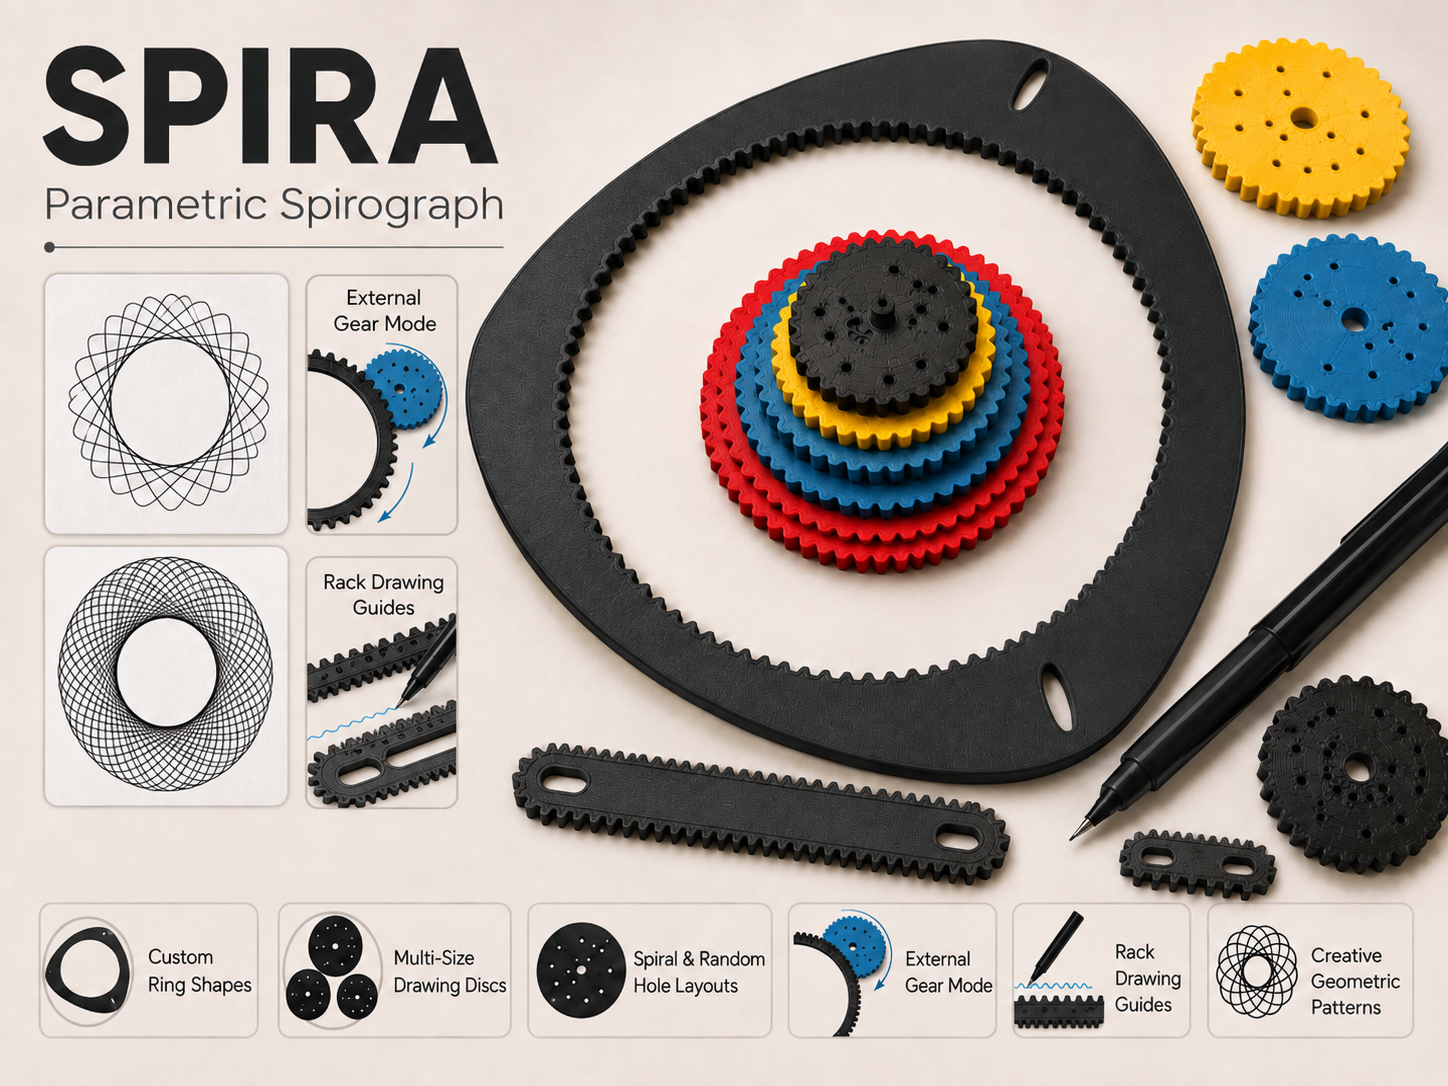
SPIRA - Parametric Spirograph
Peso
77g
Tiempo
2h 58m
Precio
Cotiza este producto por WhatsApp
Contáctanos y te damos el precio según color y acabado
Las dimensiones dependen del diseño. Confirmamos las medidas exactas por WhatsApp.
Descripción
MembershipLike my models? Do you want to sell them? Please consider subscribing. This will help me dedicate more time to create new interesting designs. As a subscriber, you'll get my direct email!SPIRA — Parametric Spirograph A spirograph you generate, not one you buy. Set the ring size, the tooth counts and the pen holes in the Customizer, and get a complete drawing system: a ring toothed on both faces, up to eight gear discs, two straight drawing guides, and a stand to keep it all on. Everything is a flat extrusion. No supports, no assembly hardware, no glue. Three ways to roll Inside the ring. The classic spirograph. The pen folds the curve inwards into stars, cusps and tight rosettes. Outside the ring. Switch on the external gear and the same disc rolls around the outside instead. Now the curve blooms outwards into broad petals — the opposite family entirely. Along a guide. The drawing guides are toothed tracks with straight sides. A disc rolling along one traces an arch that travels across the page instead of closing on itself — the cycloid curves a point on a rolling wheel makes. Nothing in a boxed spirograph does this. Same discs, all three times. Nothing to swap or adjust. The arithmetic, in two lines For any gear with R teeth and a disc with r teeth: the figure has R ÷ gcd(R, r) lobes it closes after r ÷ gcd(R, r) trips around the track A 24-tooth disc inside the default 96-tooth ring draws a four-pointed star in a single lap. A 25-tooth disc draws a 96-lobed rosette over 25 laps. The rule works on the outer gear and on the guides too — just swap in their tooth counts. Two numbers in the Customizer, and you know exactly what you'll get. What you get PartNotesRingFour decorative outlines, optional external gear, engraved tooth counts, optional grip cutoutsDiscsUp to 8, each with its own tooth count, hole count and engraved labelGuide rackA long toothed track (~192 mm) with a centre line and numbered divisions for placing repeatsGuide sliderA short toothed track that closes figures fastStorage stand + capThree base styles; the discs stack on the post through their centre holesCustomizer highlights Ring — diameter from 80 to 250 mm, 48 to 180 teeth, adjustable wall and thickness. The decorative outline is fully parametric: how far the lobes extend, how balanced they are, how sharply defined. External gear — off by default, with two ways to switch it on. Circular turns the outside into a true circular gear for predictable, classical epitrochoids; the decorative outline is replaced, because the outside has to be round. Follow Shape wraps the teeth along the decorative outline itself, so you keep the lobed silhouette and the figures become custom rolling curves no ordinary spirograph can produce. You don't pick the external tooth count — it's derived from the ring so both gears share a pitch and every disc meshes with either. At defaults that's 111 teeth (Circular) or 121 (Follow Shape), and both are engraved on the ring next to the inside count. Drawing guides — a rack and a slider, both closed tracks whose perimeter is snapped to a whole number of teeth so there's no half-width tooth at the seam. The rack's straight run is about 168 mm with 21 numbered divisions, so you can start successive passes at measured intervals and build a repeating border instead of a single arch. Paper fixing — the one thing every printed spirograph gets wrong. Choose Pin Holes for drawing pins into a cardboard backing, or Rubber Pad Recesses for self-adhesive feet. A ring that moves is a ruined drawing — and it matters more, not less, when you're working on the outside or on a guide, where the disc pushes the track away instead of into itself. Pen holes — four layouts (Spiral, Spiral Arms, Random, Concentric) with a minimum spacing constraint that is actually enforced: set how much material you want between holes and the generator respects it or refuses the layout. Change the seed for a completely different scatter. Labels — engrave the tooth count on each disc so you always know which one draws what, or write your own text. Gear geometry — tooth depth, tip width and clearance are all exposed if your printer wants something different from the defaults. Most people never touch them. How to generate and print The Customizer builds one model at a time; the Output selector at the top decides what that is. Generate these, each as its own plate: Ring All Discs — the whole set laid out together Guide Rack and Guide Slider (if you want them) Storage Stand and Storage Cap (if you want them) The five Preview outputs — Inside Drawing, Outside Drawing, Guide Drawing, Storage, Full Layout — exist so you can check the fit before committing. Use them to look, then generate the individual parts to print. A preview may well arrive in your slicer as one merged object; that's expected, and it's why you print from the single-part outputs. If a parameter combination cannot work, generation stops with a message naming the problem rather than handing you a broken part. Print settings Layer height: 0.2 mm (0.16 mm for slightly crisper teeth) Walls: 2/3 — the teeth are almost entirely perimeter Infill: 10/20 % Supports: none, nothing overhangs Brim: recommended for the ring and essential for the rack — both are long and thin, and their outer teeth are the first thing to peel Material: PLA or PETG Nozzle: 0.4 mm is comfortable at default settings The rack is the one large part, about 192 × 25 mm at defaults. If it won't fit your plate, drop guide_rack_units — each unit is one numbered division. One tip that saves a reprint: enable elephant-foot compensation. A squashed first layer makes the teeth thicker than the model says, and that's the most common reason a disc feels tight — check that before you start raising gear_clearance. Drawing with it Put the paper on something slightly soft — a few sheets of card, a cutting mat. Fix the ring or the guide down. Drop the disc against the teeth, put the pen through a hole, and press the pen gently towards the track so the teeth stay engaged. Then walk it around slowly. Inside the ring that means pushing outwards; outside the ring, inwards; on a guide, downwards towards the track. Working outside the ring needs paper all the way around — roughly the ring diameter plus twice the disc diameter. Almost every failed drawing is a tooth skipped because the disc drifted off the teeth, or a pen that was leaning instead of vertical. Included A full PDF guide is attached: every parameter explained, all three drawing modes, print settings, how to choose tooth counts for the figures you actually want, and a troubleshooting table. Designed by Xeyos Design. Version 1.0.0. If you print it, post a photo of what you drew with it — that's the best possible feedback. Boost MeIf you like my project, please give it a boost to help me expand it.
Tags
Diseñador
Xeyos