
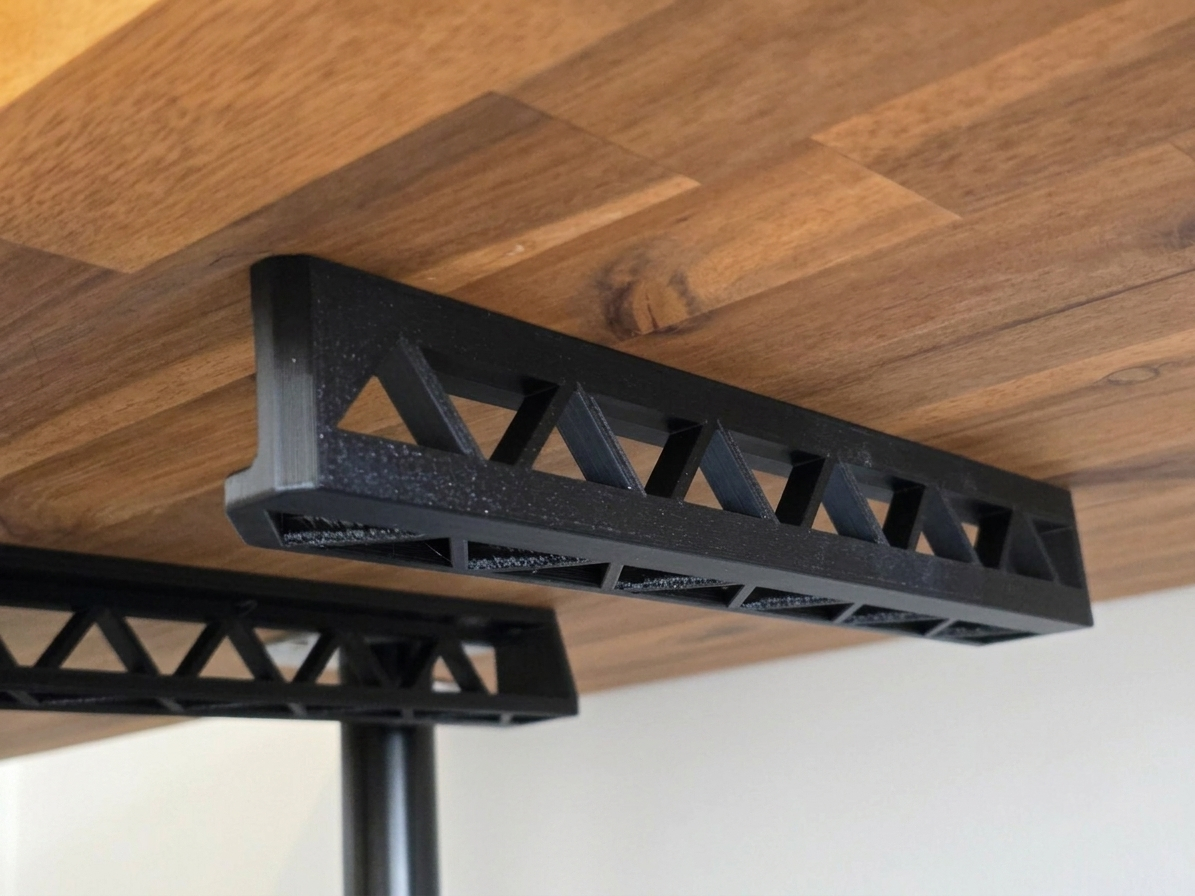
StealthSlide Under-Desk Laptop Bracket
Peso
213g
Tiempo
6h 29m
Precio
Cotiza este producto por WhatsApp
Contáctanos y te damos el precio según color y acabado
Las dimensiones dependen del diseño. Confirmamos las medidas exactas por WhatsApp.
Descripción
Keep your workspace clean, organised, and completely clutter-free with the Stealth Slide Under Desk Laptop Bracket. This mount is designed to hide your laptop under your desk, creating a clean, "stealth" build where your computer is completely out of sight. It allows you to easily slide your laptop in and out whenever you need to take it on the go. The design is optimised to be strong while maintaining a slim profile that ensures efficient filament usage. Design Features Optimal Cooling: Triangular cutouts are included along the structure to maximise airflow, ensuring your device can effectively cool from its rear exhaust vents while mounted. Port Accessibility: The bracket's profile is optimised so that side ports on your laptop remain accessible while docked. If you have ports at the very end, you may need to make a cut in your slicer to the rear section. Note: this may affect rigidity. Laptop Compatibility The bracket will fit any laptop up to 30mm thick (tall). Because the mount consists of two separate side brackets, the width is completely adjustable based on how far apart you install them. Here are a few popular laptops that easily fit this mount, well under the 30mm height limit (with their maximum thickness/height in brackets for reference): Apple MacBook Pro 16" [16.8mm] Apple MacBook Pro 14" [15.5mm] Apple MacBook Air 13" [11.3mm] Dell XPS 15 [18.0mm] Lenovo ThinkPad X1 Carbon [16.9mm] Razer Blade 15 [17.0mm] Print Settings & Technical Details Material: Designed specifically to be printed in PETG for optimal strength and heat resistance. Included Files: The provided .3mf file includes cylinder modifiers around the screw holes to ensure maximum strength where it matters most. Bridging: Your printer will need to be dialled in to bridge gaps up to 30mm. Reference: The brackets pictured in the gallery were printed on my X2D. Installation Guide Each bracket is designed to attach using three screws (please refer to the included diagram in the gallery). For a smooth sliding experience, follow these steps: Mark the first side: Place one bracket in your desired location under the desk. Use a pencil to mark the desk through the bottom screw holes. Attach the first bracket: Screw the first bracket securely into the desk. Align the laptop: Place your laptop inside the attached bracket, ensuring the back of the bracket sits flush against the back of the laptop. Mark the second side: Slide the unattached bracket onto the other side of the laptop. Mark the corners of this bracket on the underside of your desk, then remove the laptop. Adjust for clearance: Once marked, align the bracket with your markings but move it outward by about 5mm. This extra clearance provides the wiggle room necessary to slide the laptop in and out easily without scratching. Secure and verify: It is absolutely essential that both sides are parallel. Screw the second bracket in and test the slide! Disclaimer I have tested this mount with my own laptop and found it to be very strong. However, final part strength will vary based on your specific 3D printer, filament quality, and slicer settings. Please test the bracket's strength safely before inserting your device. Use at your own risk.
Tags
Diseñador
BigJohn596