
HEXAGON TESSERA - Modular Parametric Wall Tiles
Peso
29g
Tiempo
1h 17m
Precio
Cotiza este producto por WhatsApp
Contáctanos y te damos el precio según color y acabado
Las dimensiones dependen del diseño. Confirmamos las medidas exactas por WhatsApp.
Descripción
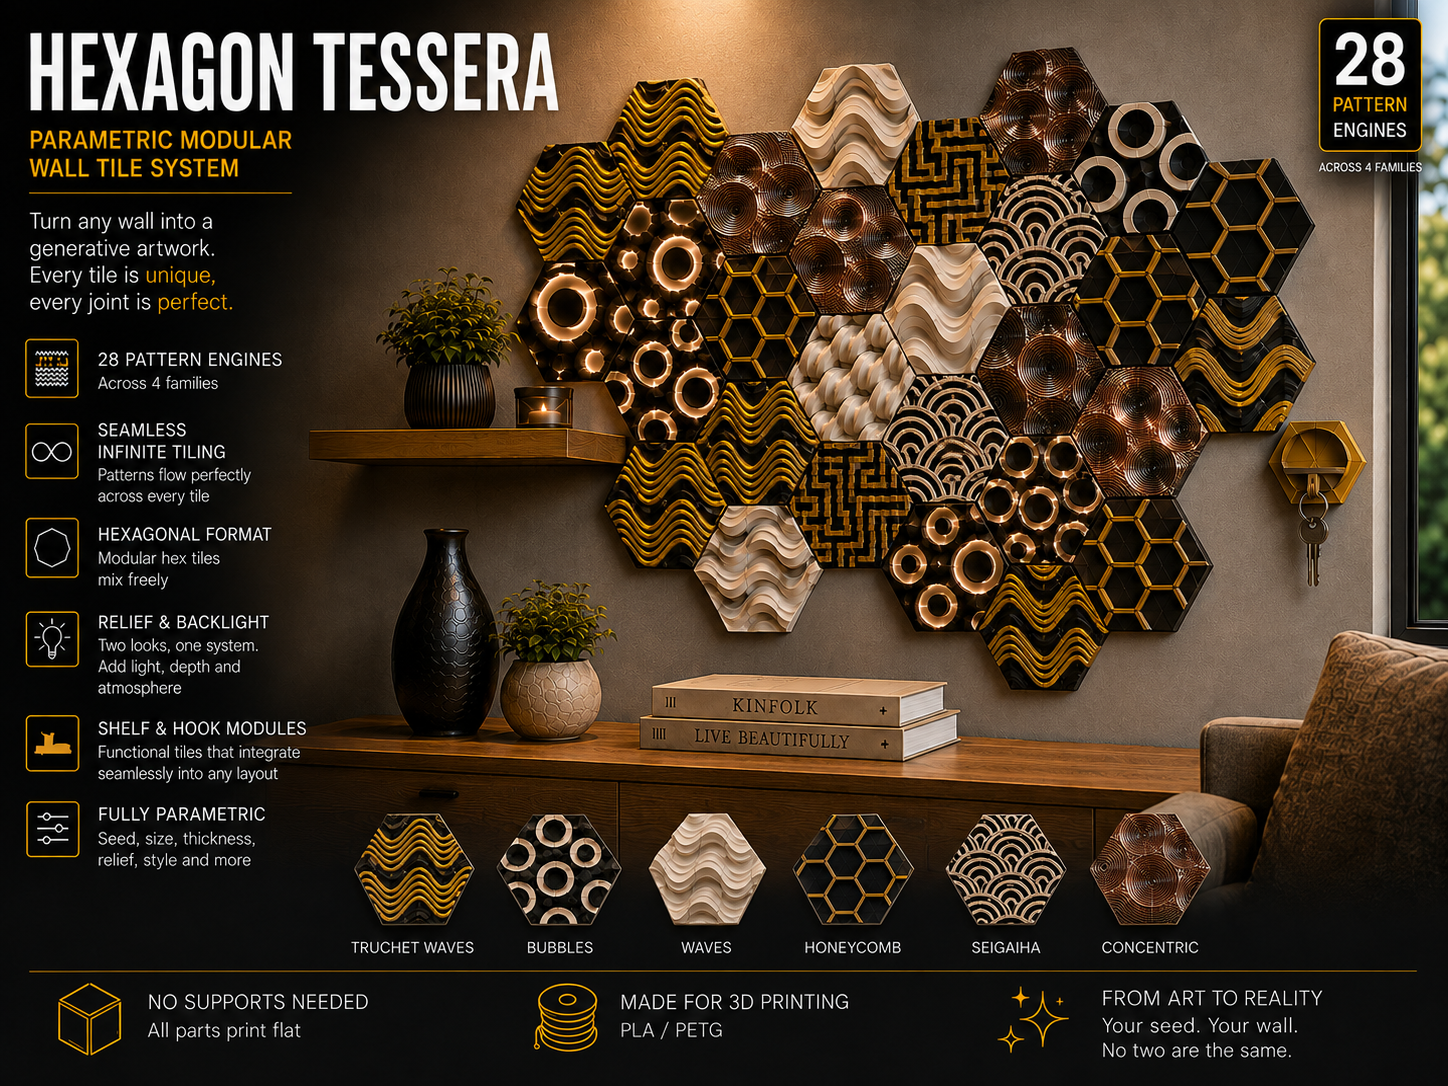
HEXAGON TESSERA Modular parametric wall tiles on a hexagonal grid — 28 pattern engines, seamless across every joint. The idea Most tiled wall models give you one tile and repeat it. The pattern restarts at every joint, and from two metres away you see a grid of identical squares. HEXAGON TESSERA works the other way round. There is one infinite pattern field, and each tile is a hexagonal window cut out of it. The design does not restart at the joints — it flows straight through them. Truchet loops wander across four tiles. A labyrinth's corridors run from one side of the wall to the other. A sunflower spiral can span the entire installation. Pick a pattern, pick a size, generate one tile per position. The wall assembles itself. This is the hexagonal sibling of TESSERA, my square-grid tile system. Same philosophy, different tessellation — and hexagons pack with a rhythm that squares simply cannot give you. What you get 28 pattern engines — geometric, woven, organic, sculpted surfaces and true 3D reliefs Two orientations — flat top for aligned rows, pointy top for the classic honeycomb Seamless by construction — same seed, same field, and every joint matches Six-edge bowtie connectors — no handedness, no left/right tiles: any tile fits any neighbour on any edge Hidden keyhole mounting — nothing visible from the front Shelf and hook tiles — functional add-ons as separate, colourable meshes Backlight mode — pierced tiles plus a printable LED spacer frame Multi-colour ready — each mesh exports as its own object in the 3MF Fully parametric in MakerWorld's Customizer, or in OpenSCAD if you prefer Quick start 1 · Calibrate the joint first. Set part = calibration, print it, test the fit, adjust conn_clearance. Higher = looser. A connector weighs about 1.5 g; a tile does not. Do this once per filament and forget about it. 2 · Choose the look. Set part = preview, preview_layout = block. Try patterns, sizes and hex_orient. What you see is what you print. 3 · Read the addresses off the preview. Keep preview_labels = true and every tile is embossed with its own col,row. That is your wall plan — no counting, no working out hexagonal coordinates by hand. 4 · Export tile by tile. Set part = tile, type the pair into tile_col and tile_row, export. Repeat for each position. 5 · Print the hardware. part = connectors_plate gives you twelve connectors at a time. One per shared edge. ⚠️ Use the same seed for every tile of a wall. The seed is what makes adjacent windows agree. Changing it mid-way gives you a wall that does not line up. Change it freely before you start exporting — every seed is a different wall. The pattern engines Flat 2D reliefs — extruded, and the only ones that accept chamfer, height modulation and backlight: Truchet arcs · Diagonal maze · True labyrinth · Voronoi web · Hexagon honeycomb · Tri-weave · Isometric cubes · Diamond plate · Flowing waves · Concentric ripples · Sunflower (Fibonacci phyllotaxis) · Fish scales · Basket weave · Star lattice · Girih strapwork · Celtic plait · Bubbles · S-wave flames · Scallop interlace True 3D reliefs — these build their own mesh: Hicks hexagon — open hexagonal rings chaining into continuous ribbons, in three colours Vertex cubes — cubes stood on a vertex, three faces showing, in compressed staggered rows Hex height field — a honeycomb where every cell rises to one of several heights Overlapping hexagons — interpenetrating hexagons of random radius across several passes Scallop interlace (domed) — the scallop ribbon as a revolved, filleted section Sculpted height fields — here the tile is the surface, a single continuous solid: Ridges / silk — parallel ridges meandering along a sine path Dunes — three interfering plane waves, soft and never repeating Interfering waves — alternating domes and saddles Radial splash — concentric swells fading from a point you place anywhere on the wall Stepped topography — terrain quantised into flat terraces, with optional raised contour lines Each engine has its own parameter group in the Customizer. Only the group belonging to the selected pattern does anything. Sizing tile_size is the distance across the flats — the short diameter, the one you measure with a caliper. The corner-to-corner diameter is 1.1547 × larger. A 100 mm tile needs 115.5 mm of bed. Check that against your printer before you commit to a size. Print settings SettingSuggestionOrientationFlat on the bed, relief facing upSupportsNone — every overhang is shaped to avoid themLayer height0.2 mm; 0.12 mm for the sculpted enginesWalls3 or moreInfill10–15 %Connector clearanceStart at 0.15–0.2 mm, then calibrateAssembly: lay the tiles face down, slide a connector into each shared edge, press the neighbour on. Work outwards from a single tile rather than building clusters and joining them — tolerances add up. Then hang from the keyholes. For shelf and hook tiles, set keyholes = 2 and drive at least one screw into a stud or a rated wall anchor. Multi-colour Enable Preferences → Features → lazy-union in OpenSCAD so every mesh exports as a separate object. Most tiles: 2 objects — base and relief Hicks hexagon: 3 objects — base, bands, centre hexagons Shelf / hook tiles: 3 objects — base, relief, add-on Sculpted engines: 1 object — base and surface are genuinely one solid Backlight mode Set render_style = cutout and the tile is pierced right through, so an LED strip behind it lights the pattern from within. Any pattern produces islands — the inside of a Truchet ring, the centre of a star. The support web is what stops them falling out: a grid of thin lines running in world coordinates, so it aligns across tiles like window muntins. web_style = tri runs three families at 60°, which sits more naturally on a hexagon than an orthogonal grid. part = backlight_spacer prints the box behind the tile: wall mounting, LED chamber, wire pass-through, and a rebate the tile drops into. One thing to know before you start There are no edge pieces. A hexagonal wall ends on a ragged, staggered edge. That is the intended look, not something missing — hexagons do not close onto a rectangle without a whole family of half and wedge pieces, and adding them would change the character of the thing entirely. If you want a wall that ends flush on all four sides, use TESSERA instead. If you want the honeycomb rhythm, this is the one. Notes Designed in OpenSCAD, compatible with 2021.01 and later. No external libraries. A full printable guide (PDF) is attached, covering addressing, joints, every engine group, and troubleshooting. Made a wall with it? Post a Make — I would genuinely like to see what patterns people land on. by Xeyos Design See also the other projects by the TESSERA family Boost MeIf you like my project, please give it a boost to help me expand it.
Tags
Diseñador
Xeyos