
Apache 2800 Mod Box
Peso
362g
Tiempo
11h 12m
Precio
Cotiza este producto por WhatsApp
Contáctanos y te damos el precio según color y acabado
Las dimensiones dependen del diseño. Confirmamos las medidas exactas por WhatsApp.
Descripción
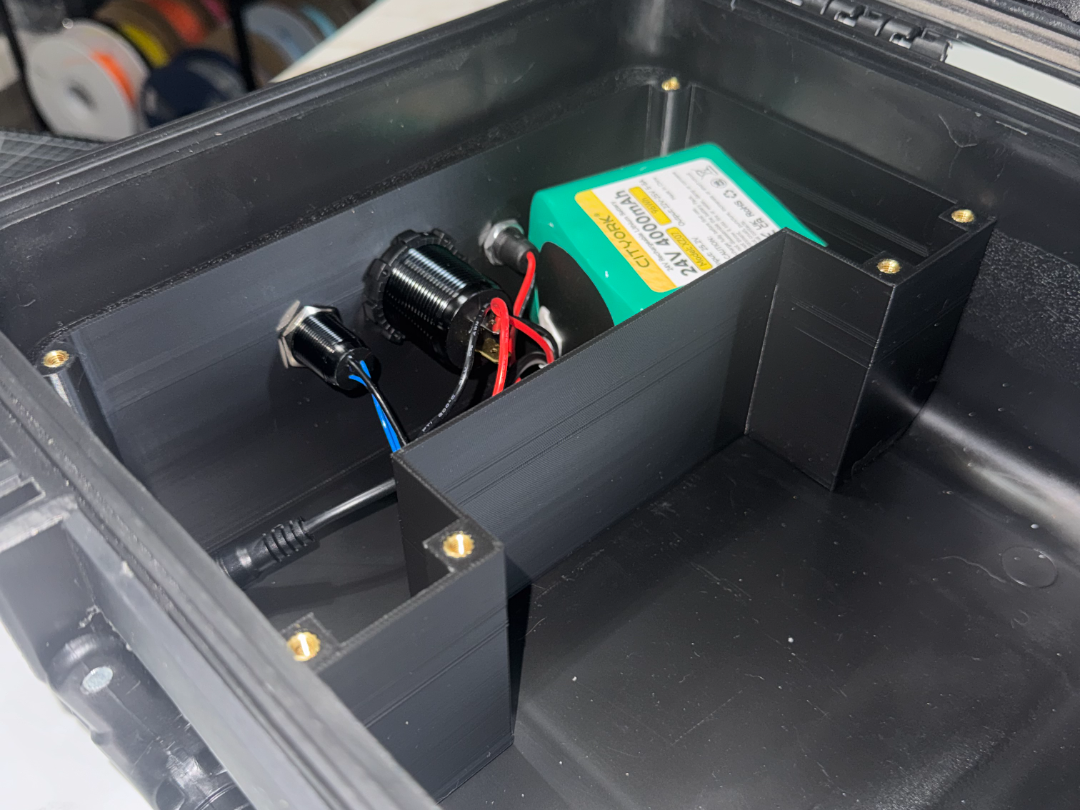
Apache Mod Box Modular Electronics Housing for Apache 2800 Boombox Builds Update — July 30, 2026 This update adds more amplifier options and additional layout flexibility: Added a mirrored ZK-1001U lid for left- or right-side placement inside the Apache case Added ZK-1002T compatibility using inward-facing mounts on either bump out Added TW100U compatibility using an inward-facing mount between the two bump outs Added a protective cover panel for the TW100U Added Lid - No Amp for the ZK-1002T, TW100U, or builds that need a clean top lid Added selectable left- and right-side wire cutouts to Lid - No Amp Overview I designed the Apache Mod Box as an all-in-one housing for the amplifier, battery, wiring, and controls used in an Apache 2800 boombox build. There are several similar designs available, but I wanted something that gave the builder more freedom when planning the layout. Instead of locking the power button, charging port, and Voltmeter/USB Quick Charger into one location, the included 3MF lets you choose which openings to use before printing. The Mod Box currently supports three amplifier configurations: AmplifierMounting LocationRecommended LidZK-1001UMounted on top of the Mod BoxStandard or mirrored ZK-1001U lidZK-1002TInward-facing on either bump outLid - No AmpTW100UInward-facing between the bump outsLid - No Amp and optional protective cover panelMake sure you choose the correct amplifier mount, lid, wire cutout, and control openings before starting the print. Amplifier Compatibility ZK-1001U The ZK-1001U mounts directly to the top of the Mod Box using an amplifier-specific lid. Two lid orientations are included: Standard ZK-1001U lid Mirrored ZK-1001U lid The mirrored version gives you more freedom to position the Mod Box on either the left or right side of the Apache case and have the amp be near or away from the opening of the case. Because of the available clearance, the amplifier power connection requires a 5.5 × 2.1 mm right-angle DC adapter. A straight connector will not fit properly with this setup. The battery and wiring remain contained underneath the lid, while the amplifier controls stay accessible from the top. ZK-1002T The ZK-1002T mounts inward-facing on one of the two bump outs. There are two available mounting locations: Left bump out Right bump out Choose the mounting objects for the side you want to use and change them to Negative Parts in Bambu Studio. After printing: Remove the washers and nuts from the amplifier knobs. Slide the controls through the openings from inside the Mod Box. Reinstall the washers and nuts from the outside. Install Lid - No Amp for a clean finish on top. The ZK-1002T does not require an amplifier-specific lid. TW100U The TW100U mounts inward-facing in the center area between the two bump outs. Unlike the ZK-1001U, the TW100U does not mount to the lid. Use Lid - No Amp to close the top of the Mod Box. A separate protective cover panel is also included for the TW100U. The panel can be installed over the amplifier to help protect it while keeping the controls accessible from inside the Apache case. This mounting position uses the open area between the bump outs while keeping the top of the Mod Box clean. Make sure the TW100U mounting openings and the appropriate wire cutout are selected before printing. Assembly Required Hardware The Mod Box is assembled using M4 heat-set inserts and M4 × 12 mm screws. You’ll need: 6x M4 heat-set inserts 6x M4 × 12 mm flat head machine screws Install the heat-set inserts into the Mod Box, then secure the lid using the six M4 screws. Tools Soldering Iron Heat Set Insert Tips Parts 5.5mm x 2.1mm Charge Port Jack 5.5mm x 2.1mm Right Angle Adapter Voltmeter/USB Quick Charger or USB-C Model 16mm 12v/24v Latching Power Button 24v 4Ah Battery or 7Ah Battery (same size) Internal Space Main Chamber: 227 mm long × 86 mm deep × 74 mm tall Bump Outs: 46mm wide x 111mm long Make sure your battery and other components fit within that space before printing. Voltmeter/USB Charger The model is designed around a standard 30 mm round Voltmeter/USB Charger with a 30.3 mm modeled opening. There are three possible mounting locations: Inside of the Apache case Outside of the Apache case Top of the Mod Box and accessible from inside the case So whether you want your USB ports accessible without opening the case or would rather keep everything inside, you can set it up either way. Charging Port The charging port is designed for a standard 12 mm round charging port with a 12.3 mm modeled opening. There are four possible mounting locations: Inside – left Inside – right Outside – left Outside – right This gives you the option to keep the charging connection inside the case or make it accessible from the outside. Power Button The Mod Box supports 16 mm, 19 mm, and 22 mm power buttons. Like the charging port, the power button has four possible mounting locations: Inside – left Inside – right Outside – left Outside – right The modeled openings are: Button SizeModeled Opening16 mm16.3 mm19 mm19.3 mm22 mm22.3 mm The power button and charging port do not have to be placed together. For example, you can: Place the power button outside and the charging port inside Put them on opposite sides of the Voltmeter/USB Quick Charger Keep all controls inside Mount all controls outside Setting Up Your Mod Box The different cutouts are already built into the included 3MF, so you don't need to edit anything in CAD. In Bambu Studio, open the Objects tab and expand the Mod Box. You'll see the different cutout options labeled by size and location. Find the openings you want to use and change those objects to Negative Part. When the model is sliced, the negative objects will create the holes in the Mod Box. Leave any locations you aren't using alone. I highly recommend checking the sliced preview before starting the print. It's an easy way to make sure you've opened the right locations before committing to the full box. Important: Power Button Sizes The charging-port and power-button openings are nested together. Because of that, when you choose a larger power button, you also need to make all of the smaller openings at that same location negative. What You're UsingMake These Negative12 mm charging port12 mm16 mm power button12 mm + 16 mm19 mm power button12 mm + 16 mm + 19 mm22 mm power button12 mm + 16 mm + 19 mm + 22 mmFor example, if you're using a 22 mm power button, make the 12 mm, 16 mm, 19 mm, and 22 mm objects at that location Negative Parts. Making only the 22 mm object negative will not create the complete opening. Thanks for checking out the Apache Mod Box! I put a lot of thought into making this as flexible and useful as possible for different Apache boombox builds. If you print one, I’d love to see how you set yours up. And if you have an idea for another amp lid, different port size, mounting option, or anything else that would make the Mod Box better, drop a comment or send a recommendation. I’m always open to improving the design and adding more options for future builds. Ratings and comments help me so much and if you love it, please consider boosting!
Tags
Diseñador
Holistx