
Parametric Modular Tube - Any Length
Peso
987g
Tiempo
21h 57m
Precio
Cotiza este producto por WhatsApp
Contáctanos y te damos el precio según color y acabado
Las dimensiones dependen del diseño. Confirmamos las medidas exactas por WhatsApp.
Descripción
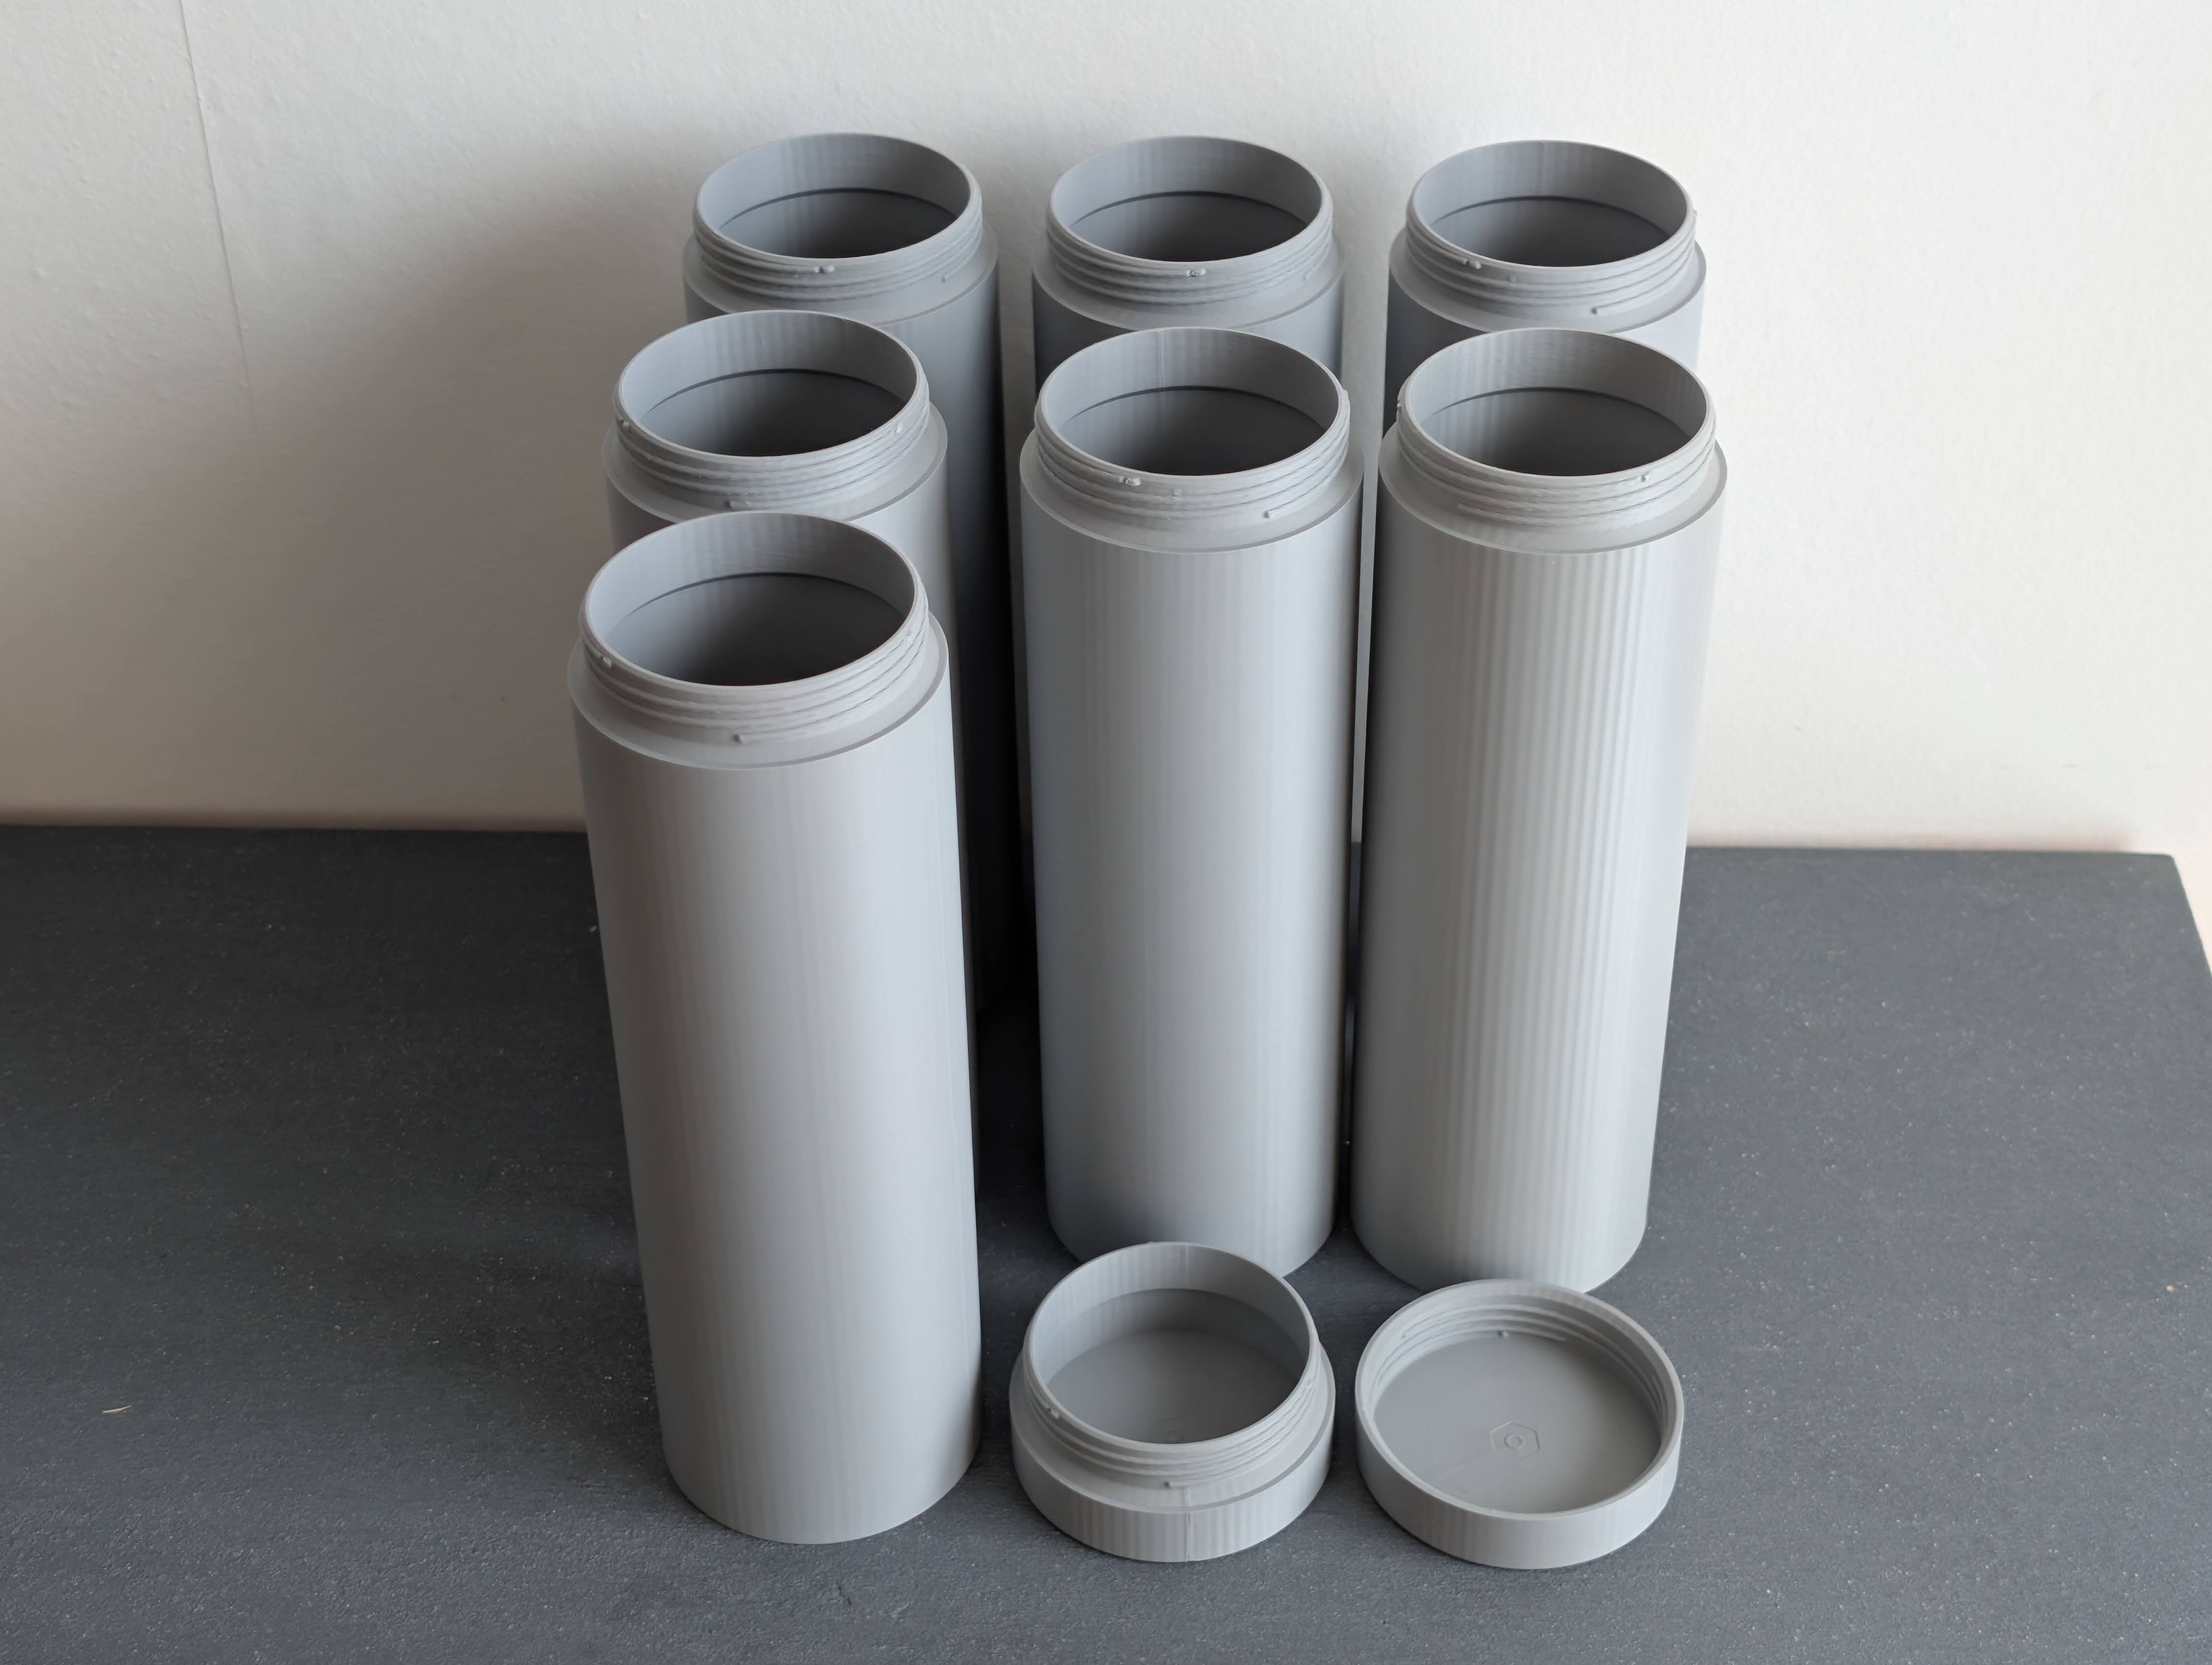
MODYLO Quiver Same idea as the MODYLO Column rod, but for tubes. Open the Customizer, set the length and the inner diameter you want, hit Generate. It works out how many segments you need, lays them out on the plate, and you screw them together afterwards. I built it to store posters. Then I built a fat one to hold the tablecloth that lives rolled on a Column. If you read one thing, read this Segments print standing on the bed, and tall standing prints topple if adhesion is not right. This is the single thing that goes wrong. The Quiver is much steadier than a Column rod, because a 40 to 90 mm tube has a far wider footprint than a 30 mm stick. I did not need a brim. But if you have had tall prints fail before, here is the order to reach for: Clean plate. Soap, then isopropyl. A Cool Plate SuperTack helps a lot. Lower Max segment height. More segments, shorter ones, far less leverage. This is the most effective dial you have. Add an external brim to the segments (not the caps). Use Quiver Braced. Two versions in this listing Quiver - no internal bracing. Fewer parts, less filament, faster. Use this if you have your process under control. Quiver Braced - generates a sacrificial support tube inside each segment. It has a wide base for bed grip and is held to the inner wall by a few small tabs, so the segment can't pivot on its base and the tabs break away cleanly afterwards. Minimum length 180 mm. Both use the same geometry and the same thread. The braced version just leaves the support features enabled. Pick whichever suits your printer, they assemble together. The bracing costs about 185 g and 3h40 on a 1.4 m tube. If your printer handles tall prints and your plate adhesion is good, skip it. If you have had segments fall, it is worth every gram. MakerWorld's Customizer cannot switch a Fusion feature on and off, which is why this is two entries rather than one checkbox. What you can set ParameterRangeWhat it doesTotal length30 to 3000 mm (Quiver) 180 to 3000 mm (Quiver Braced)The usable space inside the finished tube.Inner diameter40 to 90 mmThe narrowest opening inside the tube. Whatever you want to store has to fit through this.Extra wall thickness0 mm and upAdded on top of the 2.8 mm default wall.Max segment heightQuiver onlyThe longest a single segment is allowed to be. Lower it for more segments, shorter ones, and less chance of anything toppling mid-print.Length is usable internal length. It does not include the threads or the caps. If your poster is 841 mm, ask for 841 mm. Ask for 850 if you want a little slack. Add roughly 17 mm to the outside length when you are working out shelf space. Inner diameter is the narrowest point, which is the wall inside the top thread, not the middle of the tube. So the number you set is the number that matters: if it says 60, a 60 mm roll goes in. Extra wall thickness does two jobs: a stiffer tube, and a heavier, more stable segment while it prints. At 40 mm diameter and full height, a millimetre or two is cheap insurance. Max segment height is the toppling dial. If your printer struggles with tall prints, bring it down. You get more joints and a slightly longer total print, and much less risk. It is only on the unbraced version, since the braced one solves the same problem a different way. What size do I need? Length, by content: ContentShort sideAsk forA3297 mm300 mmA2420 mm425 mmA1594 mm600 mmA0841 mm850 mmUS 24 × 36 in610 mm615 mmInner diameter, by use: UseSuggested IDOne or two posters, light stock40 mmSeveral posters, or heavy / matte stock that creases60 mmRolled around a 30 mm Column rod (tablecloth, fabric, banner)60 mmRolled around a Column with a thick fabric, or a big stack90 mmTight rolls leave memory creases in heavy paper. If in doubt go one size up, the extra filament is mostly in the length, not the diameter. Printing Segments print standing on the bed, threaded socket down. The caps print flat. The Customizer lays this out for you, but the plate layout is not preserved if you re-slice from a saved profile, so check it. Quick self-check: if your slice is full of supports, the orientation is wrong. Layer height: 0.2 mm Walls: 2 Infill: lightning. This one matters. A gyroid or grid infill sends the toolhead darting back and forth on every layer, and on a tall thin segment that is exactly the force that tips it over. Lightning leaves the head running smooth continuous loops around the wall. Less filament, less time, and much less shaking. Supports: none. All overhangs clear along the vertical axis. Brim: I did not need one. The tube footprint is much wider than a Column rod, so it sits far more solidly. If you see any lifting, or you have had tall prints fail before, add an external brim to the segments and leave it off the caps. Filament: standard PLA Real slice, 1.4 m tube, 60 mm inner diameter, 7 segments of 200 mm on one plate: VersionFilamentTimeQuiver595 g12h39Quiver Braced780 g16h19If you have had segments topple, print fewer per plate. The risk is not really about any single segment, it is about how long they all stand there and how much the toolhead has to travel between them. Seven segments standing for twelve hours is seven chances, and one faller can take out its neighbours. Printing them one at a time costs surprisingly little: about 1h50 each plus a few minutes of prep, so roughly 40 minutes more machine time across the whole tube. You pay for it in plate changes, not in printing. Worth it if the alternative is losing a plate at hour ten. Worth being straight about this: a cardboard poster tube costs a few euros and this does not beat it on price. What it gives you is the exact length you asked for, a screw cap that actually closes, segments you can reconfigure later, and an object that will outlive twenty cardboard tubes. On the wall: the 2.8 mm figure is the wall envelope, not 2.8 mm of solid plastic. Inside it, two printed skins with lightning infill between them. That is deliberate: faster, lighter, and far more stable on a tall segment. Plenty stiff for storage. Do not stand on it. Assembly Screw the segments together. The thread is a 3-start thread with a detent, so it seats firmly and does not back out on its own. Every segment is identical, so: Assemble them in any order A cap screws onto any segment, at either end A 900 mm tube can be taken apart and rebuilt as two shorter ones with a second pair of caps Print one spare segment now and extend the tube later instead of reprinting it Dry-fit keeps it adjustable. A drop of glue on the threads makes it permanent and noticeably stiffer. Your call. Seam tip: set seam position to Back before slicing. Not Aligned. Aligned drifts the seam around from segment to segment and you can never line them up. Back puts it in the same place on every segment. Then, because the thread is 3-start, each joint seats in three positions 120° apart. Dry-fit and try all three at each joint, keep the one that lines up. You end up with a seam running close to straight down the whole tube instead of spiralling. Pairs with MODYLO Column MODYLO Column is the same idea as a solid rod. Roll fabric onto a Column, slide the whole thing into a Quiver, cap both ends. That is the setup I use for the tablecloth, and it is what a 60 mm inner diameter is sized for. Tell me what you put in it I make things because I need them, then share them in case someone else does. So far all I know about this one is that it holds posters and a tablecloth, because that is what I built it for. If you print a Quiver, I would like to know what goes inside it. That is the fastest way for me to work out what a v2 should be: a different diameter range, a cap that seals better, a wall mount, a label. Right now I would just be guessing. Comment or send me a message, whichever is easier. I am a lot happier making things when I know they are actually useful to someone 🙏
Tags
Diseñador
CuratedLayer