
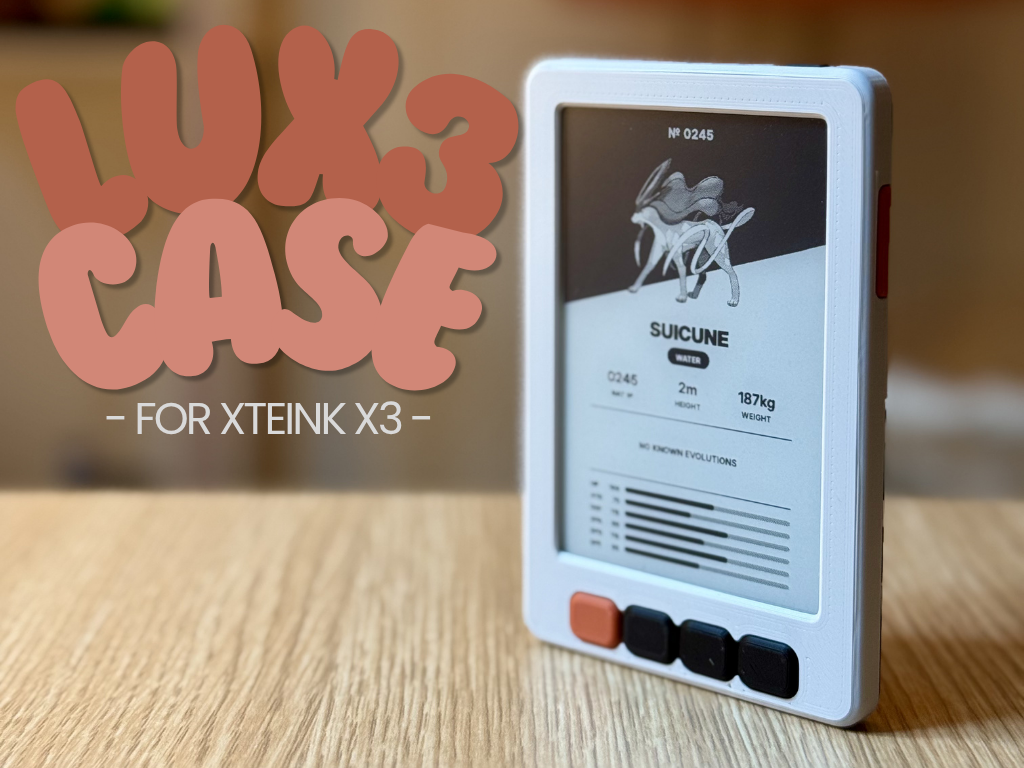
LUX3 Case for XTEINK X3 Reader
Peso
20g
Tiempo
1h 43m
Precio
Cotiza este producto por WhatsApp
Contáctanos y te damos el precio según color y acabado
Las dimensiones dependen del diseño. Confirmamos las medidas exactas por WhatsApp.
Descripción
LUX3: A Minimal Case for the Xteink X3 Credits This design was inspired by the Retro X3 Case and Xteink X4 Full Body Case. Though I designed all geometry from scratch in Fusion 360, I wanted to give credit where it's due, since the overall concept and vibe started with their work. Go check out their cases! The Pokédex style wallpaper shown in my photos were generated here. Because they only export in a size for X4 devices, I did have to expand the artwork to properly fit my X3. About the Case LUX3 is a rounded, minimalist case built specifically for the Xteink X3 e-reader. This case intentionally covers several parts of the device (reset button, micro SD card slot, and lanyard holes) to keep it looking and feeling as clean as possible (depending on feedback, Im open to making an alternative version where all of these are exposed and usable with the case on the device). The lower back portion of the case has a subtle arch/contour pattern for grip and visual interest without breaking the minimal look. It's a snap-fit case, so no adhesives or hardware is required. It's designed to clsoely hug the X3's body while still being easy to get on and off. Known Issues / Printing Notes In general, this case has a lot of tight tolerances because I wanted it to feel premium. That said, some of the tight tolerances around the button cutouts can cause issues depending on your printer's calibration. Slight scaling of certain parts (1-2%) may be needed depending on your setup. There are a lot of small details to this case that allow it to snap/fit together well, which means that it may take a few prints to get one coming out clean. Because of this, I highly recommend printing at a .1mm layer height (.4 nozel is fine). Some of the rounded parts on the front of the case can have a very slight blob effect due to how 3D printers fill tight spaces with filament. Though its expected, its not intended and I hope to resolve this in the future. A V2 may be in the works to address tolerance consistency and simplify the button cutout geometry depending on any feedback here! Assembly Guide Place and press the front buttons into the front case part. Insert the X3 screen down and then the side button with the extended lip facing down (towards the front of the device). Then slide the top back half on the case using the guide rails on the side. Finally, slide on the bottom back half until it snaps in place with the top back half. Misc. Notes The case in the photos was all printed with Bambu Labs PLA To customize colors, just add a print place to the file and print some of the part separately to mix and match different colors together Because their are small parts to print, make sure you clean that print bed before printing! Id love to hear feedback on this and how it can be improved for future versions. Thanks everyone and happy reading!
Tags
Diseñador
Dibblin